Materials:
- Yellow Cardstock
- Patterned Paper 'Lime Rickey - Cherry Cola' (Basic Grey)
- Patterned Paper 'Lime Rickey - Orange Cream' (Basic Grey)
- Patterned Paper 'Lime Rickey - Liquid Candy' (Basic Grey)
- Patterned Paper 'Lime Rickey - Tutti Frutti' (Basic Grey)
- Patterned Paper 'Lime Rickey - Deep Blue' (Basic Grey)
- Sticker Elements 'Lime Rickey' (Basic Grey)
- Sticker Alphabet 'Lime Rickey' (Basic Grey)
- Black Pen
- Circle Punch 15 mm
- Circle Punch 35 mm
Scallops are very popular these days, aren't they? In this layout I made two different siezed scalloped borders using my circle punches. I first punched a bunch of little circles (15 mm) for my smaller border out of the Orange Cream paper.

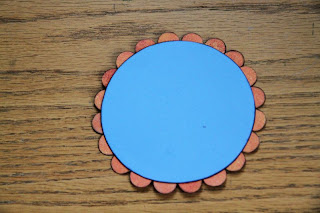
Using a little plate I traced a circle (about 10 cm) out of light blue cardstock. I added glue all around the back of the circle to be able to glue my little circles on it. As you will see at the end result I actually ended up making another circle in Deep Blue since I didn't like the lighter blue circle on my layout, but I only made photos when I was making the light blue circle, sorry if this causes any confusion ...
 This is what my scalloped circle looked like from the back:
And from the front:


The square paper Liquid Candy is 9.5" x 9.5". This is what it looked like with the red scalloped border:
Using doubled-sided tape I adhered the square onto the yellow cardstock.
 Following the curvy lines on the Tutti Frutti paper, I cut a strip and adhered it to the left side of the layout.
 I added my blue circle in the left top corner.
 Following the curvy lines on the Tutti Frutti paper, I cut a strip and adhered it to the left side of the layout.
 I added my blue circle in the left top corner.
I finished the layout with some doodling, the title (using the Sticker Alphabet) and some more stickers.


 I added my photo.
 I also added a
5 comments:
what a fun and funky LO....and great tips for the scalloped borders too xo
Love the tip for the scalloped borders!! Alz :)
This is wonderful, Ingeborg!
Great bright layout!! Thanks for sharing :)
this is a great layout Ingeborg. Keep up the great work and thanks for sharing.
Marion
Post a Comment