I have a new blog!

If you want to see only my creations please come and check out and follow my new blog http://www.tanyah-payne.blogspot.com
Showing posts with label Glitter. Show all posts

Tuesday, December 14, 2010

Joy Banner - easy glitter

Uses:

cardstock tag, Maya Mist, glitter paper, 7 Gypsies Avignon paper, Bella raw chipboard alpha, ribbons, white lace, black embossing powder, rhinestone brad, jump rings, beads, charms and pearls, Distres inks - pine needle, vintage photo


I have made a number of things that I carefully painted on glue and dipped in glitter and found myself in a bit of a mess. So I was delighted when I found this glitter paper at Tanyah's. All I had to do was die cut or punch out the shapes I wanted and I got exactly the same effect without all the messing around.

For the shield and branches(J tag) I use a Tim Holtz die that I cut out in chipboard as well as glitter paper, I traced the heart onto chipboard, cut it out and covered it with glitter paper (J tag), the circle I punched out and covered a chipboard circle (Y tag). I glued the pieces together and inked the edges to finish off.

To attach charms and beads I made a hole and used jump rings. You can personalise these anyway you like. the Beads are attached with eye pins that have the ends curled round with pliers.


Shining off June

Thursday, August 19, 2010

Layout using SEI Happy Day papers by Nic Amber

Last week I used the SEI Happy Day papers to make a card, this week I've made a layout using the same papers - 'Make a Wish' and 'Shout Out' from the SEI 'Happy Day' range. .

Make a Wish...

Shout Out


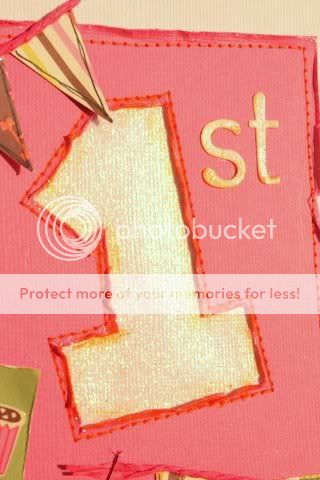
The papers in this range have a great varnish finish so I thought it might be nice to add some extra shine and sparkle by playing around with some Extreme Glitter.  It is really simple to use, just a matter of painting it on with a paint brush and you can vary the amount of glitter just by adding extra coats.

I have used the Extreme Glitter on the title 'Birthday', around the edges of the paper and to fill inside the '1'. 

For the title, I have used chipboard wording, painted it with orange paint then once that was dry I added a layer of extreme glitter.  For this project I used the 'hologram' extreme glitter which is a great neutral colour but they come in a wide range of colours to suit your project.
 Hopefully you can see from these pictures it really gives a great glittery finish and just adds that bit of sparkle to your project.  Tanyah has a range of examples in store if you want to see other ways to use this product.

I have also added some bunting (the flags), it's a great way to use up your scraps... I have just cut them into triangles, stuck them down and attached some paper string across the top.


So there's a couple of ways to use the SEI papers, if you have used them in a project don't forget to add them to our gallery.

Happy crafting and hope you all have a great day!!

Tuesday, June 22, 2010

Extreme Glitter @ Scrap N Craft with T

We have a NEW product that we are getting in very soon and is on order. It is very cool for, Off the page, decorating your titles and adding texture to your projects/layouts.

It is called EXTREME GLITTER, have you heard of it before? What do you think of it if you have used it already? we would love to know.

It is made by Plaid and comes in 11 different fashionable colours for you all to enjoy.

  • CLICK HERE for step by step projects by Plaid using extreme glitter paint.
  • CLICK HERE for a varity of video's step by steps to enjoy! by Plaid using the extreme glitter paint.
WE HAVE THESE UP FOR PRE-ORDER.... CHECK IT OUT here!!!!

We hope to have these in stock within a week! so be quick to grab yours!.. 

hope you have a wonderful Tuesday!
take care
luv tanXx

Thursday, September 11, 2008

Glitter and rubons!

Hi everyone
this technique is similar to one i have below.


  • Using clear Think embossing powder UTEE
  • Sprinkling glitter
  • Then reheating.
  • Once this is completed you can then add rubons, buttons and other embellishments!


HERE IS THE COMPLETED LAYOUT!


Wednesday, September 10, 2008

Dripping Glue/embossing powder

This is such a fun technique and your able to make it look like rain/snow etc

USING GLUE!

Step1 Colour your shape... I used twinkling H20's but daubers would be better

STEP 2 Place glue running down your sape

S
TEP 3 Add glitter and wait to dry


USING CLEAR UTEE

S
TEP 1 Ink the top of your letter with a watermark ink like versamark

S
TEP 2 Sprinkle clear UTEE, heat and reapply the powder a few times


STEP 3 Turn your shape on its end and let the wet UTEE run down your shape


S
TEP 4 make sure the UTEE is wet and hot and sprinkle the glitter on the top

STEP 5 reheat the glitter


NOW you can use rubons/stickers onto of the shape for great fun affects.

Friday, September 5, 2008

USING GLITTER & UTEE!!!!

This is one of my favourite techniques for this is one way glitter can be adhered and not come off and flack anywhere!

Materials USED:
Chipboard shape
Glitter (2 colours)
UTEE
Versa mark ink

Step 1


  • Find a Chip shape/alpha
  • Find something that can have 2 colours


Step 2

  • Find your Versamark/watermark ink


Step 3

  • Ink the first part only that you want to glitter


Step 4

  • When the ink is still wet
  • sprinkle the UTEE over the top
  • Shake off any excess and place back into container/packet


Step 5

  • Heat the UTEE until it is melted
  • once powder is melted
  • look to see if you would like to adhere some more UTEE
  • Make sure the UTEE on the chip shape is wet
  • Apply more of the UTEE on top
  • Reheat


Step 6

  • Till it looks like this


Step 7

  • Find your glitter and your heat gun


Step 8

  • Heat your utee again
  • When the UTEE is WET
  • sprinkle the glitter
  • Then reheat to sock the glitter into the UTEE


Step 9

Till it looks like this


Step 10

  • Using your versamark/watermark ink
  • Ink the rest of your shape


Step 11

  • Ink it until it is wet like this


Step 12


  • Sprinkle the UTEE over the wet part
  • Heat using your heat gun
  • reapply the powder and reheat if necessary


Step 13

  • Repeat the above steps
  • Make sure the UTEE is melted and hot before sprinkling the glitter


Step 14 - finished shape


You will find these products in our shop
GLITTER...HERE!
EMBOSSING POWDERS AND UTEE... HERE!
OUR SHOP... scrap n craft with T...HERE!

Hope you have enjoyed this one! Xx

Tuesday, September 2, 2008

FOIL - paint, glitter

Materials NEEDED
Jac Paper
One Colour of Foil
Chip alpha/shape
Paint/pigment ink
Clear glitter
Punch (any small shape)
Step 1

  • Trace your chip letter/shape onto the Jac Paper
  • NOTE: Those of you that may not know what jac paper is. It is sticky paper on both sides like double sided tape
  • Cut out your Chip alpha/shape


Step 2


Step 3


Step 4


  • DO NOT TAKE THE TOP OF THE STICKY PAPER YET!
  • Find some quick drying paint like Making memories
  • Paint/pigment ink over the entier shape where the punch outs were
  • Sprinkle some clear/crystal glitter
  • Leave to dry for a half hour


Step 5


  • Peal off the Jac Paper, leaving the stick part. You will be left with coloured shapes on your letter and the rest will be sticky


Step 6


  • Get your coloured Fab Foil and place onto yoru stick jack paper
  • NOTE: make sure you are looking at the coloured side when placing the fab foils down onto the Jac Paper
  • Rub using your fingers or stylus around the shapes


Step 7


  • Once you have rubed all over
  • Lift your foil carefully
  • If you haven't rubed firmly enough than you will see white bits and you can replace the foil and rub over again
  • You will see through the foil where it has come off


Finished shape/alpha