I have a new blog!

If you want to see only my creations please come and check out and follow my new blog http://www.tanyah-payne.blogspot.com
Showing posts with label die cutting. Show all posts

Thursday, April 28, 2011

My latest Creation.....

Lately I am in LOVE with bright summer like colours! they are happy and has given me the  inspiration I needed right now.

This layout I created late last night and was surprised how quick it came together!..
Hope this inspires you and want to create too!..

Products I have used:
  • Echo Parch - summertime range
  • My Minds Eye tree die cut
  • Making Memories Paint
  • bandange
  • string
  • 2 Crafty Chipboard
  • Distresser
  • Nic Creates tiny flowers (from the bright and beautiful range)
  • Sizzix tree die cut strip
  • 7 gypsy paper
  • Prima Flowers
  • Bella Alphas
  • American Craft Thickers
  • Bead trim
  • Bella felt butterflies
  • Plasters Mesh
  • Kaiser pearls
  • quilling papers
  • the girls paperie paper

Thankyou for popping in to check my layout ou, please feel free to leave some love as I get a buzz when  you do....
Hope you have a fantastic day today its the first day back of school today for us!
take care till next time
TanXx

Wednesday, January 5, 2011

Quick card using Ruby Rockit papers

After seeing Sue's wonderful layout yesterday I was inspired to use up some of my Ruby Rockit papers to make a quick card.


I have used the following materials:


I had made the butterfly earlier in the week by playing around with some sticky back canvas.


I diecut a butterfly shape, then stamped the canvas using a script stamp inked with versamark then embossed.  Using a mini-mister, I wet the canvas then sprayed on some Color Wash.  I wet it first so the two colours would bleed into each other a bit.
When dry, I added some Distress Stickles.


.
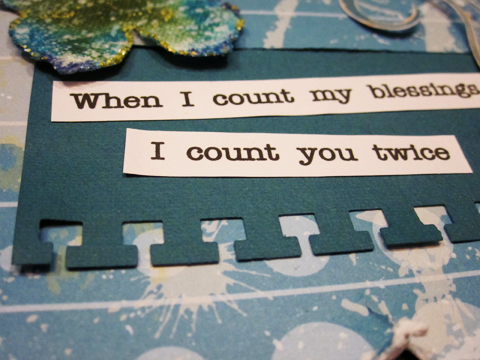
 I have used a border punch to give the edge some definition, fussy cut a flourish from the Ruby Rockit paper and added one of my favourite verses.

All done...very simple...xxxooo

Hope everyone had a wonderful Christmas and all the best for the New Year.

nic...xxxooo

Wednesday, December 15, 2010

Step by step layout by Tanyah Payne

Hi Everyone...


How are we all going with only 9 days to Christmas... how are we all going with organisation? For me....its not happening very fast....lol!

In my time out lately I have created a layout that was a challenge on the Scraplounge a couple of weeks ago. We were to base our layout on a music lyric and
only allowed to use 3 embellishments...yep for those who know me that is imposible!.... well accually i did it and surprised myself what you can do with very little supplies.


Products Used:

  • Bo Bunny Gypsy Range of pattern papers
  • Making Memories Paint
  • Carolee Creations Sleek Alphas
  • paper string - for the sewing
  • very small amount of red cardstock
  • Gelly
  • journal pen
  • crafters workshop template


 My 3 embellishments were...

  • Chipboard
  • Rubons
  • Sizzix ladybug die cut.

Instructions

  1. Place your template over the top of your paper
  2. Using a brush, cover the paint over the top of your template
  3. Lift template off and wash the paint off
  4. Wait to dry
  5. Cut a co ordinating patten paper and distress around the edges. Place at the left hand side of the photo. 
  6. Cut a shape from the gypsy range of papers and placed on the right hand side of the photo
  7. Tear a small part of the base paper approx 1.5".
  8. Find a co ordinated paper and place under the teared edges, this will give a different dimention and colour to your page.
  9. Roll the edges and place cardstock underneath
  10. Punch holes using a hole reamer or thick needle where you want to sew
  11. than using your paper string sew in and out to where you want to go.
  12. I placed the ladybug  at the top left of the pealed back edges.
  13. Typed my lyrics on the computer and matted with red cardstock and placed on the left side of my photo.
  14. title your layout
  15. sewing my corner on the right hand side.
  16. Using a journal pen i doodled a frame around the bottom of my photo.

EMBELLISHED CHIPBOARD SHAPE...
  1. I am sure i have put this on here before but here it is again....
  2. paint your surface
  3. place gelly over parts of your chip shape
  4. Carefully paint over the top of the gelly and entire chip shape
  5. Wait to dry
  6. Using a paper towel, wipe off the gelly to get this amazing effect!... cool hey!
  7. Embellish with rubons!...and all is done!

Hope my layout enspires you to create and have some time out at this crazy time of year....
take care and till next time
TanXx

Tuesday, December 7, 2010

Christmas Banner with Maya Mist

Christmas is fast approaching so I thought I should do my annual bling thing - a rarity for me. I have created a banner based on 3 tags for the word JOY.


J and Y use a white crepe paper rosette that I sprayed with Maya Mist to alter the colour to a lovely glimmery emerald green - you could also use Glimmer mist but I decided on Maya Mist because it had such a lovely strong colour and is more blingy. I put tape down on my bench and attached the dry coloured crepe paper. I peeled off the backing, punched a circle from cardstock, and pleated it around in a spiral on top of the circle and itself to make the rosette. I trimmed off or shaped any wayward bits. Voila - a rosette. I also used the mist to die the white lace attached along the bottom as well as the chipboard J, O, Y.

Bye for now June

Monday, October 26, 2009

OZEDIES Techniques...By Alison Callcott

Here is some samples of uses of the OZEDIES... this is a liqud die that works prefectly with cotton fabric or with paper.


Laces ...Row 1 – white lace
Row 2 – white lace dyed with Regency Rose

Row 3 – white eyelet lace dyed with Turquoise
Row 4 – white eyelet lace
Row 5 – white eyelet lace dyed with Luscious Lime

Row 6 – white circle lace
Row 7 – white circle lace dyed with Edwardian Pearl
Row 8 – white circle lace dyed with Chocolate

Row 9 – white stretch lace
Row 10 – white stretch lace dyed with Pansy
Row 11 – white stretch lace dyed with Chocolate

* All the laces were dyed with 100% full strength dye and left in dye for varying short times to achieve results obtained.
**************************************************************

Blue denim swatches ...

This example is used from recycled blue denim (from old pair of jeans)
These swatches are in the first picture above....

Swatch 1 – Edwardian Pearl
Swatch 2 – Regency Rose
Swatch 3 – Fuschia
Swatch 4 – Luscious Lime
Swatch 5 – Pansy
Swatch 6 – Chocolate
Swatch 7 – Turquoise

* All the denim swatches were dyed with 100% full strength dye and left in dye for varying short times to achieve results obtained.
*********************************************************

Here is a Card that Alison Callcott has made with some blue denim recycled from an old pair of jeans which she has dyed with Ozecraft Chocolate and Turquoise dyes. Alison has included examples of the original blue denim above the card.

Other products used when making the card are:
  • white cardstock,
  • brown velvet cardstock,
  • Big Shot Circles die,
  • Sizzix Round & Round border die,
  • white eyelets and
  • Kaiser rhinestones.


Again the denim was dyed with 100% full strength dye.

Step 1
Alison found both the Turquoise and Chocolate dyes to be very strong so the blue denim was only in the dyes for a short amount of time.
Step 2
Additionally, to make the most of my dyes, Alison squeezed the denim circles to ensure any excess dyed returned to the container she was using.
Step 3
Alison then laid the denim circles on an old towel so as to not stain any surface and they dried reasonably quickly ... as quickly as any wet fabric would.

When using the Ozecraft dyes Alison primarily used small recycled yoghurt containers to pour the dye into.

hope you liked these samples and if you have any questions please feel free to email us at admin@scrapncraftwitht.com.au

Thanks Alison for this awesome technique
Luv tanxx