






Alison Calcott...
Since I was a little girl I’ve had a fascination with buttons. My Grandmother used to have this very old tin full of buttons she had collected over the years. Today my Mum has beautiful, big jars full of buttons. I guess with four sons and one daughter she had a lot of reasons to have a lot of buttons! My Mum also used to be a dressmaker so you can imagine the unique, delicious buttons she has that I’d love to get my hands on! As sad as it may seem (LOL) I often find myself checking buttons on garments prior to purchasing them just to ensure I will be able to recycle the buttons at some point further down the track.
Since I was a little girl I’ve had a fascination with buttons. My Grandmother used to have this very old tin full of buttons she had collected over the years. Today my Mum has beautiful, big jars full of buttons. I guess with four sons and one daughter she had a lot of reasons to have a lot of buttons! My Mum also used to be a dressmaker so you can imagine the unique, delicious buttons she has that I’d love to get my hands on! As sad as it may seem (LOL) I often find myself checking buttons on garments prior to purchasing them just to ensure I will be able to recycle the buttons at some point further down the track.
Regrettably (?) that’s not where my dreams of buttons end. A long time ago when I bought a Big Shot (remember when that was first released?!) and a few basic shaped dies, I started making my own buttons ‘to order’ with raw chipboard combined with double-sided adhesive JAC paper and then pretty much whatever I had in my stash that I could lay my hands on. Here are a few I have ‘whipped up’ to share.

The above round buttons were made by adhering patterned paper (I had some Basic Grey Blush Collection scraps) to chipboard with JAC paper and then die-cutting some circles with my favourite die … Big Shot Thick Cuts Circles. In the top row you can see that the first button is simply the patterned paper with some sanding. The second button has also had Inkssentials Glossy Accents applied. On the bottom row the first button had Kaiser Pearls added before the Glossy Accents was applied. I added Kindy Glitz to the third button before the Glossy Accents (once the Kindy Glitz was dry). The third button is a combination of the Kaiser Pearls with Kindy Glitz and Glossy Accents.

I applied the Flower Soft to the large, middle button exactly the same way as I applied the loose Flocking. I put my sticky chipboard button in the bag and ‘squished’ away. You can see the result for yourself … one very funky, textural button that looks fabulous. Finally, as the German Glass Glitter I used on the small button needs to be handled with care, I decided to see how one would look if I applied Glossy Accents over the top of the glitter. Whilst it certainly alters the colour of the glitter, the end result is an ever so very cool, textured, plastic-like tile. I was so thrilled with the result (don’t we all hate glitter spreading all over our projects) that I’ve decided to do the same with my Flower Soft button and am currently awaiting the result. I will be sure to let you know!
As you can see, if you’d rather custom make your own buttons, the possibilities are endless. They are quick and easy to make, a great way of using up any scraps you have left over from your latest project, they look fabulous, and most importantly, they were made by YOU.
Alz :)
PS: Here is a photo of the Flower Soft button once the Glossy Accents had dried. Oh boy LOL, I think I’ve died and gone to Button Heaven!!! :)

The above harlequin shaped buttons are a shape I haven’t made before. I think they’re kind of cute. The one with the eyelets I want to make into a stick figure!!! Anyway, when making these buttons I didn’t use any JAC paper. The first button is raw chipboard with two eyelets set in the holes. For the second button I lightly inked the raw chipboard with a Tim Holtz Distress Ink and then used a Tim Holtz Stampers Anonymous Visual Artistry stamp and (of course!) another Tim Holtz Distress Ink to stamp text onto the button. The third button was painted and once completely dry, distressed with a sanding tool, whilst the fourth button was painted and had Glossy Accents applied. These buttons were made with a Cuttlebug die … Harlequin.

Finally, the above funky shaped buttons were made with chipboard, JAC paper, and a variety of textural elements. I enjoyed making these ones the most. Once I had die-cut the shapes with my Big Shot Thick Cuts Boxes, Funky die it was simply a matter of removing the top layer of the JAC paper to reveal the adhesive layer beneath. Then all I had to do was to stick them sticky side down into a variety of products, well kind of. For the first button I used a Pinkerrific We R Memory Keepers Foil Sheet as a rub-on (foil side down on the adhesive JAC paper) and ended up with this terrific metallic effect which shows the lines from when I did the rubbing. Pretty cool. Next up I used glitter to cover my button. I used a German Glitter made from real glass so needed to handle this one with care. For the third small button I used a Magenta We R Memory Keepers Flock Sheet exactly the same way I used the Foil Sheet, as a rub-on. This time though I didn’t get the rubbing lines.
Finally, the above funky shaped buttons were made with chipboard, JAC paper, and a variety of textural elements. I enjoyed making these ones the most. Once I had die-cut the shapes with my Big Shot Thick Cuts Boxes, Funky die it was simply a matter of removing the top layer of the JAC paper to reveal the adhesive layer beneath. Then all I had to do was to stick them sticky side down into a variety of products, well kind of. For the first button I used a Pinkerrific We R Memory Keepers Foil Sheet as a rub-on (foil side down on the adhesive JAC paper) and ended up with this terrific metallic effect which shows the lines from when I did the rubbing. Pretty cool. Next up I used glitter to cover my button. I used a German Glitter made from real glass so needed to handle this one with care. For the third small button I used a Magenta We R Memory Keepers Flock Sheet exactly the same way I used the Foil Sheet, as a rub-on. This time though I didn’t get the rubbing lines.
Moving onto the three larger buttons. The one on the left I put in a plastic bag in which I store my loose Hot Pink Flocking and then ‘squished’ away. By putting the button into the bag with the flocking I didn’t have to worry about cleaning up any loose flocking afterwards. Plus I was able to get a fabulous application. The middle button was even more fun to create! I used the Bright Pink Flower Soft. Now anyone who has used Flower Soft knows that once you release the filaments from their original packaging that you need to then store them in a larger zip lock bag. Yes?
Well setting aside the buttons for just a moment … up until now I have been storing the empty Flower Soft containers in the bag so I knew what colours I was using. I discovered whilst making these buttons that in fact the labeling on the Flower Soft containers is actually an easily removable disc on the inside of the lid. So I removed the disc to pop into the bag and as a result ended up being able to store my Flower Soft in a smaller space plus I ended up with a really cool container for later use. For any storage junkies you’ll love this tip! So where were we? Oh that’s right … buttons.
Well setting aside the buttons for just a moment … up until now I have been storing the empty Flower Soft containers in the bag so I knew what colours I was using. I discovered whilst making these buttons that in fact the labeling on the Flower Soft containers is actually an easily removable disc on the inside of the lid. So I removed the disc to pop into the bag and as a result ended up being able to store my Flower Soft in a smaller space plus I ended up with a really cool container for later use. For any storage junkies you’ll love this tip! So where were we? Oh that’s right … buttons.
I applied the Flower Soft to the large, middle button exactly the same way as I applied the loose Flocking. I put my sticky chipboard button in the bag and ‘squished’ away. You can see the result for yourself … one very funky, textural button that looks fabulous. Finally, as the German Glass Glitter I used on the small button needs to be handled with care, I decided to see how one would look if I applied Glossy Accents over the top of the glitter. Whilst it certainly alters the colour of the glitter, the end result is an ever so very cool, textured, plastic-like tile. I was so thrilled with the result (don’t we all hate glitter spreading all over our projects) that I’ve decided to do the same with my Flower Soft button and am currently awaiting the result. I will be sure to let you know!
As you can see, if you’d rather custom make your own buttons, the possibilities are endless. They are quick and easy to make, a great way of using up any scraps you have left over from your latest project, they look fabulous, and most importantly, they were made by YOU.
Alz :)
PS: Here is a photo of the Flower Soft button once the Glossy Accents had dried. Oh boy LOL, I think I’ve died and gone to Button Heaven!!! :)
PPS: I think next time I'll paint the button pink for a more polished effect! :)
---------------------------------------------------
Melinda Spinks...
Buttons, Buttons, Buttons... come in all shapes, sizes and colours yet I will be the first to admit that I haven't really endeavoured to use them to their full potential. I have a tray of bits/bobs/buttons/bling beside me when I scrap and although it looks seriously amazing it is extremely underused and overstocked. So I took it upon myself to find new and interesting ways start using buttons in my work and I was amazed at how versatile a simple little button can be.
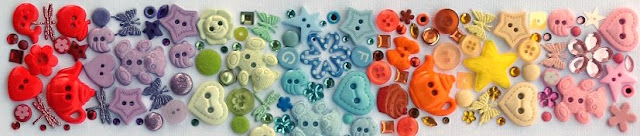 A button doesn't necessarily have to be for keeping your shirt from gaping or your pants from falling down, it can be used to embellish, enhance, add colour, add dimension... you are only limited by your imagination.
Try adding multiple buttons in the one colour scheme and overlapping them to create great dimension and an interesting statement on your project...
 One of the latest trends seems to be that of adding just a simple bow to your button which looks really cute and is an alternative method in attaching a button to your layouts or cards...

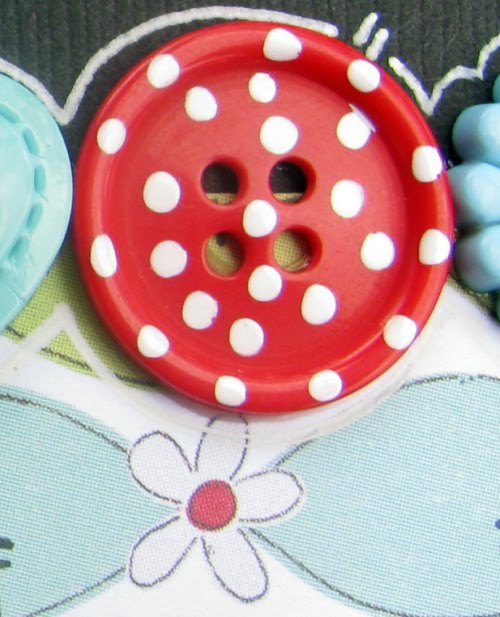
 Ever thought of grabbing a paint pen and adding some extra pizzaz to your button collection...

 So I think it is time to have a little wander through your supplies and you may be pleasantly surprised at the collection you have built up over the years. Why not re-evaluate the way your buttons are stored, try separating them into individual colour schemes. I find buttons look so vibrant when they are individually sorted into their own colours and it makes life a whole lot easier to find a match for your project.
Next time you are looking for that perfect embellishment... try a button!
-----------------------------------------------------------------
Tanyah Payne...
Buttons can be of all shapes and sizes, hand made as you can see above posts.
At scrap in craft with T. we stock....
Chellebean Buttons which are adorable... check more of them out HERE:

We also stock packs of small buttons which are fantastic value...

 Thankyou girls for your ideas with this one, i really apprecate it and I am sure our readers love your ideas...
thanks for reading
enjoy your day
luv tanXx
---------------------------------------------------
Melinda Spinks...
Buttons, Buttons, Buttons... come in all shapes, sizes and colours yet I will be the first to admit that I haven't really endeavoured to use them to their full potential. I have a tray of bits/bobs/buttons/bling beside me when I scrap and although it looks seriously amazing it is extremely underused and overstocked. So I took it upon myself to find new and interesting ways start using buttons in my work and I was amazed at how versatile a simple little button can be.

Try adding multiple buttons in the one colour scheme and overlapping them to create great dimension and an interesting statement on your project...


Next time you are looking for that perfect embellishment... try a button!
-----------------------------------------------------------------
Tanyah Payne...
Buttons can be of all shapes and sizes, hand made as you can see above posts.
At scrap in craft with T. we stock....
Chellebean Buttons which are adorable... check more of them out HERE:

We also stock packs of small buttons which are fantastic value...

We also have glittered buttons which look fantastic for placing in a garden pages and so much more.

thanks for reading
enjoy your day
luv tanXx




 On this layout I used ribbons in different sizes and colours as an important part of the design. I wanted to create a 'sun' and I used both ribbons and strips of paper to do so. The ribbons add a softer touch to the whole layout.
 I made this layout for a challenge about 'What I love about Holland'. Well ... the thing I love most about Holland is the cheese. I wanted to create a 'Dutch feel' to the layout and used a striped ribbon in the colours of the flag to make a little 'flag on the right. I wanted to repeat the ribbon and made a sort of flower with it and added the date on the top. The blue and white ribbon with the windmills also added to the Dutch theme.
 On this layout I wanted the ribbon not to be to dominant. I just added a bit in the top right corner and I also tied some around my chipboard swirl to make 'petals' for the flower.

 On the layout below I used the ribbon to adhere the tag with the title to the layout.
 On the layout below I used two different kind of ribbons to create the stem and the petals of my handmade flower.
 On this layout I added the black and white ribbon to add to the 'car races' theme of the layout. I also wanted to show that ribbon doesn't have to be 'girly'; it can be used on layout for girls and boys.
 ***************************************************************


 I used different sizes of patterned brads (these are from KaiserCraft) on these pages. I also used some metal leaves for more decoration:


