I have a new blog!

If you want to see only my creations please come and check out and follow my new blog http://www.tanyah-payne.blogspot.com
Showing posts with label Distress powders. Show all posts

Sunday, August 10, 2008

DISTRESS POWDERS - TECHNIQUE 5 & 6

USING DISTRESS POWDERS AND MESH - technique 5
I love this technique for you are unable to rub onto normal embossing powders where with the distress embossing powders you can for added more great affects. Think out side your comfort zone and look around your home and see what you come up with and find another way of using this powder.

Step 1
Place the mesh onto your chip shape

Step 2
Ink up your shape using a versamark ink (watermark ink)


Step 3
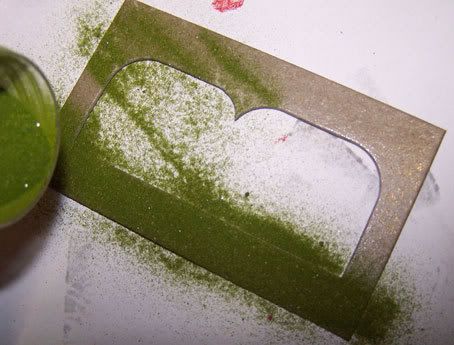
Sprinkle the distress embossing
powder entirly over the top of the
inked mesh and chip shape


Step 4

Take excess powder off and place back into packet


Step 5

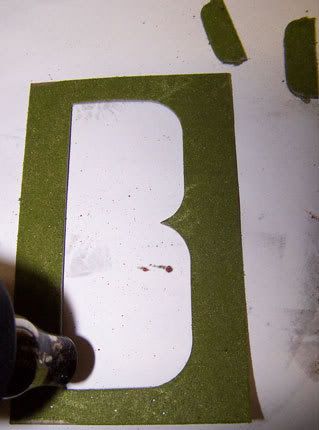
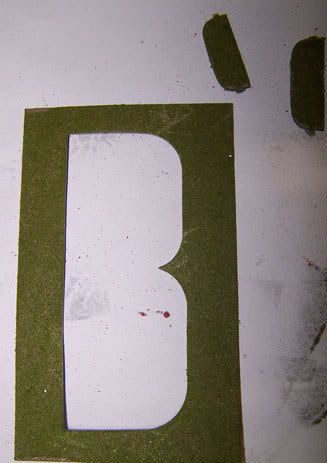
Take off the mesh. You should be left with a mesh pattern


Step 6

Use your heat gun, heat the powder till it changes colour slightly. Try not to burn it.


Step 7

I placed the mesh under the shape to give another dimention.


DISTRESS EMBOSSING POWDER and RUBONS - TECHNIQUE 6

Step 1

Get out your rubons provided or some of your own supplies

Step 2

Place the rubons wherever you want it to go onto your chip shape/alpha


Step 3

Hold firmly with one hand and using a paddle pop stick, rub over the image until it looks like it has come off onto the distress powders.


Here are the 2 techniques put together


HERE IS 5 OF THE TECHNIQUES JOINED TOGETHER AND A LAYOUT!


Thursday, August 7, 2008

DISTRESS POWDERS - TECHNIQUE 4

DISTRESS POWDERS AND CORK!...........

Step 1

Copy your chip shape/alpha onto the jac paper

Cut out the Jac paper shape


Step 2

Peal the bottom of the jac paper

Place onto your shape


Step 3

Press down the jac paper firmly

Peal off the top layer of the jac paper


Step 4

Place the stick shape onto the cork

Press down firmly


Step 5

Cut around your shape


Step 6

Ink up your stamp with versamark ink


Step 7

Place your cork shape onto the textured stamp and press firmly


Step 8

Take off your shape from the textured stamp

Poor your distress powder over the top of the cork


Step 9

Place excess back into the packet


Step 10

Heat the image until the powder changes colour


Enjoy and have fun!

Tuesday, August 5, 2008

Distress Embossing Powders- Technique 3

Hi all

sorry I haven't been able to post a technique until today. This technique is really easy and what distress powders were designed for.

Step 1

Ink up your letter/shape with versamark

Step 2

Shake your embossing powder before you sprinkle

Sprinkle embossing powder over the versamark


Step 3

Shake off any excess and put back into packet


Step 4

Heat to melt the powder remembering that it goes darker and doesn’t melt like normal powders


Step 5

When cool rub you’re fingers over the top allowing the crystals to fall off. This will give you a distress and worn look.

Thursday, July 31, 2008

Distress Powder Technique 2

DISTRESS POWDERS, DOUBLE EMBOSSING USING STAMPS!


STEP 1

Choose your alpha/ shape


STEP 2

Find your versa mark ink (watermark ink)

Stamp and ink the entire shape


STEP 3

While the ink is wet
Sprinkle the entire image with distress powders
Place excess back into packet


STEP 4

Using your heat gun heat your image
Wait until your powder has changed colour and slightly darker


STEP 5

Once done leave to cool for a minute or two


STEP 6

Ink up your stamp with versamark


STEP 7

Place you shape onto the wet texture stamp

Press your shape down firmly to get an even coverage


STEP 8

Carefully take your shape off the stamp

Poor a different colour of embossing powder over the top of the entire shape.


STEP 9

Place excess powder into packet


STEP 10

Heat the powder until you see a slight change of colour

Wait a min for shape to cool

Take the shape off the stamp


YOU HAVE NOW FINISHED THIS TECHNIQUE!!!!!


CARD SAMPLES


TOMORROW I HOPE TO HAVE ANOTHER TECHNIQUE FOR YOU!

Tuesday, July 29, 2008

Distress Embossing Powder Technique ONE!!

DISTRESS POWDERS , ROPE AND DOUBLE EMBOSSING!!!

Step 1

If you have a kit....Create a shape with the chipboard provided.

Ink up your chip shape/alpha with versa mark ink (watermark ink)


NOTE: make sure your chip shape is entirly covered with ink.


Step 2

Poor a small amount of one colour embossing powder over the wet versamark ink

NOTE: place the shape on top of paper before sprinkling the powder.


Step 3

Shack off any excess


Step 4

Put excess powder back into the packet


Step 5

Using your heat gun,

Heat the embossing powder.

You will notice the powder to change colour and go a shade darker

Allow cooling for a minute or two before going onto the next step


Step 6

Using double sided tape to adhere the rope to the back of the alpha/shape


Step 7

Place the rope around the letter / shape

This is the back


This is the front


Step 8

Place the versamark ink over the top of the wrapped chipboard


Step 9

Place your shape on top of some paper

Sprinkle a different colour of embossing powder over the top


Step 10

Shake off excess embossing powder onto the paper.


Place embossing powder into the packet


Step 11

Take off the rope carefully

Heat the embossing powder until the colour changes slightly


Step 12

Finished letter


IF YOU HAVE ANY QUESTIONS PLEASE EMAIL ME!!!

HOPE YOU HAVE FUN & I WOULD LOVE TO KNOW WHAT YOU THINK OF IT!