I have a new blog!

If you want to see only my creations please come and check out and follow my new blog http://www.tanyah-payne.blogspot.com
Showing posts with label flower techniques. Show all posts

Thursday, December 22, 2011

Time at the Beach!...

Hello readers!

Christmas is so close now and I still haven't finished my shopping... naughty me!...
I want to share with you today a layout I created recently of my kiddies at the beach last summer. We can't wait to get to the beach this summer to enjoy the sun, sand, surf and RELAX!!


Materials used:
  • Papers- 7 gypsy, pink paisley, little bicycle 
  • Chipboard: scrapware, 2 crafty, scrapmatts, raw chipboard
  • Embellishments: Maya Road calenda and journal ticket, bollywood beads & trims, Bella epoxy charm, pin, Holts charms, Crafty queen mini metal flower, Kaisercraft mini pearls
  • Alphas: Prima Marketing, Carolee Creations, Making Memories
  • Stamp: stamp it mesh stamp
  • Red & black brilliance ink
  • Mini flowers
  • Mini pom pom trim
  • Sanding tools
  • Foam mounting board
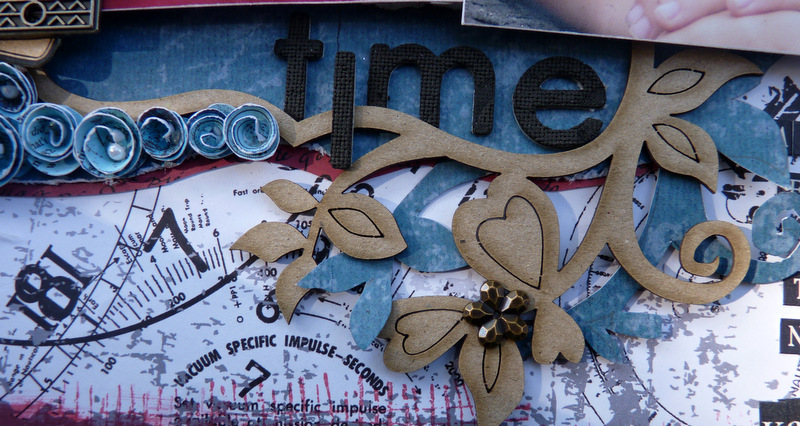
Creating all these grup roses took ages but I love how it all turned out in the end.
 Below are some close ups to see what i have done!..


Enjoy your summer break everyone!
thanks in advance for popping in to say hi!
Tan :)
XXOO

Monday, May 2, 2011

Another Single layout creation playing with gel mediums, paint & Templates

How are we all going with our kiddies back at school now and life starting to get back to normal for most of us. Life can bring so many up's and downs  for us. This is why I  love creating.... creating for yourself  is a fantastic way to explore lots about you and what you like.

I have found the Bright and Beautiful  RAK pack from Nic creates has inspired me to do just this lately. I love these bright colours so so much but really hadn't explored this combination before and had so much fun doing so.

Here is a layout I want to share with you today and hope you enjoy and feel inspired to create using colours you like but haven't thought of creating with.


  • Echo park - springtime range
  • Nic Creates - Bright & Beautiful RAK kit.
  • Prima flowers, leaves and pearl flourishes
  • Bella Alphas & felt butterflies
  • Spritz spray
    A2Z Scraplet tree
  • Structure Gel
  • Crafters Workshop Templates (I have used 2 different templates)
  • Making Memories Paint
  • Felt pen

Over the past recent months we have been working hard on our store, blog/s and gallery, making it easier for you to shop and be inspired... Please come and visit and let us know what you think of our new site  www.scrapncraftwitht.com.au  We have LOTS of bargins for you to enjoy! we are still working on the stock control as it is taking a while to get through. Please email us if you have any questions.

Also we all love to see your work in our gallery www.scrapncraftwitht.com.au/gallery. We have now changed the traditional gallery for layouts using one, two, three, four or more layouts. This is to help you if your wanting ideas for scrapping or crafting.... enjoy!

Thankyou for stopping by and feel free to leave a bit of luv it makes my day!
enjoy
Till next time
TanXx

Tuesday, November 16, 2010

Fun Christmas Step by Step Layout & a Card by June Burtonwood

Christmas Spirit


Products USED:
  1. With Christmas fast approaching what better than a tree to embellish your layout.
  2. To create my tree, I used a ten pack of lightly inked flowers.
  3. Cut a triangle out of matching cardstock for the base (3 1/2" base, 5" high).
  4. Stamp 2 leaves with a music stamp for colour variation (or use darker coloured flowers).


Begin at the top with 3 petals cut from a flower, next row 4 petals, next 3 and 2 petals and so on. Cut into 2, 3 or 4 petals depending on what you need to fill the row. I attached the petals with strips of double sided tape. Every now and then put in darker petals. The petals overhang the sides and bottom for best effect. If there are any gaps poke in 2 petals. Finish with anything you like for baubles and the star at the top. Then attach your tree to your layout wherever you like.


**************************************
Rectangular red card
If you came to the gift making day last Saturday I'm sure you left satisfied with all your goodies and ideas. I thought I would put the instructions up for the last card we didn't have time to finish.


Products USED:


  1. Distressed inks edges of red patterned paper rectangle and attach lace 2 3/4" down from the top. Attach flat to the centre front of cream card.
  2. Distress the edges of black rectangle and attach flat to centre of red paper.
  3. Distressed inks edges and 3D cream rectangle that is stamped with script stamp and puff swirl. Attach to centre of black rectangle.
  4. Trim butterfly and Distressed inks - I used wild honey and aged mahogany. Attach to corner of cream cardstock with 3D tape.
  5. Distressed inks edges of card.

If you want the inside info on a number of Tim Holtz techniques and secrets, come to our Vintage Patchwork Canvas class on Saturday 4th or Sunday 5th of December. 

We will be making up kits of all the materials required so booking with a deposit will be essential to ensure your spot. The canvas is on display in the shop and everyone has admired it so you won't be disappointed.

bye for now June

Friday, February 19, 2010

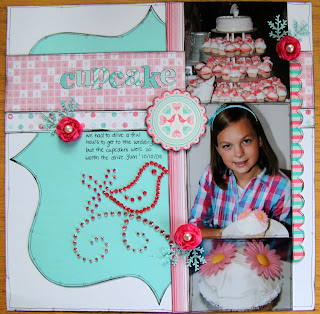
Step By Step Layout 'Cupcake' by Ingeborg Dijkstra


Materials used:

Instructions:

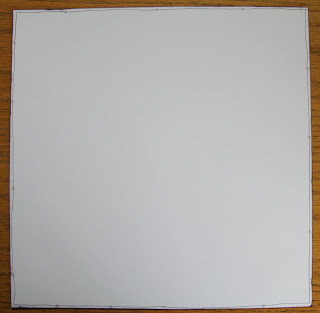
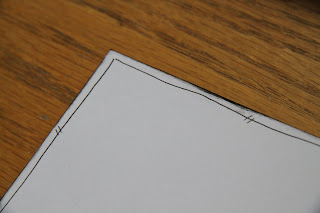
  • I doodled a frame all around the white cardstock.


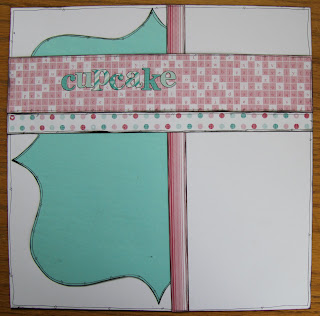
  • Using my 'Orchid' template I traced and cut a shape out of the teal cardstock.
  • I doodled around the shape to give it some more dimension. I placed the shape to the left of my page.
  • I placed a thin strip of paper on the right side of the shape (slightly off centre).

  • I cut a thin and a thicker strip out of the patterned papers and placed them across the page.
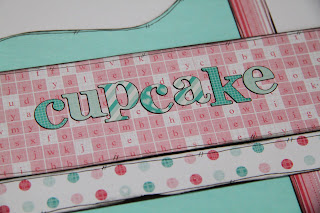
  • I added a title 'Cupcake' with the Alpha Stickers. I outlined the stickers with black pen.


  • I used three vertical photos. I cropped two of them to make them fit vertically.
  • I added some journaling and two die cuts (the scalloped strip is one of the die cuts).
  • I doodled all around the papers and shapes to make them stand out.

  • I decided to add 'something handmade' to the page. I made flowers out of tissue paper (the kind that you can get anywhere in the gift wrapping department).
  • I folded the paper a few times and punched a few dozen 1" circles ( see picture 1 below).
  • PLEASE NOTE: if you try to punch though only one or two layers of tissue paper, it will most likely not work and you could damage your punch! I punched 8 layers at the time and that worked fine!
  • I put about 20 punched circles on top of each other (picture 2).
  • Using a hole piercer I pierced a hole through the punched circles (picture 3).

  • I put a piece of wire through the bead and twisted the wire a few times (picture 4).


  • I put the wire through the punched hole (picture 5, 6 and 7).

  • I cut a bit of the wire so it won't stick out (picture 8).


  • I 'separated' the wires to make it 'stick' (picture 9 and 10).
  • The pearl is nicely centred in the middle (picture 11).

  • Using my fingers I crinkled the paper to make a flower shape (picture 12).


  • Using my 'Jewel Templates' I added the final touch with some bling swirls and a cute bird.
  • I also punched some branches and added them under the tissue paper flowers.

  • Done!

Sunday, February 14, 2010

Two Cards for Valentine's Day by Ingeborg Dijkstra

Valentine's Day is a perfect day to make a card for someone you love! I made two cards this week; one with handmade flowers out of tissue paper (see instructions at the end of this post) and one with 'floating circles', that move when you walk past.


Materials used for these cards:

Instructions:
  • I cut a sheet of teal cardstock in half (6" x 12")
  • I folded the sheet three times to have four equal rectangles.

  • Using my hole punch, I punched two holes (2.5") in the middle of the middle fold (see picture below).


  • I punched four 1.5" circles out the patterned paper.

  • I tied a string across the larger punched circled. I also tied it in the middle and a the top (see picture below).


  • I glued the punched circles together in the middle of the punched holes. Since the circles spin a little bit, I wanted to make sure the back was as pretty as the front.

  • I punched scallop circles (3") in light pink and I punched a 2" hole in them. I glued the scalloped border around the holes.

  • I doodled around the circles and scalloped border.


  • I added some die cuts, strips of paper and stamped 'I love You' on the card 10 times (I wanted to make sure the receiver of the card got the message)...
  • Inside the card is plenty of room for a handwritten message. I will add my message to the card later, because it is too personal to share here ...
  • Done!


Instructions 'I love You Card':

  • I hand cut the scalloped circle out of the patterned paper.
  • This circle will be the 'sentiment' on the card.


  • I cut some strips out of the leftover patterned paper to cover the front.
  • Using the alphabet stickers I created 'I love you'.
  • I outlined the stickers to make them stand out.
  • I made flowers out of tissue paper (the kind that you can get anywhere in the gift wrapping department).
  • I folded the paper a few times and punched a few dozen 1" circles ( see picture 1 below).
  • PLEASE NOTE: if you try to punch though only one or two layers of tissue paper, it will most likely not work and you could damage your punch! I punched 8 layers at the time and that worked fine!
  • I put about 20 punched circles on top of each other (picture 2).
  • Using a hole piercer I pierced a hole through the punched circles (picture 3).

    I put a piece of wire through the bead and twisted the wire a few times (picture 4). I put the wire through the punched hole (picture 5, 6 and 7).

  • I cut a bit of the wire so it won't stick out (picture 8).
  • I 'separated' the wires to make it 'stick' (picture 9 and 10).
  • The pearl is nicely centred in the middle (picture 11).
  • Using my fingers I crinkled the paper to make a flower shape (picture 12).