Transparencies is one product that can be daunting at first, but once you have used them and know how to use them, their will be no stoping from their.
The adventage of these if you have
STAZON INK and
STAMPS you can create your own transparencie images.
Here is some of my ideas on how to attach Transparencies..- Adhereing by placing brads through the transparencie
- By Sewing by hand or machine
- Using your eyelets
- Also a stapler can come in very handy for transparencies
- I love using rubons butterflys onto transparencies and cutting them out and staple them to your pages to give a more dementional look
- Also love using my stamps, for i have heaps and heaps of them and can put them to great use but stamping with stazon ink (permant ink), cut out the image and adhere it in all sorts of ways.
- Placing one end under your decorated chipboard word/alpha
- Use your printer to do your journalling onto and place under a photo
- Using small 7Gypsy transparencie to journal and adhere using adhesive flourish bling and place under a flower
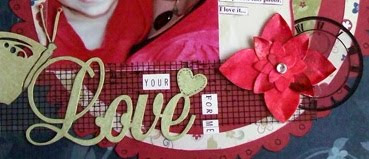
- I love to use rubons on excisting transparencies or ones I have created to add an individual look. And adhere under photos and under felt embelishments.
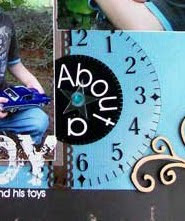
- This below pic is a Heidi Swapp Large Clock and I have used alpha rubons in the center for the title. I have adhered it on the page with half of the clock under the photo.
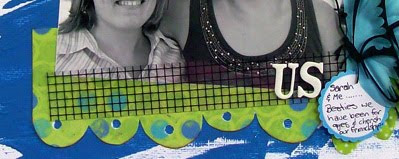
- Those who know me well I am a fan of the Hamply Screen Prints Mini Graphic Mesh. I love how you can use an small or large amount on your layouts and one sheet can go a long way. I have place tape under the alphas, journalling spot and the flower
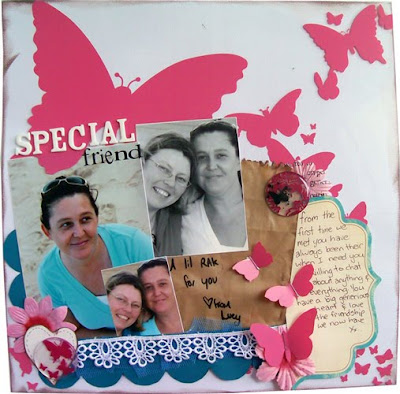
- This Pic below is a full Hamply Screen Print Transparency, I have cut out the butterflys under where the photos would be, and also cut out the bottom part of the butterfly at the top to allow the wing to go over the photo a bit. I have stapled the small butterflies onto the layout.
Thanks for reading... hope you find these ideas useful..
***********************************************************************
Check out our transparencies we have in our shop!...
CLICK HERE! We have a large range to offer and brands that include;
Tracey Thorne... our of our Design Team Members makes her own label Transparencies that are to die for and a MUST HAVE... those of you that have purchased them already will know what i am talking about.
If your wanting to purchase any of these, you need tobe quick when Tracey puts them up at
ScrapChats Aution Site.HERE IS WHAT our design Team member - TRACEY THORNE HAS TO SAY ABOUT TRANSPARENCIES...
I love using transparencies they are so versatile. I like to create a lot journaling and words on them and adhere with stitching or brads. I also create frames which are great to add to my ATC cards or oversized playing cards- they give a totally different look and dimension to the card and are easy to overlay over fabric and texture paste… I tend to sew these on or use my stapler . Another great way to adhere them is to use tape – not hidden but on the outside… masking tape and bookbinding tape looks fantastic exposed in this situation.
SAMPLE 1 SAMPLE 2
 SAMPLE 3
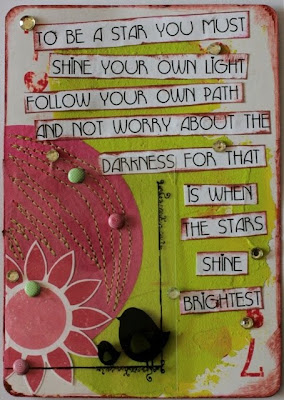
***************************************************************************
HERE IS WHAT
our design Team member - KYLIE ABEL HAS TO SAY ABOUT TRANSPARENCIES....
Sample 1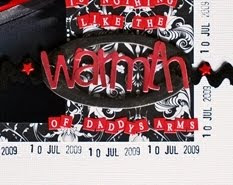
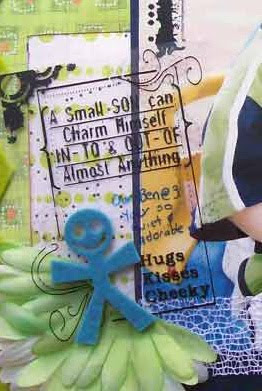
I have used the packaging from some scrapping items (hey, it's clear and it's cheap and it's better than chucking it away! LOL) to stick the word "warmth" to. I then cut the transparency out to suit the shape of the chipboard bookplate and used glossy accents to stick it down. If you look closely you can just see the glossy accents, but it worked OK in this situation.
Sample 2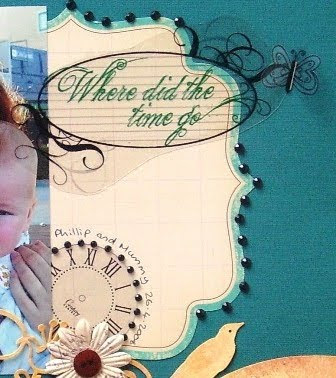
I have used 3 transperancy items on this LO - 2 home-made and one bought. The title I printed (reversed so the printed image is proctected) onto a sheet of printable transparency and then cut out. I used very very thin slices of double sided tape behind the flourishes to stick this down. The butterfly has been stamped (using stazon ink) onto a transparency sheet and then cut out, and stapled down. This allows the wings to be bent up slightly. The clock is from Heidi Swapp, and was stuck down under the photo and with the black bling around the edges.
Sample 3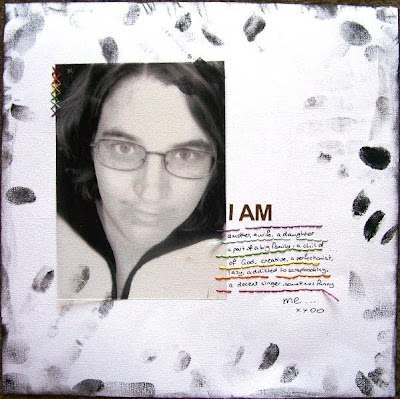
This LO has a whole photo I have printed onto a printable transparency sheet as the main focus. It is held down only by the rainbow coloured cross stitches in he top corner and the stitched journaling lines at the bottom. This allows it to almost "float" on the page. The slight movement of the transparency adds to the effect I think.
***************************************************************************
HERE IS WHAT
our design Team member - ALISON COLLCATT HAS TO SAY ABOUT TRANSPARENCIES....
Do I use transparencies?
Yes. I love them. Whether they be pre-printed ones or ones I create myself with blank acetate or ones I print on ink jet transparencies.
The brands?
Hmmm. Hambly, Fancy Pants, Making Memories, Little Yellow Bicycle, 7Gypsies and ummm I’m sure there’s more!!
How do I attach them?
One of my favourite ways to use transparencies is to layer them amongst a cluster of other items in which case I primarily use double-sided tape in areas where the tape won’t show. Other ways I attach them are with brads (for example in the centre of a flower), staples, a spot of Glossy Accents here and there which perhaps is easily masked by the pattern on the transparency or can be covered with another embellishment. Occasionally by running the transparency through a Xyron if its the right size.
Anything different I’m happy sharing?
* Make your own transparencies with blank acetate by applying rub-ons to the acetate and not directly to the surface of your LO.
* Use a frame transparency on a photo larger than the frame to highlight the ‘important’ part of the photo.
* Use an overlay frame transparency on a photo to which you have applied a circular vignette to add interest to an otherwise blank area of a photo.
* Print your own definitions and quotes etc on inkjet transparencies.
* Transparencies can be placed almost anywhere as essentially they are see through and won’t mask the item beneath where they are placed.
* Some transparencies like Fancy Pants glitter cuts don’t need to be used the right side up ... glitter may not suit your LO yet the shape of the transparency might so adhere it glitter side down.
* Some products are packaged adhered to a form of transparency (such as Kaiser’s bling range, including flowers and words) ... for extra definition of say the flowers, cut the flower out still stuck down.
*****************************************

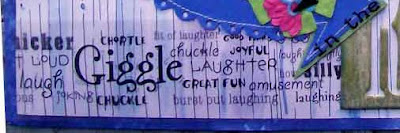
I created my own definition (using a dictionary of course!!) for the word
'Friends' in Word and then printed that definition on an inkjet
transparency.  The definition was then placed over the photo in an area
where it didn't detract from the subjects in the photo and yet could still
be read.  It was attached with staples.
************************************************************

This LO features the use of the Kaiser rhinestone flowers by cutting the entire flower with the transparency it is attached to out and then attaching to the middle of other flowers with a brad. This gives the flower stability and definition and when adhered with the brad in the middle of another
flower gives the flower petals support to stand out.*******************************************************************************
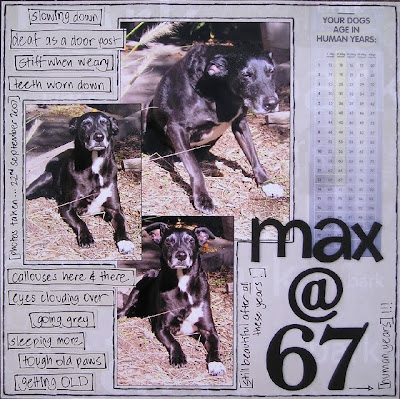
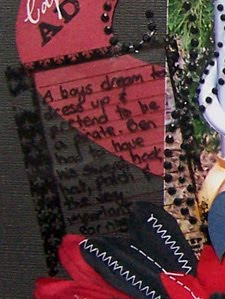
This LO shows a photo printed onto an inkjet transparency on the back of which I have used paint to highlight a certain part of the photo (in this
case Max's age in human years at the time the photos were taken).**************************************************************

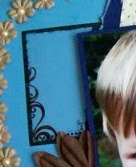
This LO features a Hambly frame transparency which I have used on a larger
sized photo to draw the eye into the most important part of the photo.********************************************************

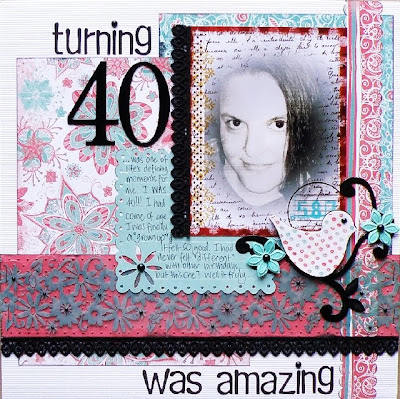
This LO features a gorgeous Me (ha ha ha) and a MME Bohemia transparency which I have placed on the at an angle to draw attention to the photo in a busy LO. I have also used BG rub-ons to extend the flourish which connects the photo to the remainder of the LO.
*********************************************************
This LO features a 7Gypsies frame overlay transparency which I have used on the photo which was edited with a circular vignette to cover the blank space
in the photo created by the editing.*************************************************************
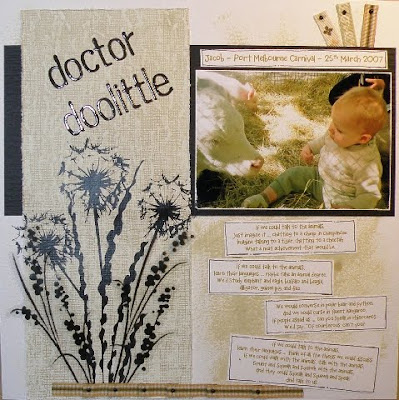
This LO shows the use of a large rub-on on blank acetate to create a transparency heading. It also shows the use of a MME Bohemia butterfly transparency attached with a staple in the centre and the wings pushed up for definition.
**********************************************************************
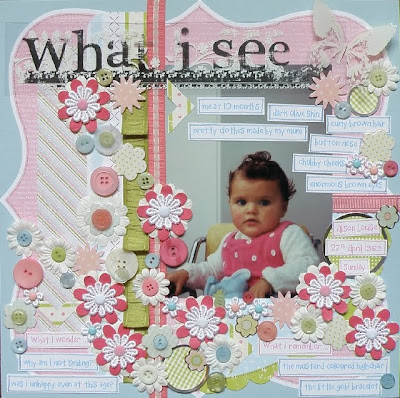
 This LO uses both a LYB and a Hambly transparency. The LYB is actually from the Christmas range and I have used brads in the centres of 'flowers' printed on the transparency and added other flowers to create a layered frame around the photo. The Hambly transparency comes out from the side of the photo to 'frame' the journalling.
**************************************************************************
*******************************************************************
HERE IS WHAT our design Team member - MICHELLE JAMIESON HAS TO SAY ABOUT TRANSPARENCIES....
Sample 1

- Transparencies come in lots of different forms, from 12x12 sheets to a little frame or word.
- They can really dress up a layout.
- I created my layout using a 12x12 Fancy Pants transperancy and I sewed it onto white cardstock.
- Looks great as a different base. It gives some texture to the whole feel of the layout. I’ve kept my layout reasonably simple, as I didn’t want to cover up the gorgeous transparency.
Sample 2
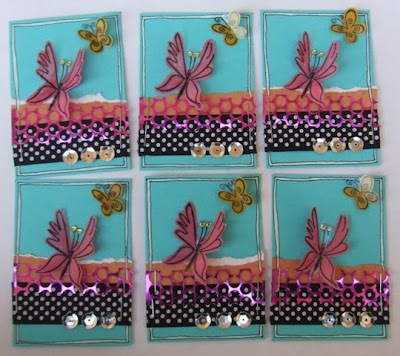
- I’ve also recently created some ATC cards for a swap, using a transparency. I stamped my butterfly images onto it using Stazon, then painted the back, therefore colouring the butterflies. Once it’s dry, cut them out and fold them in half, so the butterflies wings look like they are flying. It’s a great effect.
Happy playing with transparencies...
**********************************************************************


 Happy scrapping!


