This cardstock features a glittered design on one side and co-ordinating pattern on the back.
Materials:
- Birch - Double sided cardstock - one side glittered - bird owls
- Cardstock - white, pink, green
- crafters workshop template - mini orchard
- Glimmermist (paint could also be used)
- White journalling pen
- buttons
- thickers
- paint
- rhinestones
- Carolee creations mini alpha stickers
- distressing tool
- I wanted to continue the 'glittered' look of the patterned paper so I used the white cardstock as a base and sprayed glimmermist around the border of the page (I think I got a bit carried away but I was having fun doing it).
- I machine stitched a couple of rows around the border of the white cardstock.
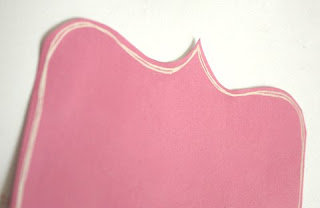
- I cut the pink cardstock to approx. 11.5 x 6 inches then used the mini orchard template to shape the ends of the cardstock.
- Using the white pen I doodled a border around the edges of the shaped pink cardstock.
- Using the Birch patterned paper (glittered side) I cut an 8 x 8 inch square from the top right-hand corner.
- I then cut around the two owls and flowers from the bottom left-hand corner.

- I distressed the edges of the 8 x 8 inch patterned paper and lightly brushed the edges with paint. I also machine stitched a couple of rows around the border.
- I attached the shaped piece of pink cardstock to the left-hand side of the page.
- I then placed the patterned paper (with a slight tilt) on the page overlapping the pink cardstock.
- I attached the title using the mini alpha stickers and the thickers to the bottom of the pink cardstock. I have used the new fabric thickers for the title - they give a really nice texture.
- I attached green rhinestones over the machine stitching on the base cardstock. Two to the top right and three to the bottom left-hand edges.
- I also attached green rhinestones to the centre of three flowers on the patterned paper.
- I matted a 4 x 6 photo with green cardstock and distressed the edges
- Then attached over the patterned paper. I didn't want to cover up too much of the glittered design on the patterned paper so I placed the photo quite low down on the page.
- I attached the cut out owls to the left-hand side of the page.
I thought it needed something in the bottom right-hand corner so...
- From the reverse side of the patterned paper, I cut a strip approx. 10cm long.
- From the pink cardstock, I cut a strip approx. 3cm x 10cm long and used this to mat the patterned paper strip. I have distressed the edges of the pink cardstock.
- I attached this strip to the bottom right-hand side corner. Tucking one end under the photo and wrapping the other end around to the back of the page and securing.
- I attached two buttons over the strip near the photo.
- All done!!
- Here's a sketch based on this layout.
I hope you can use this sketch to create a layout of your own. It would be fantastic to see your wonderful creations in the gallery.
I just loved working with the Birch glittered papers - so sweet, very reasonably priced and if you're not a pink person they have a boy range as well.
Enjoy and take care!


3 comments:
gorgeous LO and I love the step-by-step xo
Cute as! Thanks for the instructions :)
That is such an adorable photo and layout! Gorgeous!
Post a Comment