I have a new blog!

If you want to see only my creations please come and check out and follow my new blog http://www.tanyah-payne.blogspot.com
Showing posts with label FLOWERS. Show all posts

Thursday, December 22, 2011

Time at the Beach!...

Hello readers!

Christmas is so close now and I still haven't finished my shopping... naughty me!...
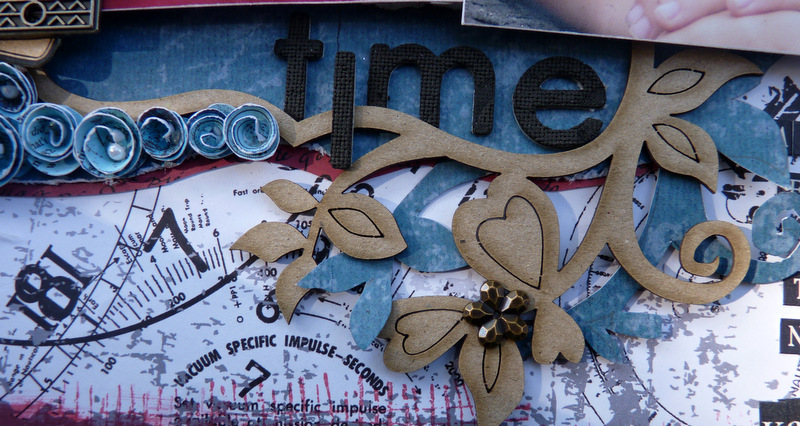
I want to share with you today a layout I created recently of my kiddies at the beach last summer. We can't wait to get to the beach this summer to enjoy the sun, sand, surf and RELAX!!


Materials used:
  • Papers- 7 gypsy, pink paisley, little bicycle 
  • Chipboard: scrapware, 2 crafty, scrapmatts, raw chipboard
  • Embellishments: Maya Road calenda and journal ticket, bollywood beads & trims, Bella epoxy charm, pin, Holts charms, Crafty queen mini metal flower, Kaisercraft mini pearls
  • Alphas: Prima Marketing, Carolee Creations, Making Memories
  • Stamp: stamp it mesh stamp
  • Red & black brilliance ink
  • Mini flowers
  • Mini pom pom trim
  • Sanding tools
  • Foam mounting board
Creating all these grup roses took ages but I love how it all turned out in the end.
 Below are some close ups to see what i have done!..


Enjoy your summer break everyone!
thanks in advance for popping in to say hi!
Tan :)
XXOO

Sunday, July 31, 2011

Kraft it up - July Challenge

I really wanted to have a go at the Kraft it up challenge this month and have got it done with a few hours to spare... Only prob is my pics arn't that great taken at night and will have to redo them later on.

The challenge was to find inspiration from the picture using the colours or how many cupcakes as photos etc.

 Here is my layout...


Materials used
  • Kraft cardstock
  • Bo bunny pattern paper
  • lots of little flowers
  • K & co paper 3D flowers
  • scrapmatts chipboard
  • Journaling pen
  • Prima butterfly
  • Martha Stewart punch
  • Dauber
  • mesh
  • cosmo cricit embellishments
  • Cosmo cricit alphas
  • ribbon
  • stamps
  • distress ink

was lots of fun!
sorry the pic isn't very good
Thankyou for looking, have a fab night
Tan Xx :)

Sunday, May 8, 2011

A Layout to share for Mothers day!

Today is the day we celebrate and remember someone very special in our lives. For those of us that are fortunate to have children to treat us something special to say thankyou for what we do. Its the small things nothing big that makes me put a smile on my face and feel loved...

My ben made a little candle holder at school with this adorable note:
Mum I love you
Oh! You're special
The best mum in the world
Her Favourite colour is pink
Excellent mum, you
Rock mum....

how adoreable is this ....thankyou Ben. xoxo

Kate promised to clean my house as my gift... I'm still waiting on that one to happen... their is still time!...
My day has been filled with either cleaning and taking my girl to dancing and only now have i had a chance to show you a a layout I wanted to share.


Products used:
  • Acrylic paint
  • white cardstock
  • Bo bunny dot cardstock
  • Bella small alphas
  • American craft thickers
  • 2 Crafty swirl chipboard
  • Prima Flowers and leaves
  • Distressing tool
  • Sizzix Arrow
  • sewing
  • Black journaling pen
  • Nic Creates  - Bright & Beautiful RAK/embellishment pack.
PLEASE REMEMBER @ http://www.scrapncraftwitht.com.au/ WE HAVE LOTS OF SPECIALS FOR YOU TO ENJOY AND WILL HAVE LOTS TO UPLOAD SOON AS I CAN!

I have been away the last few days and will share with you soon with some fun pics!
Hope you all had a wonderful day and I wish it to be special for you no matter what.
take care
hugs from me
TanXx

Thursday, April 28, 2011

My latest Creation.....

Lately I am in LOVE with bright summer like colours! they are happy and has given me the  inspiration I needed right now.

This layout I created late last night and was surprised how quick it came together!..
Hope this inspires you and want to create too!..

Products I have used:
  • Echo Parch - summertime range
  • My Minds Eye tree die cut
  • Making Memories Paint
  • bandange
  • string
  • 2 Crafty Chipboard
  • Distresser
  • Nic Creates tiny flowers (from the bright and beautiful range)
  • Sizzix tree die cut strip
  • 7 gypsy paper
  • Prima Flowers
  • Bella Alphas
  • American Craft Thickers
  • Bead trim
  • Bella felt butterflies
  • Plasters Mesh
  • Kaiser pearls
  • quilling papers
  • the girls paperie paper

Thankyou for popping in to check my layout ou, please feel free to leave some love as I get a buzz when  you do....
Hope you have a fantastic day today its the first day back of school today for us!
take care till next time
TanXx

Wednesday, February 2, 2011

Easy gift bags

As you might be aware by now, I like things that are quick and easy to make. 

Today I have made some easy little thank you gift bags for a get together I'm having on the weekend.

Materials used:


Here's a step by step:
Step 1.  Cut out some cardstock.  I've used a spellbinder die but you can just cut a rectangle to suit.

Step 2.  I've printed a sentiment on the cardstock using my printer but you can use alpha stickers or a stamp.

Step 3.  I've folded in half...

Step 4.  Inked around the edges.

Step 5.  Fill a small bag with some treats, fold over the top and placed in between the folded card.

Step 6.  Punch a couple of holes in the top (or staple) and tie with string.

Step 7.  Fold a flower in half and attach to the cardstock.

Step 8. I've cut out a circle of patterned paper and placed it over the flower.

All done!

They make great party favours or a lovely little gift for a friend....with Valentines day coming up you could even fill with some chocolates and a sweet little note.

Don't forget Tanyah's GREAT SPECIALS -get in quickly they won't be around for long.

Happy creating...xxxooo

Wednesday, December 15, 2010

Guest book - Nic Amber

This week I thought I'd share a guest book I've made for my nan's 70th birthday party this weekend.  These are a great gift idea for those special occasions where a lot of friends and family are getting together...people can simply sign their name or leave a special message.


Along with messages and well wishes, I've also featured photos throughout to showcase Nan's life.


To make the album:

I've used a Kaisercraft chipboard album as the base for the guest book.

I have used the Jazmyne range of papers from Bo Bunny but you can pick any papers that will suit the occasion - choosing papers from the same range will help you co-ordinate much easier.  I have used patterned paper for the front cover and then cardstock for the other covers.


To get the right shape, I just laid the chipboard shape over the paper, traced around the shape and cut it out with scissors.


I have embellished the front cover using:
 I chose a quote to be the focus on the front cover, but you could put a photo, name or the occasion instead.

 I cut out flower and leaf shapes from the patterned paper and incorporated them into the embellishment cluster.

I added '70' with alpha stickers and blinged it up a bit using some rhinestones.

For the inside pages, I inked around the edges with some Distress ink to help it all blend in.

To attach it all together, I've used some album rings and then added some ricrac, ribbon and lace.

Well I hope she likes it....thanks for looking.

Happy creating!
nic...xxxooo

    Monday, December 13, 2010

    A Step by Step Layout - by Sue Smith

    I have recently gotten my hands a lot of photos from my Mum's youth, so a lot of my layouts are tending to be vintage style lately....


    Here are the products I used for this layout...

    * Cardstock (Mint)
    * Cosmo Cricket - Earth Love - 'Relive'
    * Crate Paper - Prudence Collection - Charity Die-cut Sheet
    * Flower Tag
    * Prima Marketing - Holiday Lights Birds
    * Chelleybean Designs Flowers
    * Foof-A-La - foof-a-bets
    * Zva Creative - self-adhesive pearls* Fiskars Word & Border Rub-ons - Nature's Flora
    * Washi Tape

    Starting with the basic cardstock, I ran a strip of washi tape across the bottom and the top, just in from the edge...


    Next, I cut an edge from the Crate Paper circle die-cut and attached with DST to the layout....


    Then added the floral tag and a strip from the Cosmo Cricket paper overlapping the elements...


    Then the placement of the photo...


    ....and added the self-adhesive pearls over the top....


    To finish, I added a heading, journalling around the edge of the photo, rub-ons across the top, the flowers and the gorgeous little Prima bird and inked around the entire edge of the cardstock.....


    Thanks for looking and happy scrapping! xxx

    Monday, December 6, 2010

    A Monochromatic Card - by Sue Smith

    This week I have done a card using a monochromatic colour scheme...it's always fun to put together a card or a layout using lots of products in your stash in just the one colour......


    Here is what I used on this card....

    * Red cardstock

    * May Arts Sheer Ribbon Rosettes in Red

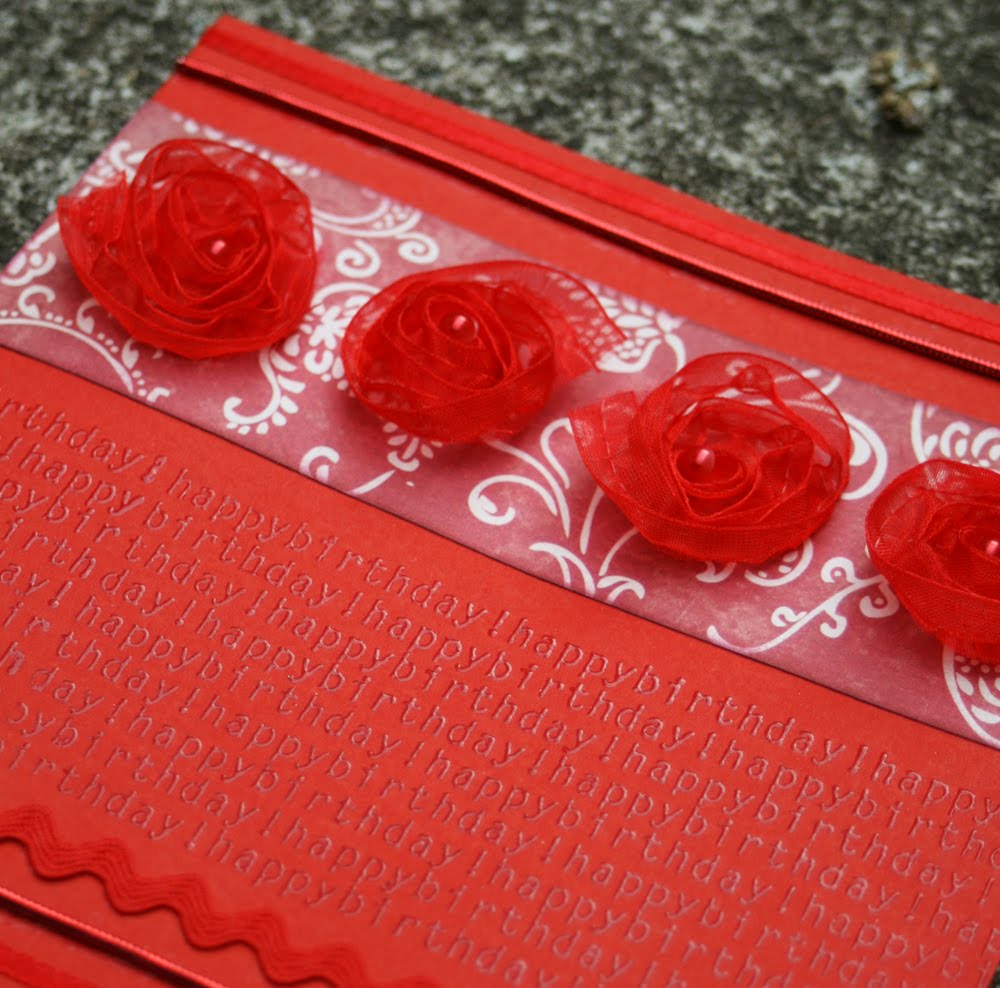
    * Pink Paislee - Cupid Collection - 'Love Potion'

    * Kaisercraft Pearls - Red

    * Stampin' Up Happy Birthday roller stamp

    * Versamark stamp pad

    * Clear embossing powder - fine

    * Assorted ribbon and trim in red

    This is a fairly straightforward card to put together so I won't do a step-by-step. The four red roses from May Arts come attached at intervals to the same sheer ribbon which you can use just as it is, but for this card I decided to cut them off the backing (which you can easily do because of the way they are sewn on) and then decorated each one in the centre with a Kaisercraft pearl.

    Here is a picture which shows the detail on the card a little more....


    Until next Monday....happy scrapping everyone (if you get time in this silly season that is!) xx

    Tuesday, November 23, 2010

    Altering Die Cut Papers with June Burtonwood

    "Change is inevitable - except from a vending machine."

    Die cut papers are great to use if you want a change from straight edges. You can use them as is, cut them into section and change the positions or simply ink, mist or spray them. I love the distressed look so today I'm sharing ways of altering a diecut paper for an aged tattered look.


    Products Include.

    1. On this layout, My Regret, I cut out an inside shape - a circle in my case. Distressed all the inside and outside edges. Because my paper was a dark colour I left the white edges but you could also ink them.
    2. The reverse of most die cut papers is white so to add interest on the bits I was curling over I stamped a small script stamp that gave it a pattern - you could also ink in a matching colour. Then I tore and curled over the edges revealing the script.
    3. My biggest tear gave a spot to embellish in matching net - lace, flowers etc would also work well.
    4. I only removed a few of the punched out dots and curled up the scalloped edges. You could add your own random holes if the paper didn't have any.
    5. Before attaching the inside and outside pieces I made sure they were distressed enough for the background cardstock to show through.
    6. I could also have scrunched up and inked the paper. Another way of distressing the paper would be to sand it like I did the painted chipboard leaves and photographs.
    7. Try to vary the distressing techniques you use over all in your layout. Using the same on everything isn't as interesting. I have used sanding, inking, tearing, curling and edge distressing.


    enjoy
    June

    Tuesday, November 16, 2010

    Fun Christmas Step by Step Layout & a Card by June Burtonwood

    Christmas Spirit


    Products USED:
    1. With Christmas fast approaching what better than a tree to embellish your layout.
    2. To create my tree, I used a ten pack of lightly inked flowers.
    3. Cut a triangle out of matching cardstock for the base (3 1/2" base, 5" high).
    4. Stamp 2 leaves with a music stamp for colour variation (or use darker coloured flowers).


    Begin at the top with 3 petals cut from a flower, next row 4 petals, next 3 and 2 petals and so on. Cut into 2, 3 or 4 petals depending on what you need to fill the row. I attached the petals with strips of double sided tape. Every now and then put in darker petals. The petals overhang the sides and bottom for best effect. If there are any gaps poke in 2 petals. Finish with anything you like for baubles and the star at the top. Then attach your tree to your layout wherever you like.


    **************************************
    Rectangular red card
    If you came to the gift making day last Saturday I'm sure you left satisfied with all your goodies and ideas. I thought I would put the instructions up for the last card we didn't have time to finish.


    Products USED:


    1. Distressed inks edges of red patterned paper rectangle and attach lace 2 3/4" down from the top. Attach flat to the centre front of cream card.
    2. Distress the edges of black rectangle and attach flat to centre of red paper.
    3. Distressed inks edges and 3D cream rectangle that is stamped with script stamp and puff swirl. Attach to centre of black rectangle.
    4. Trim butterfly and Distressed inks - I used wild honey and aged mahogany. Attach to corner of cream cardstock with 3D tape.
    5. Distressed inks edges of card.

    If you want the inside info on a number of Tim Holtz techniques and secrets, come to our Vintage Patchwork Canvas class on Saturday 4th or Sunday 5th of December. 

    We will be making up kits of all the materials required so booking with a deposit will be essential to ensure your spot. The canvas is on display in the shop and everyone has admired it so you won't be disappointed.

    bye for now June

    Wednesday, October 13, 2010

    Mini Album using the Rock Chic range- Nic Amber

    My niece recently celebrated her 10th birthday by having a disco party, after playing with the Rock Chic papers I thought they would match perfectly to make an album marking the occasion.


    I have used the Bella mini bracket album as the base...
    ...to which I added some pink paint around the edges and ran a couple of pieces through the cuttlebug with the checkerboard embossing folder to give it a bit more texture.

    I have used the papers, Dark Angel

    and the Rock Chic cardstock ATC sheet.

    This range has a lots of co-ordinating embellishments to enhance your project, from chipboard pieces to journalling tablets and more....

    I have left spaces for my niece to put in photos and comments later.


    Tip. Getting the most out of your embellishments...In the above picture, you can see I have cut around the shape left over after I pushed out a journaling die-cut and used it to embellish the project (it's the white bracket shape).  This uses up something that may have just been thrown away.


    Materials I have used include:
    These albums are a great way to celebrate a birthday or event and at under $3 for the album they are unbelievable value!

    Happy crafting...xxxooo