Material Needed:
- 4x coordinating papers either patterned or cardstock, your choice
- 1 x Raw chipboard or brown Cardstock
- 30cm String/Ribbon
- 20cm Coordinating Ribbon/Ric Rac
- Pencil
- Pen
- Ink
- Scissors/Craft Knife
- Double sided Tape
- 3D foam tape/squares
The tree
Step 1
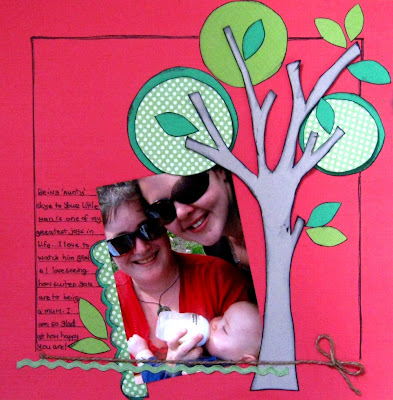
Using your pencil, draw a freehand tree on your raw chipboard or brown cardstock. Mine is about 11 inches hight and about 4 inches wide. I encourage freehand drawing but if you are not comfortable with this and need a template just contact me and I'll send one across.
Step 2
Cut your tree trunk out and sand and ink all of your edges. I perfer black ink as it works with most colour schemes.
Step 3
Set aside one of your papers/carstock for a backing page. using the remaining three papers, draw(in pencil!) and cut out the following circles.
- Paper A. 1 x 8cm Circle, 1 x 6.5cm Circle
- Paper B. 1x6.5cm Circle
- Paper C. 1x6.5cm Circle, 1 x 5cm Circle
- Mark these A, B and C on the back, so you can refer to them later. Ink all edges. Layer circles C on top of Circles A with 3D foam mounting tape/squares.
Using scraps of papers A and C draw two scallop strips approximately 12cm long one with slightly larger scallops than the other. Sand and ink all edges and layer with double sided tape.
Step 5.
Cut several small leaf shapes from the remaining scraps of papers A and B - sand and ink all edges
Step 6
Position all elements on your page with your photo before sticking down. Move things around until you find a set up that you like - you might like your leaves in different places to where I have put mine - or your scallop along the bottom of the photo - it is up to you really!
Step 7
Stick all elements down with double sided tape.
Boarder:
So many people are afraid to draw a freehand boarder, so why not try it with a ruler first?
- Using your ruler measure a boarder ( I have 1 ink to either side) - Draw a single ruled line across the top and down either side.
- Put your ruler to the side and freehand draw over these lines several times
- Tie a small bow in one end of your larger length of string/ribbon. and position this accross the bottom of your page to complete your border
- Position your smaller length of ribbon underneath
And that's pretty much it!
This layout is pretty much about how you want it to look! There are no rules with freehand, and you will always end up with something unique that is different to what everyone else has created.
Be confident in your drawing! There is no right or wrong way to do this and it is supposed to be fun!
Remember, you can always erase pencil lines and start again!
Have fun and happy scrapping!
Thanks again skye for a fantastic class!


No comments:
Post a Comment