hope you enjoy!
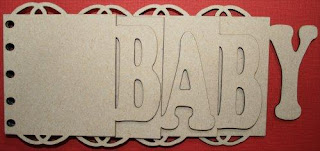
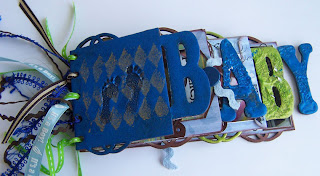
Materials required:
Baby A2Z scraplets album (or anyother mini A2Z scraplets album)
Opals
Versamark ink (watermark ink)
Gold Brillance ink
Black Brillance ink
texture stamp (we can order in for you email us for enquiries)
Image stamp (we can order in for you email us for enquiries)
Pritts Glue
Pattern Paper
Cardstock
Sissors
Craft knife
Accetate
Mini Brad
Great Big Brads
Rub ons
ribbon
White gel pen
Black Stazon Ink
DOUBLE EMBOSSING
- Ink your front cover with watermark ink
- Sprinkle opal powders over the top
- Heat to melt powder
- While powder is hot sprinkle more powder and reheat
- Ink your texture stamp with Gold brillance ink
- Heat your image again if it has cooled hard
- Stamp into the wet embossing powder
- Ink using black brillance ink your image stamp & have ready
- Heat your embossed image and you will see the image come to the surface and become flat
- When wet stamp into the embossing powder
- Wait to cool
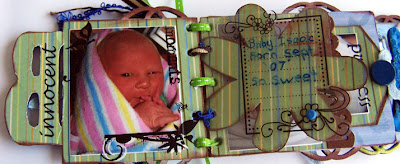
- Choose 1 cardstock, 2 co-0rdinate patern paper
- Cover the first page with paper
- First adhering Pritt glue
- Place the paper over the top of glue
- Cut around the edges and use a craft knife if needed to get into the tricky spots
- Sand and ink your edges
- Sand a small photo and adhere to the center of the page
- Place a word rubon on top of the 'b' and a corner one at the bottom
Draw a flower shape to go as an extra page onto cardstock
Cut it out and cover one side with pattern paper
Ink the edges
Punch holes where needed for album
Cut a small sheet of accetate(this is optional)
Punch corresponding holes in accetate for album (this is optional)
Adhere the accetate to the flower with a mini brad

- This is the other side of the insert page
- Using a white gel pen draw a stiched line all the way around
- Stamp a circle image (this could also be a rubon)
- Cut out the circle
- Place foam mount under circle
- Place in the center of flower
- Cut small strips of ribobn at the side of circle and place
FOR ALL THE LETTERS - REFER TO THE FOIL & OPAL TECHNIQUE BELOW.
I have just used differnt coloured embossing powders on the letters.
http://tanyahpayne.blogspot.com/2008/09/alfoil-and-opals.htm
PAGE 2
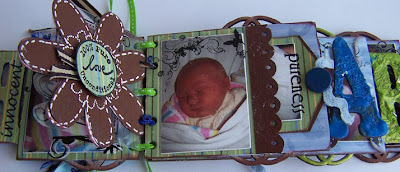
- Cover page 2 with patten paper
- Using the corresponding patterned paper cut 7cm high x 6cm wide
- Ink
- Cut a 1.5cm stip of cardstock and draw & cut scollops on one edge
- Using your eyelet too punch holes in each scollop
- Adhere uner the 7x6cm paper
- Place double sided tape ONLY around edges of the 2 sides and at the end
- Sand and adhere a small photo in the center
- Place a rubon/sticker at the top left corner if you want to
- Punch holes where needed for album
INSERT TAG
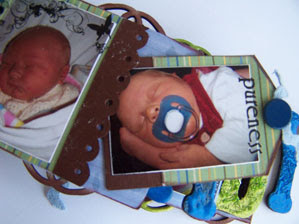
- Make a tag out of cardstock 5x8cm
- Cut a 'v' at the top
- Make another tag out of pattern paper 4.5 x 7.5cm
- Trim to make a 'v'
- Tear the bottom
- Adhere onto the tag
- Sand & Adhere a photo in the middle
- Place a brad and ric rac at the end of tag
- Place a rubon/sticker over the edge of photo
PAGE 3
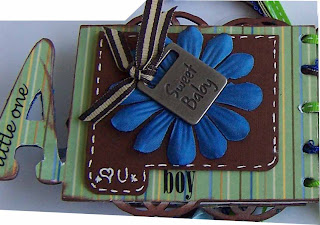
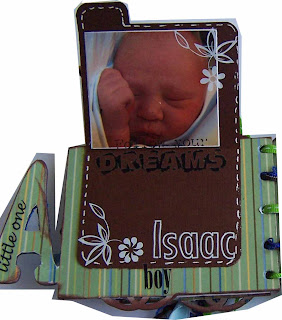
- Cover with pttern paper page 3
- May need a craft knife to go into the hard to reach places
- Sand and ink the edges
- Make a flip up pocket
- Cut out of the cardstock 12 x 7 cm
- Cut one end accross 5cm leaving a little tab
- Fold in half the cardstock
- Adhere the bottom part to the album
- Place a small flower on the top of flap
- Adhere an embelishment on the top of the flower
- Using a white gel pen draw a stiched line all around
- Inside sand and place a small photo
- Use some stickers/rubons to decorate your page
- Re-punch holes in required place of album
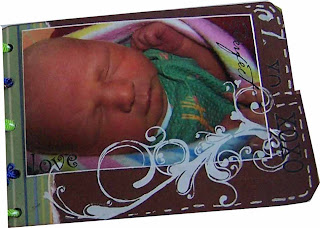 TAB page 1
- Cut 2 out of cardstockmeasuring 9x7cm
- Cut tabs at the top
- Cut a 1cm strip of patern paper
- Tear down one side
- Ink edges
- Adhere at the bottom of first tabed page
- Sand and adhere photo to first page
- Use white gel pen to draw a stiched line
- Use rubons/stickers to decorate
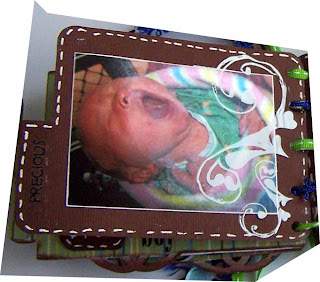
TAB page 2
- Using your white gel pen draw a stitched line
- Sand and adhere your photo on the back
- Place rubons/stickers where desired
- Punch holes to fit into album
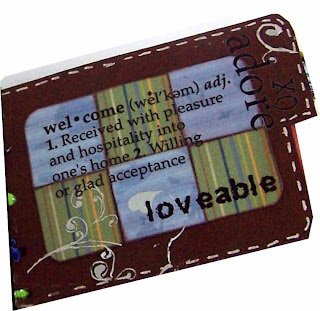 TAB page 3
- Cut out 6 2x2cm squares
- Corner round only the top and bottom corners
- Ink the edges
- Place on top of page 3 as in the picture
- Use a a rubon/clear sticker to go over the top of these squares
- Draw a stitched line around the outside edges
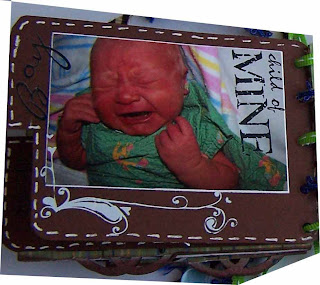 TAB page 4
- Repeat the above steps
PAGE 4
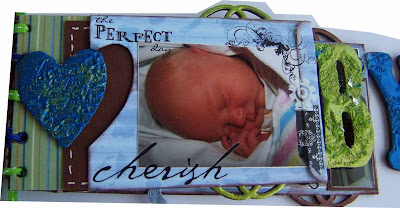
- Cover your 4th page with pattern paper
- Out of corresponding pattern paper we now need to make a pocket
- Cut a 10 x 15cm of the corresponding pattern paper
- Fold one 1cm edge
- Meet the other edge with the folded edge
- Adhere onto flap
- Punch using a Corner rounder at the bottom ends
- Fold and cut off an excess
- Ink edges and adhere flap
- The open part cut out a shape* in the center
- *This shape- I used half a heart chp shape that i have used on the tag ( i will explain this part soon)
- Adhere the pocket onto page 4

- Cut out of cardstock 6.6 x 9cm
- Use a white gel pen to draw a stitched line all around
- Using your heart shape* above
- NOTE: have some glitter ready to use!
- Ink using versamark (watermark) ink
- Using opals- sprinkle over the top
- heat to melt
- Sprinkle the glitter on the melted powder
- Then ink a script stamp using versamark (watermark)ink- This will put a print into the heart
- Re heat shape if needed
- When powder is melted stamp on the shape
- When cooled
- Adhere the shape in place so it slots nicely into your envelope.
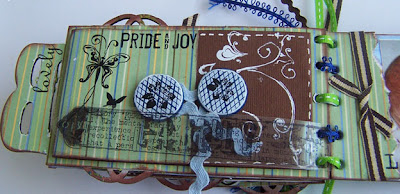

- Cover using patten paper page 5
- Out of the cardstock cut a strip 22 x 6cm
- Measure in 6cm and fold on one side
- measure in 7cm on the other side and fold
- Cut out of pattern paper 7cm x 6cm
- adhere onto the 6cm fold side allowing 1cm to be adhered underneath
- Adhere the back to page 5
- Place one brad on each side- I used Hot Off the Press great big brads, Then used rubons on top
- Cut some ric rac 10cm and twirl around the ribbon
- Using a white gel pen draw stitching all the way around
- Decorate using rubons/stickers
- Journal and/or put more photos inside
- Repunch holes as needed
PAGE 6
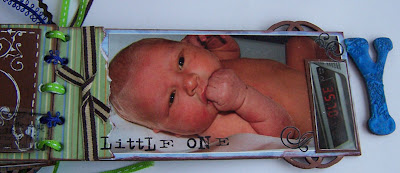
- Cover the main page
- Cut a strip 7cm x 4cm
- Tear down one side
- Place and adhere ribbon
- Adhere to the page
- Sand & Adhere photo onto your page
INK ALL EDGES
USE 3MM THICK RIBBON TO PUT THE ALBUM TOGETHER
YOUR FINISHED!!!!!
Hope you enjoyed this one and have a go at it!
Till next time
Luv TanXx


4 comments:
What an awesome mini album Tanyah!
OMG I Love it....My GF's 18yr old DD just had a lil baby boy last month....would love to do one for her! Can I please purchase a kit or something to create this album. Email me if a kit is avail for purchase please Luv Shaz
This album is just gorgeous Tanya ... and I must say, your blog is the most exciting one I've ever been a part of!!
What a beautiful album...and heaps of great techniques...thanks for sharing!
Post a Comment