I have a new blog!

If you want to see only my creations please come and check out and follow my new blog http://www.tanyah-payne.blogspot.com

Monday, August 23, 2010

Altering Embellishments - Layout by Sue Smith

Here is a layout I created using some gorgeous vintage-style papers from Graphic 45's Botanicabella range.


There are so many gorgeous embellishments available these days, but no matter how large my 'stash' might be, I still find myself wanting the perfect accompaniment for my creation, so today I wanted to show you a couple of techniques that I have used for altering some to match the style and colour scheme of this layout. With a bit of imagination and some great products, you can easily change any embellishment to suit your layout perfectly.

The red Romantic Roses were the perfect colour for the papers, but I wanted to 'antique' and change them a little.

1. This is what they look like straight out of the pack

2. I wanted to make them more 3D, so I carefully teased and pinched them a couple of layers at a time and worked them until I got the desired effect.

3. I then sprayed them with Glimmer Mist in the colour Antique Brass. I also removed the larger 'petals' at the back of one of them to make it a different size.


The next embellies I altered were two of the 2Crafty ATC size Flourishes. I painted them with KaiserColour Acrylic Paint in Metallic Gold and once the paint was dry, I lightly touched some of the edges with a VersaColour Inkpad in the colour 'Bark' to give them a burnished finish.
In the picture, you can see the raw chipboard at the bottom as they come in the pack.


The last embellishment I altered is a cream feather that I got in multi-coloured pack from the cheap shop. The cream wasn't quite right for the feel of this layout, so I set about changing it's colour to suit....

1. Using a Misting Mat, I stamped some Ranger - Tim Holtz - Distress Ink in the colour 'Tea Dye' straight onto the surface of the mat.

2. Then I spray misted my 'stamping' with some water.

3. Next I dragged the feather through the watered-down ink until I was happy with the coverage and then set the feather aside to dry. The mat is then easily wiped clean.

4. The dry finished feather ready to use on my layout.


Here is the product list that I have used for the rest of the layout...

* Cardstock - Bazzill & Coredinations
* Graphic 45 - Botanicabella - Love Letters and Summer Sonata
* Lace
* Bella Petites Journalling card
* Printable transparency sheet
* Caolee's Creations Adornit Alphas in Sleek Brown
* Pergamano White Gel Pen
* Birch Pearl Trimming in black

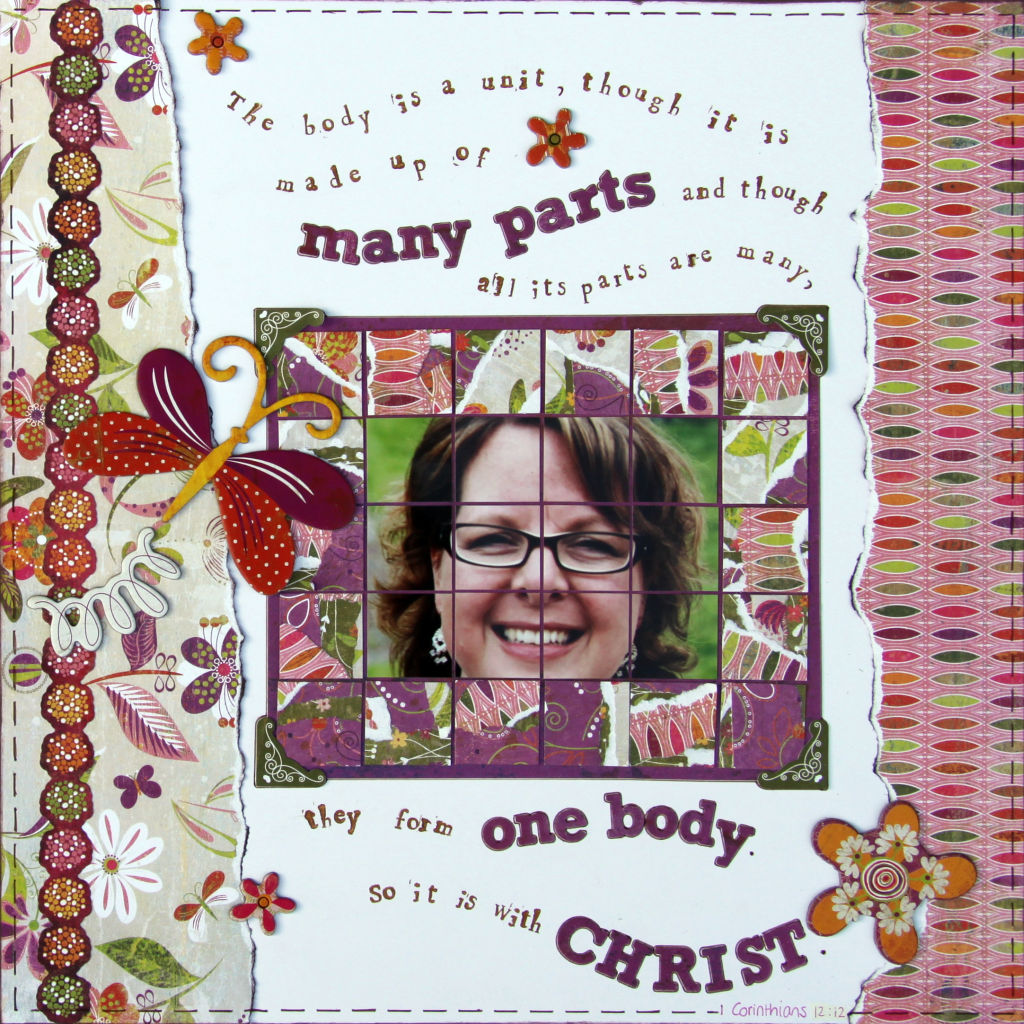
I won't go through all the steps of creating this layout, as many of the processes are self-explanatory, but here are a few key points about how the rest of the layout was put together.

* I distressed the edge of the photo with sandpaper.

* I used a corner rounder on the edges of the large square of background patterned paper, then distressed with an edge distresser, inked it for an aged feel and then sewed it to the cardstock with a burgundy heavy-weight cotton.

* The title was created with my Pazzles Inspiration electronic die-cutter using patterned paper over a cardstock background. Note: If you are interested in purchasing one of these amazing cutters, Tanyah would be more than happy to pre-order one for you.

* For the sub-title, I really wanted to use the brown Carolee's Creation letters, but to place them where I wanted to, the 'roaring' word got lost on the photo, so I used a white gel pen to highlight the lettering.

* To adhere the beading to the top and bottom of the page, I used a small thin line of Pritt Power Gel (my favourite adhesive of all time).

* I printed my journalling onto a transparency and then 'sandwiched' it between patterned paper and the outside edge of Bella journalling spot.


Thanks for looking at my first post here as a member of Tan's Design Team. I hope you like it and have perhaps been inspired to used some of the techniques I've shown you.

Until next Monday...happy scrapping!

Sue xx

Sunday, August 22, 2010

Scrap n Craft with T's NEW CREATIVE TEAM.

Hi everyone,
Hope your sunday is an enjoyable one for you all.
Firstly would like to thank our past design team for all their efforts, support, & friendship I will always cherish. Their work has been incredible and I know a lot of our readers have enjoyed their work.
 
We have some exciting news and would like share with you and intoduce you to our NEW CREATIVE TEAM....


My name is Sue and I am 53, happily single, working full-time as a cardiac
technologist in private practice and living with my adult son and daughter in
Wollongong NSW. I have been scrapping for over 4 years now and, like a lot of
scrappers, my introduction to scrapbooking came when I attended a Creative
Memories class run by my sister and it was love at first sight.
But I soon found this style of scrapbooking too formal and not nearly as
exciting or artistic as what I was seeing on websites and in magazines and so
the changes to my style started to evolve.
I don't really have a scrapping style as such...I enjoy dabbling in all aspects
of this wonderful craft, and love discovering new techniques and products. I
also love competitions and challenges as they make me try new things and push
me out of my comfort zone. I also love the community of scrapbookers both in
person and online and I have met and made so many new friends through a mutual
love for this all-consuming craft.
I am so thrilled to have been invited by Tanyah to be part of her Design Team,
and I am looking forward to contributing to this wonderful blog and hopefully
will inspire some of you along the way


"Starting with the basics, I’m a stay at home mum of two small girls and wife to one very busy man who does a bit of everything.  All in all they keep me pretty busy.  We live in the northern rivers of NSW after moving home from the UK almost 2 years ago. 

I was introduced to scrapbooking by my best friend 3 years ago and was immediately hooked.  Being quite busy at the time (first baby, final year at university and an international move!!!) I only really dived into scrapbooking 6 months ago and, wow, how much you can learn and your style can change in that time!  You might not agree with me, but I still consider myself to be a beginner in scrapbooking!!!  There is always something new on the market or a new technique to learn and apply.  The possibilities are only limited by your imagination!

If you were to ask me about my style, I’d say I don’t have one as I think it changes for the project I’m working on.  A bit of this, a bit of that and a bit more on top just for good measure…I guess you could call it eclectic.  I rarely use matching papers and like to mix things up.  When I’m not scraping I’m making handbags so you’ll often find some fabric or stitching that will cross over onto a layout or other project. 

What I love about scrapbooking is that I’m able to keep a record of my girls milestones and the different stages of their lives.  I can also finish a LO in an afternoon, where a bag with the design, pattern making, sampling, tweaking and final make can take a week or more.  With scrapbooking the results of my labour are almost immediate.  Check out my blog....www.bagsofscraps.blogspot.com" 


 June Burtonwood

Scrapbooking has been a passion of mine for many years. Having discovered the wonderful range of products and the ‘anything is possible’ approach, I was hooked. 

My style is best described as ‘vintage collage’ but this varies with the subject matter and materials I’m using. I spend most of my time producing 12 x 12 layouts but I love the compact and 3D effect of little books and “off the page” creations.

I have been a teacher and Design Team member of a number of Gold Coast scrapbook shops for several years now. My work has also been published in Scrapbook Creations and Scrapbooking Memories magazines.

Most importantly of course, I have three amazing children and two delinquent pets. We all happily made our home on the far north coast of NSW.

I am delighted to be working with Tanyah and her talented Design Team as well as sharing my ideas and creations with all of you


My name is Sarah and I live in Northern NSW with my husband and 3
gorgeous boys.  I have been scrapbooking for 6 1/2 years and I just
love everything about this craft.  My main scrapbooking focus is my
boys and my family.  I usually scrapbook 12 x 12 pages, but I do love
to make mini albums and mini books.  I am not sure how to describe my
style, i do like clean lines and not overly embellished pages.


Hi! my name is Nicky Amber, I am a wife and mum to 3 kids.  I enjoy all
things crafty (especially scrapbooking and cardmaking) and love to make
things by hand for my family and friends.  I also love photography and
spending time with my family.
 

Ingeborg Dijkstra

My name is Ingeborg (39) , married to Siebe (39) and mum to Emma (11), Rick (10) and Tom (10). We are currently living in the Netherlands, Europe. I started scrapping in 1997 when I was pregnant with Emma. At that time we lived in the US where scrapping was already quite popular. In 1999 we moved to Germany. There were no scrapbooking shops there at all. Due to the fact I had three children under two and I was too tired to do much and the fact it was impossible to find a lot of materials, I hadn't scrapped for a few years. Luckily we moved to Australia in 2002 where we had plenty of scrapbooking shops and sites to get inspired by. I even had my own scrapbooking shop and site whilst living there. In July 2009 we moved back to the Netherlands and I am excited about the opportunity to continue to scrap, since I am now truly addicted and nothing can stop me anymore. I am looking forward to creating things for Tanyah and I hope it will inspire you all!

Lisa Kamphius

My name is Lisa and I am obsessed - with all things scrapbooking - the creating , the shopping , the challenges, the journalling and my favourite part - the friendships I have made and the beautiful people I have been able to meet!! I started scrapbooking way back when it was all about ovals and circles and stickers!!! And to think I even loved it back then. Well time has moved forward about 10 years and I can now look back and see my own style change and evolve. My current favourite is vintage, shabby chic type layouts and given that it is the current flavour of the month in the scrapbooking world I am in my element. I love traditional 12 x 12 layouts and I'm also a bit of a fan of off the page creations as well!!

I live on the Gold Coast with my fabulous husband and our four kids so I always have plenty of inspiration for photos!!! I look forward to spending my time here at Tanyah's sharing some of my work with you and hope that I can provide you with some thought and ideas and inspiration.


These girls will inspire you all and have lots of ideas coming your way for you all to enjoy!
ta heaps for reading and have a wonderful day

Saturday, August 21, 2010

Cosmo Cricket - "The Boyfriend" Range - Layout by Sarah Rickard

What a fantastic brand Cosmo Cricket it!  Gorgeous colours and patterns :-)

I have done a layout using Cosmo Cricket Tube Socks patterned paper to create the layout below.
This is a layout of our middle son's school photo.


I tend to scrap my boys' school photo's in a similar way with a main photo and a strip of smaller photos, also incorporating the grade that they are in.

The products I have used to create this layout are:
Cosmo Cricket Tube Sock patterned paper - part of The Boyfriend collection of papers 
*  Lead pencil, staples and red mesh
Happy scrapping,

Sarah xoxoxo

Friday, August 20, 2010

Different ways to make and use inchies (part 2: Inchies & Scrapbooking) by Ingeborg Dijkstra

I would like to show you a few different ways to make and use inchies on a layout. Last week I showed some ways to make a use inchies for cards. If you have missed that message, please click HERE to read it. Next week I will show you how to use especially designed inchie stamps on cards. I made two layouts using inchies; a 12" x 12" layout and a layout for a mini album I am making. This is the 'traditional' 12" x 12" layout:

This is the layout for my mini album. The size of each page is approx. 5" by 7":

Let's start with the first one. To create this layout (and a bonus card, see below) I used the gorgeous Green at Heart Collection from Basic Grey. I used the following products:
I took some step-by-step photos. If you'd like to see a larger version of the collage below, please click HERE.
  1. I cut my photo into 12 inchies. I made sure the 'cuts' wouldn't go through the eyes, because that would look a bit weird. So I started in the middle of the photo and the face and made 'the first cut' through the nose.
  2. I tore about a dozen small strips of a few of the patterned papers: Grasshopper, Recycle and Vert.
  3. If you have a toddler at home, she/ he can help you with the next step! But ... if you don't have a toddler, you have to randomly stick the torn paper strips on the 'Seedling' paper yourself. Make sure you use lots of glue, because all the parts have to stick together well!
  4. Cut the paper in inchies.
  5. I used the Veggies paper to stick my photo and paper inchies on. I used the handmade inchies as a frame around my photo.
  6. I used parts of the same papers on each side and added my photo in the middle of the layout.

I created my title/ quote using the Micro Mono Stickers and Alphabet Stamps from Hero Arts. I embellished the page with the coloured chipboard stickers from the same collection. This is the finished result:

I had a few inchies left, so I decided to create a quick and easy card with them. I used a strip from the Elements Sticker Sheet and the little butterfly and owl are from the coloured chipboard shapes from Green at Heart as well.

For the layout of my mini album I have only used white cardstock and Google ... LOL ... I am making a 'Year in Review' mini album with a group of Dutch girls and each week one of the girls chooses a theme. This week's theme is 'Summer Hits'. I live in Europe, so we are in the midst of Summer right now ... I wanted to create a layout using inchies a diferent way. If you search for 'inchies collage sheet' or something like that, you will find lots and lots of printable sheets with ready-made inchies. You will find lots of different styles on Etsy. You can buy those sheets for a dollar or two, download them and print them as many times as you like.
But ... I'd like to make my own 'inchie sheet', because I'd like to personalize my pictures/ inchies. For this week's 'Summer Hits' theme, I thought long and hard about some Summer Hits that I remembered as a child, teenager, young adult and now. I wanted to have a picture of the LP or CD of each song. That's when Google comes in handy! And ... LPs and CDs are square, so perfect for inchies!
I also wanted some 'Summer Hits' CD covers to use as embellishments. My own printed sheet of inchies looked like this:
Cut into inchies the CD covers and LP covers looked like this:

And this is the finished result of the layout:


And ... taking the risk of truly showing my age ...LOL ... these are the songs I wanted to feature on my layout:

1970 - 1980
Summer Nights (1978, John Travolta & Olivia Newton John)
Three Times A Lady (1978, The Commodores)
We Are Family (1979, Sister Sledge)

1980 - 1990
Every Breath You Take (1983, The Police)
Summer of ‘69 (1984, Bryan Adams)
What’s Love Got to Do With It? (1984, Tina Turner)
The Lady In Red (1986, Chris de Burgh)
The Only Way Is Up (1988, Yazz & The Plastic Population)

1990 - 2000
Ice, Ice Baby (1990, Vanilla Ice)
Knockin’ on Heaven’s door (1992, Guns ‘N’ Roses)
All I Wanna Do (1994, Sheryl Crow)
Love Is All Around (1994, WetWetWet)

2000 - 2010
American Pie (2000, Madonna)
Absolutely Everybody ( 2000, Vanessa Amorosi)
Beautiful Day (2000, U2)
You’re Beautiful (2005, James Blunt)
Waka Waka (2010, Shakira)

Thursday, August 19, 2010

Layout using SEI Happy Day papers by Nic Amber

Last week I used the SEI Happy Day papers to make a card, this week I've made a layout using the same papers - 'Make a Wish' and 'Shout Out' from the SEI 'Happy Day' range. .

Make a Wish...

Shout Out


The papers in this range have a great varnish finish so I thought it might be nice to add some extra shine and sparkle by playing around with some Extreme Glitter.  It is really simple to use, just a matter of painting it on with a paint brush and you can vary the amount of glitter just by adding extra coats.

I have used the Extreme Glitter on the title 'Birthday', around the edges of the paper and to fill inside the '1'. 

For the title, I have used chipboard wording, painted it with orange paint then once that was dry I added a layer of extreme glitter.  For this project I used the 'hologram' extreme glitter which is a great neutral colour but they come in a wide range of colours to suit your project.
 Hopefully you can see from these pictures it really gives a great glittery finish and just adds that bit of sparkle to your project.  Tanyah has a range of examples in store if you want to see other ways to use this product.

I have also added some bunting (the flags), it's a great way to use up your scraps... I have just cut them into triangles, stuck them down and attached some paper string across the top.


So there's a couple of ways to use the SEI papers, if you have used them in a project don't forget to add them to our gallery.

Happy crafting and hope you all have a great day!!

Wednesday, August 18, 2010

Double layout by Tanyah Payne along with a sketch to try...

Today I wanted to show you a double layout I (Tanyah Payne) created using the Ruby Rock-it- Summerhouse range. It is bright with all the oranges, teal/blues, limes and is fantastic for many different themed projects. If you want to see more projects that I  have created for BELLA click here! you can also create my mini album I am honoured to be able to teach at SIA (scrapbooking Industry Australia) using this lovely range...

If you would like to create this project remember we have till the end of the month our 25% off all papers, kits and cardstock for you to enjoy!


Product List.

 Here are some Tips to try....
  •  Using your cuttlebug emboss your chipboard, ink and go over the top with a lighter coloured ink
  •  Using raw chipboard can be fun along with painting them too. 
  • Creating textured leaves on the tree, i have used maya resist and left it on then painting it.
  • Templates are my friend...lol! why not use the negitive and positive of your cut out shapes, tear/distress the edges 
  • Use sequin ribbon as a title
  • Cut circles under the chipboard tree shape to give the tree a different look.
Note: the circles on the tree was inspired by Alison Callcott... thanks heaps alz xoxox
and the sequined title was inspired by Melinda Spinks... thanks so much Melinda xoxox


Here is a sketch for those who would like to have a go, no limit of time it has to be done by but if you want some inspiration and have a go. We would love to see in our gallery..
www.scrapncraftwitht.com.au/gallery


Have a wonderful creative Wednesday everyone
thankyou for stopping by and please feel free to comment
enjoy
luv tanXx

Tuesday, August 17, 2010

A Card to share from our guest designer Sherry Mendoza

Today we have a step by step card to share using more of the little shoe box papers... They are so cute to work with and we have them in store for you to check out! remember we have our 25% off all papers, kits & cardstock (NEW & OLD) ... come in and check it out and grab a bargain while you're there.

http://www.scrapncraftwitht.com.au/


Here is Sherry's beautiful card


Products used
  • Hole Mesh Ribbon
  • Cardstock
  • Mini Alpha
  • Little Shoe box papers

Step by Step for 'Welcome' card

1 - Fold the leftover green cardstock from your layout in half.
2 - Adhere a piece of the mesh ribbon across the front.
3 - Cut the house and cloud out from patterned paper and adhere to the card.
4 - Press out die-cut fence and adhere in front of the house.
5 - Add sentiment using mini stickers.
Isn't it cute as ...... thanks sherry for sharing your work with us
have a wonderful day everyone
luv tanXx

Monday, August 16, 2010

Creative ways with paint....

I found an old photo album with  pictures of my  two eldest boys when they were little tackers....I couldnt resisit - I had to scrap this one straight away. There was quite a lot of  busyness around them in the photo so I decided to cut the photo out and  make it the feature .  I  used an old  library card - credit card style and  swiped  my  Kraft cardstock with teal and red paint.


 Make sure  you wait for one colour to dry before applying the second colour.  I had this old piece of KI memories  lace cardstock and I like that it tied into the colour of the Pooh bear that Joshua  is holding.


I wanted a  simple title  that  was in keeping with the layout so I got out my old Making  Memories foam  stamps and made the  title with a variety of fonts.....I also had the cool number stamp so I used that at the bottom of the layout.


Tanya has a  great variety of paints instore so  go and  get messy!!!!

Sunday, August 15, 2010

"My Little Shoe Box" patterned papers, Layout by Sarah Rickard

When I first saw this range of papers I instantly loved the fun feel of them and of all the monsters:-)


I have created my page with:-

1 x sheet of kraft cardstock
1 x sheet of My Little Shoe Box patterned paper - Knock Knock
 Carolee Creation Tiny Alpha stickers 
Ruby Rock-It Alphas
Staples, black pen, cardboard box (ripped up), navy mesh and cream mesh


I am looking forward to having more fun with this paper range and creating some more layouts!

Happy scrapping,

Sarah xoxo

Friday, August 13, 2010

Different ways to make and use inchies (part 1: Inchies & Cards) by Ingeborg Dijkstra

I am creating a few posts on inchies and this week I will post part 1 (Inchies & Cards) in this message. Part 2 (Inchies & Scrapbooking) will be posted next week and part 3 (Inchies & Inchie Stamps) the week after that. It actually was Nicky Amber and her Week 7 Embellish It challenge, who reminded me of those little pieces of art (measuring 1 inch x inch).

Inchies have been around for ages especially with ATC- and stamping artists. But ... I am neither an ATC- or stamping artist! What I do know though is a few tricks and tips to create and use these little squares on cards and layouts. Obviously a lot of you know this stuff too, because if you check the Embellish It Week 7 gallery, you will find all sorts of beautiful projects featuring at least a few inchies.
But ... there might be some of you, who never made an inchie. Or ... you might have only made them one way or used them the same way over and over again. If any of this sounds like you, please read on ... I have made five different cards with at least one inchie on them. I will give
the step-by-step instructions for the three black/white/ pink cards first. After that I will show you how I made the other two cards. WARNING: long message ahead LOL ! So here we go ...

I have made five inchies and used them on three different cards. I will show and tell you step-by-step how I made the inchies (if you'd like to see larger photos, please click HERE).
  1. I used five chipboard inchies as my base. I cut five slightly larger squares out of pink tissue paper.
  2. I put a little Tacky Glue around each side.
  3. I put the tissue paper squares at the other side and folded the sides onto the glue.
  4. I made sure I folded the corners first and then the sides. Yes, this is a bit sticky, but it is worth it, I promise!
  5. After the glue is dry, I added a bit of shimmering paint. I used the Radiant Rain (Pink Azalea) Paint Dauber.
  6. I let the paint dry completely.
  7. Whilst the paint was drying, I punched some little flowers. Remember, you are making inchies, so if you use punches, make sure they are small!
  8. I stamped some swirls and flowers on the dried pink inchies. I also inked the edges.
  9. I stamped the same images on the punched flowers.
  10. I wanted to outline the punched flowers. Since they are quite small, I used a scrap piece of paper and some non-permanent glue (Pritt) to stick them on temporarily.
  11. After I outlined the little flowers, I carefully peeled them of the scrap sheet of paper.
  12. I stuck the flowers on the inchies and added a little hot pink rhinestone in the middle.
These are three cards that I made with the five inchies:

As promised here are the instructions for the other inchies. If the picture below is too small for you, please click HERE to see the larger version.


  1. I wanted to create my own background. I put some Glimmer Screens (like masks/ stencils) on a piece of white cardstock.
  2. I sprayed Glimmer Mist on the screens and let it dry.
  3. I added a few stamps for more colour and variety.
  4. I cut the piece of cardstock in inchies.
  5. I put 12 inchies in a nice pattern at the front of a white card.
  6. I added some ribbon and a punched circle. Done!
Since I still had quite a few inchies left, I decided to make another card. I used the same Glimmer Screens and Glimmer Mist for a background. I stamped and embossed the words on the card using a heat gun. I used a golden embossing powder. Tan currently has a special price for the heat gun: $ 35.00 instead of $ 55.00, which is over 35% off! Anyway, I also stamped some small script images on the flowers, added some pearls, and of course my three inchies and done!