I have a new blog!

If you want to see only my creations please come and check out and follow my new blog http://www.tanyah-payne.blogspot.com

Monday, September 13, 2010

Layout by Sarah Rickard, Sketch created by Tanyah payne

Have you ever thought of buying an old story book or music book from the op shops?....

If you love the old look and words on your layout this is a wonderful and cheap way of doing something quiet amazing... The sky is the limit with this sort of thing with die cutting it to tearing to inking some more or even make flowers out of it.

We will have some paper with writing on it that is acid free, if you use these others you need to check that first if you are worried.

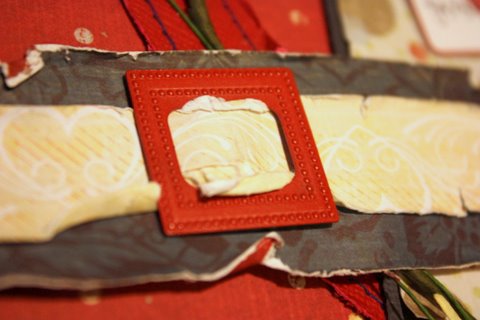
Today I want to show you a lovely layout done by Sarah Rickard using the story book paper. Sarah has torn and folded the edges to give the layout more depth.


Layout as seen in Scrapbook Creations No 80 (Vol 9 No 5).
Other products Sarah has used is the
If you want to have a go at this layout here is a sketch for you to have a go at...


Have a wonderful day everyone,
Luv Tan Xx

Sunday, September 12, 2010

My Mind's Eye, Meadow Lark Range - Layout by Annie Zorzo

Do you like colour, colour and more colour on your layouts?  Do you tend to steer away from Black and White papers?  Well, it's time to challenge yourself and to step outside your comfort zone.  Tanyah blessed me with the new Meadow Lark range from My Mind's Eye and being more of a colour layout type of person, these papers had me stumped.  


But with the help of a photo of my girls, I decided to colour the papers and came up with this...


To make this LO, I've used:
- My Mind's Eye, Meadow Lark range - White Floral, Dark Floral, Lark & Night Owl papers
- Ruby Rock-it Chip Alpha's 
- Making Memories Paint 
- Bella Rub-ons - Grace
- Ribbon 
- Fabric

Here are some instructions for you to make this layout.

1.  First thing is to paint our papers to allow them to dry before moving on.  I mixed my colour to match my daughters shirt in the photo and then I watered it down to make a wash.  Then very lightly I painted my papers and used my finger to smear where I wanted it to go and so that it wasn't too thick.  I didn't want the black to look washed out or dull.  Also don't over apply your colour wash as too much water will warp your papers.
2.  While the paint dried, I grabbed some old fabric.  On a piece of thick card cut slightly smaller than the photo, I gathered and stapled pleats and gathers in the fabric.  Once finished I teased and pulled the fabric to make it fray.
3.  I then cut two strips of paper.  The first from 'Lark' and the second from the painted reverse side of 'White Floral'.  I then gave them scallops on the bottom edge which I also distressed.
4.  I cut a 20x15cm rectangle from the painted 'Dark Floral', distressed the edges and then positioned at the top left of the layout.
5.  I then positioned the two scalloped strips at the bottom of the layout, 7cm in from the right hand side. I then fixed a scalloped ribbon on the top paper edge.
6. I covered the ends of the scallop strips with a 7x7cm distressed square of painted 'White Dusk' paper.
7. I sanded the edges of the photo and mounted on the back of the 'Night Owl' paper.
8.  I added a single Bella rubon in the bottom centre of the photo.  I then then distressed the edges of the mount and mounted it again over top of the gathered and pleated fabric before fixing it in place.
9.  Lastly I gave my layout a title using Ruby Rock-It chip Alphas.


So there you have it, a coloured layout using black and white papers.  I hope you're inspired now to give black and white a go.

Happy scrapping till next time


Saturday, September 11, 2010

Making Memories Panorama Paper Range - Layout by Sarah Rickard

When Tanyah asked me to do some creating with the Panorama range by Making Memories - I was instantly excited!  Even though they are travel papers, they are also great for men/boys pages or projects too :-)
This is a layout that I did of the Kuranda Train.  This layout was showcased at the Alstonville Craft Show and unfortunately these particular papers that I have used are sold out, but there are others in the range available.
If you have tickets or other memorabilia from trips why not include some on your page like I have done above :-)
The next project I created using the Panorama papers by Making Memories is a card and noodle box set.  


I have used a Kaisercraft blank card as my base for the card and covered it with some paper and then cut a strip of the co-ordinating paper and used it as an embellishment.  I have also used the same paper on my noodle box and topped it of using some gold ribbon.  My dad was very pleased to have received his father's day present in this box :-)
Happy scrapping,
Sarah xoxo

Friday, September 10, 2010

A 'white space' layout by Ingeborg Dijkstra

In all those years that I have been scrapping, I have always been a fan of 'white space' on layouts. Okay, I admit ... in the beginning I thought it always had to be actual WHITE space, but I soon realized

'white space' means: leaving space on your layout
and not filling every inch with embellishments, stamps or papers.

I believe 'white space' can actually add to the design and most of the time it brings focus on your picture (s) too. I made this layout using 'white space' as a part of the design. After I finished I also made a sketch, which shows clearly how there is lots of 'space' left. For some this is easy, for others ... it might freak you out! But ... if you're a scrapper that puts heaps of stuff on your layouts, I challenge you to go for plain, simple and 'white space' one time!

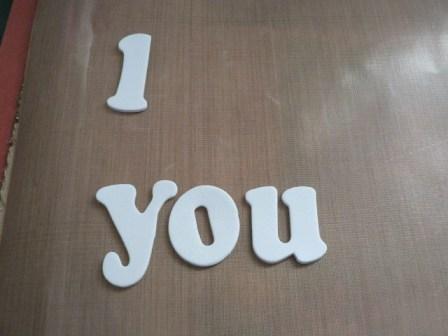
I wanted to have straight lines and some curves too to avoid a too boring look. I used an 11" x 11" inch sheet of white cardstock as my base. With a pencil I made half a heart shape to write my journaling on. In my head I already knew where the picture would be. I even put it on the layout while drawing the curved line to see if it would work out okay. I also created a doodled border around the white cardstock.

Using one of my favourite Tim Holtz stamps, I stamped a rectangle shape on the paper. The layout is about my daughter and my husband, so I wanted to add 'male' elements as well as 'girly' touches.

I didn't want this layout to be too predictable, so I rotated the white cardstock and stuck it on a 12" x 12" piece of patterned paper (from the Marrakech Collection by Basic Grey). This totally freaked me out, because I like things STRAIGHT!
I added a mat around my photo and stuck it on a piece of striped paper (Marrakech Collection, Cardamon) to emphasize the colours of the photo.

I used the Marrakech Alphabet Stickers for my title and I finished the layout by using a border and some stickers from the Marrakech Elements Sticker Sheet.

Thursday, September 9, 2010

Dont have the right colour lettering - change it!!!

If you have ever  seen my  STASH of lettering you would think this is a problem I should  never face - but ALAS - NO!!  Sometimes you  just dont have the right  shade or the right colour....so change it!!
I recently did a layout and  the  foam letters I had were  too stark  for the  subdued colours of the layout I was doing.  SO I got out my   handy  craft  mat ( available at Tans of course!)

So I laid out the letters for my title - grabbed my  trusty  ink and   changed  the  colour  - to a  subtle brown - perfect for my  project!!


and then  -  ink!!


and  voila!!!


SO  check out Tans  shop - she has a great variety of letters and some are even  raw chipbaord  or  white - nice and easy to  modify and personalise!!

Wednesday, September 8, 2010

docrafts now in store at Scrap N Craft with T!!!

Scrap N Craft with T is now stocking docraft products in store!!!

docraft products are produced in conjunction with a bi-monthly magazine docrafts Creativity! that is full of step-by-steps, techniques and loads of inspiration.  Great for beginners and advanced crafters alike.

Here are a few examples using their Christmas range (yes it is fast approaching...):

This example uses glittered patterned paper, journalling card, epoxy brad and vellum sentiment.

This tag uses their lovely glittered rub-ons.

This tag features vellum paper that has glittered dots, patterned paper and an epoxy brad.  (The inspiration for this tag came from Annie's last minute Father's Day card...thanks Annie)

This tag was kept simple to highlight the lovely glittered paper.

This card uses patterned paper, journalling card, glittered dot vellum, glitter (on the flower edges) and holly leaves.

These products are so varied - there are papers, embossing folders, stamps, glitter, stickers, die cuts, journalling tags, brads, and much more.  They are currently only available instore so come in and check them out!

The docrafts ranges are limited edition and are selling fast (we have restocked twice already) so if you want more information, have any questions or want to know what items are left in store you can contact Tanyah at cardartbytanya@yahoo.com.au.

Happy crafting everyone!!

Monday, September 6, 2010

Using multiple photos - a double layout by Sue Smith

This week I have made a double layout featuring the totally cute Imaginisce Birthday Bash range and lots of photos that I took of my son 23 years ago. Just click on the photo below for a closer look....


Sometimes it can be a little overwhelming when we are confronted with using lots of photos to tell a story without doing multiple layouts. That was the case with these photos of my son's birthday. I managed to cull them down to 8 photos, and so to be able to fit them all on my layout (and still have room for the title and other embellishments), I decided to trim them around the edge of the main subject. Another reason I did this was because most of the backgrounds in these photos detracted from the overall look as you can see below....


After cutting them out, I coloured the cut edge with a light brown marker just to take away the starkness of the white on the side which was visible at some angles, then arranged the photos to tell the story, overlapping some and raising others up with foam DST.


Here is a list of the materials I have used for this layout...

* Black cardstock

* Imaginisce Birthday Bash papers

* Basic Grey Scarlet's Letter 'Repose' paper

* Bella Foam Alphabet stickers (white)

* Heidi Grace Punchboard Alphas (green dots)

* AC Thickers - Patchwork Fabric stickers in aqua

* Green Tara Mesh Ribbon - Teal

* Bella Chipz Large Alphas

I did a lot of cutting out with the Imaginisce Birthday Bash patterned papers. This range is double-sided heavy weight paper and on one side of each of the papers, the detail has been gloss-embossed which gives them a lovely finish. From the Wish Big paper...

I roughly cut out a line of the candles to layer over the the edge of the photos and the mesh; then I cut some lines of the 'Happy Birthday To You' words from Hip Hip Hooray paper...

and placed these strips over the candles on the layout.
I cut out some of the bunting from the Birthday Banners paper...

to embellish the top right-hand corner of the layout, and finally, I covered a large chipboard numeral 3 with the Surprise paper...

and filed the edges of the covered chipboard to make a white border which gives a more finished-off look.


That's it from me this week...thanks for looking and until next Monday...happy scrapping! xx

Sunday, September 5, 2010

A last minute Father's Day Card - by Annie Zorzo

Happy Father's Day everyone!  Hope you're already enjoying your day where-ever you are and were organised with cards and gifts for dad when the kids climbed into bed!   ....But, not to worry if things got on top of you this week and you're not quite there, here's a simple little card that you can make up with the kids in no time.  Just grab the kids, go hiding for a while and come back surprising dad with this.


Materials you’ll need:
How to do it:
1. Cut your Cardstock 21cm high x 15cm wide and score across the middle to fold.  This size will fit into a standard C6 office envelope.
2.  On a separate piece of paper or cardstock, cut out an 8x8cm square.
3. Grab a whole heap of your scrap paper.  I’ve used all blue scraps but there is no reason why you can’t mix up the colours and make it a bit funky.
4. With strips of scrap paper, tear along the bottom edge.  You don’t want your strips to be higher than 1.5cm or longer than 8cm.  You actually want them in varying lengths to mix it up to create some visual interest.  You can also use a edge punch or shaped scissors to create some different edges - Tanyah has lots of different edge punches if your looking for something different.
5. Ink the bottom edge of each strip, whether torn, punched or cut.  Darker inks work better, I've used Versa Colour Pinecone.
6. With your 8x8cm square and starting from the bottom edge working upwards, start sticking your strips down being sure to over lap them and start from various points.  Don’t worry if they overlap the edge of your 8x8cm square, you’ll be trimming it later.


7. Once finished, turn over to the back and use the 8x8cm square to trim of the overlapping pieces.  Then turning back to the front, use your finger nail to distress the edges to create some volume and texture.
8. Next cut a 8.5x8.5cm square from some coordinating coloured cardstock.  Measure 0.8mm in from all sides to create a smaller square.  Cut out a smaller square, creating a frame.  Note: If your doing this with your children, they might need help with this bit, especially if your using a craft knife.
9. Ink the edge of your frame and then glue the frame over your finished collage of distressed, inked scrap strips.  


10. Glue the framed strips to the front of your card to one side.
11. Ink the edges of your card and using a zig pen, draw stitch lines around the edge of the card and the inner and outer edge of your frame.  I find faux stitching works better as a craft activity with children and when you're in hurry, better than getting the sewing machine out or a needle and thread…but the choice is yours.


12. Now, on your computer, select a font and type your sentiment.  You can enlarge the font and change the colour to match your card.
13. Print on some heavy paper or cardstock and then cut out.  Kids can cut in straight lines rather than curvy ones.
14. Ink the edges and then with mounting tape/squares, fix to the card. 
15. You can stamp a sentiment on the inside like I have with one of the many stamps available from Tanyah or leave it blank for your own sentiment. 


So that’s it, a simple crafty card made in a flash so you can go and enjoy the rest of your day with Dad.  


What I love about this card is that you can adapt it to other occasions as well.  You might like to try these and show us in the gallery what you've come up with.
  • Red and green scraps in the shape of a Christmas Tree;
  • Yellow scraps and some glitter in the shape of Christmas ornaments;
  • Red scraps in the shape of a love heart for Valentines Day; or
  • Any colour in the shape of a cake and candles for a birthday.
Enjoy your day and don't forget some photos of Dad's special day so you can scrap them later! 

Friday, September 3, 2010

Kaiser Christmas Cards


These cards are made from the left overs from a layout (Christmas Time - a November class) I used Sleigh and Stocking papers in. I made 6 cards, a layout and still have enough left to make more cards - gotta like that! I raided my bits and pieces for tapes, braid and pearls, and grabbed my c/s offcuts that were in Christmas colours - all are available at Tanyah's shop.
I used :Kaiser Sleigh and Stocking papers, Ruby Rockit Trim, 7 Gypsies Savannah paper tape, Paper Xtra stamp, red, brown and green c/s scraps and kraft cards

I inked the edges of just about everything with brown ink and took the measurements from the size of the card and elements used on them.

For the first 2 cards I cut out 2 of the little pictures from Sleigh. One I punched into a circle then 3 D matted them onto green c/s.

For the bottom card I cut out 'Seasons greetings' and cut strips of red pattern from Stocking to be the same length as this title. I added blingy braid across the middle of the main strip. Then I assembled the strips on a red c/s mat. I added the matted little picture with 3D tape on the right side before attaching it to the card.


For the top card I cut a brown c/s mat just smaller than the card front. I attached strips of green patterned paper from Stocking and a strip of green c/s (just wider than the tape) leaving a small gap around and between pieces. I attached tape over the top of the green c/s strip. I punched a circle a bit larger than the centre piece. Then pleated and attached the adhesive tape around the edge to form a rosette. Make sure it shows from under the centre. Attach rosette over the left end of the tape and the little round picture in the centre of this. Stamp Merry Christmas on the right side of the tape and attach to card front.
And you're done. Two more cards later. I hope they inspire you to start early this year to make ALL your cards.
June

'Thank You Card' by Ingeborg Dijkstra

I made this 'Thank You Card' for a friend of mine. I love sending or giving cards to my friends and family; I think it is important to show them how much I appreciate them. And ... obviously a handmade card is even more special. I first used two pieces of bright, colourful paper to cover the front.

I stamped the sentiment 'Thank you for lifting my spirits' on a strip of white cardstock and placed it across the card.

Using a piece of 7 cm x 7 cm of the same doublesided paper I cut a square like this:
I folded each corner into the middle and attached a brad in the middle to hold the pinwheel together.
I cut some very thin strips of paper and curled them around a little paint brush. Using Helmar Glue I stuck them on at the bottom of the card:

Done!

Thursday, September 2, 2010

Layout using Fancy Pants 'My Family' range

Last week I created a Fathers Day card using the Fancy Pants 'My Family' range so this week I've decided to create a layout using the same range. 


Materials used:
Tip:  use the buckle with a strip of paper instead of ribbon.

 
Getting more out of your paper...
In this layout I have matted the photo, the patterned paper under the photo and the journalling card.
You may think that I would have used a couple of sheets of cardstock to do this but it has all come from one sheet of cardstock.

I know many of you probably already do this but for those who don't... this photo shows the areas I have cut out from the back of the cardstock. 

Hope everyone has a great day!

Happy crafting...xxxooo

Wednesday, September 1, 2010

Fabulous Non stick craft sheet!!

So much of what we love about our craft  now can be messy - spraying, painting, inking , distressing....you name it....and some of those products  you need to be careful with -  alcohol inks  come to mind for me!!

So  an item that I think is  going to become an essential in our  stash is the  fabulous  non stick craft sheet - available in Tans store.....HERE
I wanted to change the  colour of some white lace and I  chose to colour it with glimmer mist.  I got out my non stick craft sheet....and sprayed....


Then when I lifted the lace to  set aside to dry - this was what I was left with


and so with a baby wipe....


it comes back to this.....


SERIOUSLY  cool huh!!!  Check it out....you can use it for paint, heating , stamping,   spraying ironing and even baking!!!