CUTE AS A BUTTON


Products Used:
- Kaisercraft pattern paper - Childs play collection - Chinese Whisper
- Kaisercraft pattern paper - Childs play collection -Jump Ropem the
- Kaisercraft pattern paper - Childs play collection -Simon Says
- Kaisercraft pattern paper - Childs play collection -Hide & Seek
- Kaisercraft flowers - Snow
- Kaisercraft Clear stamps from Childs play collection
- Grosgrain Ribbon
- Mounting Tape
- button
- ink
- Glossy Accents
- Co ordinating Cardstock
Step 1
Use jump rope pattten paper or co ordinating cardstock as base page
Step 2
From Simon Says pattern paper, cut 8x8 " square from lower part of paper -

Step 3
With craft knife, carefully cut around scallop edge
 Step 4
Ink the edges of the paper.
Step 5
From Chinese Whisper pattern paper;
- cut a journaling tag.
- cut out 3 button images.
- Cut out 1 photo corner.
- Ink around edges of all cut - outs
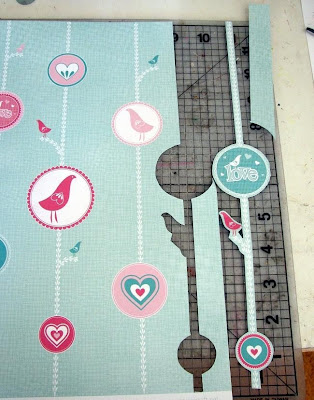
From Hide and Seek pattern paper choose one of the circles with leaf stips and carefully cut this out
 Step 7
Cut out the circle with has the ABC 123 Design, or use the clear stamp on the same design (stamp onto co-0rdinating cardstock)
Step 8
From the clear stamps use the love, cherish and adore stamps and stamp onto co-ordinating scrap scardstock, using acrylic block and ink of choice, then carefully cut these out, when dried.
 Step 9
Cut a length of ribbon , having 3 ribbons all the same length
Step 10
From the pack of snow kaisercraft flowers, take 3 of the largest flowers.
Step 11
Using mounting foam tape adhere stamped images love cherish, adore to centre of flowers.
Step 12
Take 3 of the medium sized snow flowers, and using mounting foam, attach the button cut-outs to centres of the flowers
Step 13
Take 3 of the smallest snow flowers, and attach co-ordinating rhinestones to centre of flowers
Step 14
Adhere mounting foam to back of ABC 123 circle cut-out, and attach to bottom left hand corner of journaling tag. Over lapping a little. Do journaling as desired on tag
Step 15
Attach mounting foam to back of photo corner
Step 16
With your chipboard alphas, use an ink - colour of your choice, and ink the alphas till covered. When dry, lightly highlight around edges of alphas with zig writer pen.
Step 17
From your button stash, find 6 co-ordinating buttons
Construcution.
- Adhere 8x8" square to bottom right hand corner of base paper, leaving 1" to right and bottom of squre
- Using zig writer pen, doodle around 8x8 " squre, as desired

- Attach photos to the top left of 8x8" spuare, about 1" in from side and 2" from top
- Adhere 3 lengths of ribbon to bottom of page, angling each differently and overlapping each other.
- Attach journaling tag to bottom right of page, about 2" in from side and angled

- Attach the leaf strip with circles, to right hand side of page, just overlapping journaling tag.
- If you want to do any more doodling on the page, now is the time to do it
- Attach photo corner to photo at left of page
- Adhere title top and bottom of photos, also adding rhinestone
- Attach flowers in clusters onto layout, add 2 buttons to each cluster
- Apply dimensional magic to alphas title and allow to dry
Thank you Sandy for designing this gorgeous Layout...
luv tanXx


2 comments:
That's such a gorgeous layout, Sandy and Tan!
This is just adorable Tanyah. Sandy has done an awesome job. Might have to look at buying some of this paper to do a layout of my cousins baby.
xoxo
Gypsy
Post a Comment