Ribbons, ribbons, ribbons. Sigh. The Australian Pocket Oxford Dictionary defines the word fetish as “… inanimate object worshipped …”. I have a ribbon fetish. LOL it’s not funny. This is serious business! I have boxes of the stuff. I can’t seem to stop buying it. Yes I do need grosgrain in every colour imaginable and in every width it’s manufactured. Ribbon is such a versatile product I say to myself as I run lengths of it dreamily through my fingers. I can make flowers with this I tell myself as I admire a spotted organza. OMG this twill is the perfect width for those rub-ons in my stash I exclaim! The textures of these velvets are as soft as a baby’s bottom … well of course I’ll use them on a baby’s page!! Wholy Cow these crochet trims are divine and I could even use them on that LO of my brother I’ve been waiting to do!!! Where are the baskets? Where is the checkout? Get out of my way … I need these ribbons!!!!
Okay so you get that I love ribbon LOL. It is a versatile product and comes in so many colours, widths, textures, styles and shapes. Whatever the project, whatever the subject matter, ribbons can be used; it’s just a matter of whether you want to use ribbon (and of course, come on now, why wouldn’t you?!). I’d like to share some of my favourite ribbon techniques with you …
Ribbons and cards go together like a horse and carriage! Below are three cards I have made using ribbons.
* The first card uses ribbons as a background (adhered with double-sided tape) together with a rub-on message applied to twill and secured to the card with brads.
* The second card features a handmade flower made with spotty organza, layered on top of a Green Tara flower and finished off with a button. To make the flower, wind the ribbon around your fingers several times – the number of fingers you use will determine the size of the flower and the number of times you wind the ribbon will determine the number of petals. The next step is to carefully ease your fingers out from the wound ribbon and at the same time to secure the middle of the wound ribbon with a needle, threaded and knotted. After pulling the thread up through the wound ribbon until the knot is secure, play with the wound ribbon, pulling it around and to the sides so that eventually you have the shape of a flower. Once you are happy with the shape, stitch through the centre of the flower a couple of times to secure. You will of course be left with an ‘incomplete petal’; this can either be cut off or trimmed neatly.
* The third shows how ribbon can be ‘pleated’ (in this case messily) by simply adhering double-sided tape to the back of the ribbon and then literally folding, and pleating the ribbon as you adhere it to the card. This can also be done very neatly and, if you have a steady hand, by sewing machine without the double-sided tape.
I also like to use ribbons on my LOs … they add lovely texture, can enhance the overall theme of your LO, add dimension and of course interest. Below are examples of some of the different techniques I have used with ribbons.
* Die-cutting ribbon. By attaching ribbon to a solid background, such as cardstock or thin chipboard, with a double-sided dry adhesive such as JAC paper, you can create a base from which shapes and alphas can be die-cut. If handled carefully the edges ought not fray.
* Ribbon flourishes. This is one of my favourite techniques. I have found that it works best with thin, pliable ribbons, such as ric rac – the skinnier the better! First, I lightly draw my flourish (or other) design on my LO with a pencil. Next, I run multiple lengths of the ric rac through a Xyron 150 and then carefully adhere the ric rac to the LO, removing it from the tacky paper as I go. From experience, to take the now adhesive ric rac off the Xyron sheet in one go would result in a big, gummy ball of ric rac. Alternatively if you have the Making Memories ribbon glue, working in small sections, apply the glue and then the ric rac along your flourish. With both of these adhesive options it is very important to work on your flourish in small steps, to use as few fingers as possible, to be aware that you could pick up adhesive/glue with other parts of your hands and fingers and transfer it to other sections of your LO, and (unless you are deft) to turn your LO as you go rather than trying to twist and turn your hand
* Ribbon clusters. Combining a number of ribbons (or in this instance crochet trims and twill) together with charms and buttons hanging amongst them look great hanging from one particular spot on your LO. I have used double-sided tape in small amounts here and there to specifically ‘place’ some of the trims to ensure that I don’t end up with one big mass of ribbons simply falling down the page flat.
* Ribbon backgrounds. The very simple process of adhering your ribbons in rows onto your background cardstock or patterned paper can create very effective backgrounds and can also be used to draw the viewer’s eye into the photo.
* Layering and tying off ribbons. I love to create ‘clusters’ of embellishments on my LOs. More is more! A great way to add texture, dimension and depth is to use ribbons in those clusters. These are just a few of my favourite ways of doing so: using ribbon to tie a knot in a button; folding a short length of ribbon in half and tucking it beneath another item in the cluster; if the ribbon is shaped, cutting it into pieces and randomly adhering those within the cluster; and finally if you are able, using pre-made ribbon embellishments.
* Ribbons as flower leaves. It doesn’t get much simpler than this. Fold or loop a length of ribbon to create the outline of a leaf and adhere beneath your blossom. For extra strength I like to adhere the ribbon ends together before sticking them beneath the blossom. This could be done with a quick stitch, double-sided tape, glue dots, or staples.
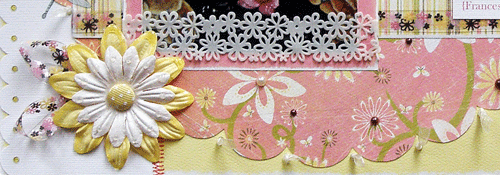
* Ribbon knots. By punching a hole (sized appropriately for the width of the ribbon you are using) in your LO, threading your ribbon from the front through to the back, and then tying a knot in the ribbon on the front of your LO, you will have created a ribbon knot. Although simple, these can look particularly effective when done in a pattern (for example around a scalloped circle), in amongst embellishment clusters, and make a great alternative to French knots when you want something a little larger.
I hope some of these techniques prove helpful when you next go to work with ribbon.
Alz
:)
******************************
We have LOTS and LOTS of Ribbon in our shop of all sizes, shapes, prints and textures. Come and Check out our large range
HERE
What has become popular is
hole ribbon or mesh ribbon , this you can cut to your required width if you want to, twist and staple it, place under your photos, create layers of different ribbons and so much more with a wonderful texture look.
We also have paper ribbon,
paper string and
Raffia for unreal affects and I have heard you can make paper jewlery out of these items, shape the paper, swirl it, tie knots and so much more!...
We also have
Lace in black, white and cream at an unbelieveable price of 80c a meter. Being cotton lace your able to die it using several different inks eg daubers, ozie dies etc.
Thankyou to all the girls who helped put these amazing samples together and Hope you will want to use your ribbon more and create amazing projects with it.
have fun creating and thankyou for stopping by
luv Tan and my tallented Team Xx






 I added my journaling (some lyrics from Miley Cyrus) at the bottom. The words are about butterflies and therefore I put the words in swirly lines to create a 'butterfly' feel. Our daughter loves Miley Cyrus at the moment, so it seemed to fit well ...


 I punched three butterflies out of a scrap piece of orange paper and added them for a final touch:
 Done ... and remember this layout only costs me about $ 1.00 ! ! !




 On this layout I used ribbons in different sizes and colours as an important part of the design. I wanted to create a 'sun' and I used both ribbons and strips of paper to do so. The ribbons add a softer touch to the whole layout.
 I made this layout for a challenge about 'What I love about Holland'. Well ... the thing I love most about Holland is the cheese. I wanted to create a 'Dutch feel' to the layout and used a striped ribbon in the colours of the flag to make a little 'flag on the right. I wanted to repeat the ribbon and made a sort of flower with it and added the date on the top. The blue and white ribbon with the windmills also added to the Dutch theme.
 On this layout I wanted the ribbon not to be to dominant. I just added a bit in the top right corner and I also tied some around my chipboard swirl to make 'petals' for the flower.

 On the layout below I used the ribbon to adhere the tag with the title to the layout.
 On the layout below I used two different kind of ribbons to create the stem and the petals of my handmade flower.
 On this layout I added the black and white ribbon to add to the 'car races' theme of the layout. I also wanted to show that ribbon doesn't have to be 'girly'; it can be used on layout for girls and boys.
 ***************************************************************


