Materials used
Cardstock
Imaginisce patterened cardstock
Chatterbox flocked paper
Kaiser craft all boy circle rubons
large flower
Imaginisce bling flower
Kaisercraft brown arrow bling
Making Memories Mini alpha stickers
white gel pen

STEP 1
- Find 3 photos
- 1 - 5x7
- 2 - 4x6
- Lightly sand the edges of all photos
- Mat your 5x7"photo
- Leave an inch boarder at the bottom of the photo

STEP 2
- Find your patterned paper you want to use. I have used Imaginisce patterened cardstock
- and Chatterbox flocked paper
- Cut the chatterbox paper to 20cm
- Cut 2cm off one side
- Ink the edges if you want to
- adhere onto your patterened paper
 STEP 3
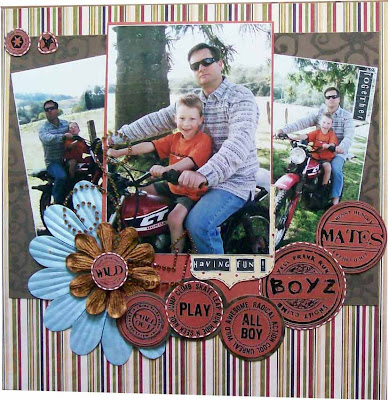
- Place and adhere photos as seen in the picture.
- Don't adhere the bottom left of the matted photo just yet

STEP 4
- Place a giant flower under the mattered photo
- Adhere the mattered photo onto the large flower
 STEP 5
- Turn over your layout
- Carefully cut out the backing of the cardstock
- As seen in the picture
- Try NOT to cut the flocked patterned paper

STEP 6
- Place a Imaginisce bling flower over the top of the large flower
- Using the Kaiser craft all boy circle rubons
- Rub onto some cardstock
- Cut out
- Place in the center of the flower
 STEP 7
- Using the Kaisercraft rubons
- Rub the circle rubons onto cardstock
- Cut them out
- Place and adhere on your layout as in the picture
 STEP 8
- Take out the arrow bling on the plastic
- Place the plastic onto your layout to see where you want to place it
- Than take the bling off and place where desired
 STEP 9
- Adhere some prima bling over the flowers and photos

STEP 10
- Rub some kaiser craft rubons onto cardstock
- Cut out leaving a small edge
- Outline drawing a stiched line using a white gel pen
 STEP 11
- Using Making Memories mini alpha stickers
- Place on the right photo, a word
- Outline it with a white gel pen

STEP 12
- Out of the backing paper you had cut out earlier
- Cut a strip 9x6.5cm
- Draw and cut a bracket shape at one end
- Outline using a black zig writter
- Adhere under the main photo
- Add Making Memories Mini alpha stickers
- Outline the words using a white gel pen

HERE IS THE FINISHED LAYOUT!!!!
HOPE YOU ENJOY!!!!
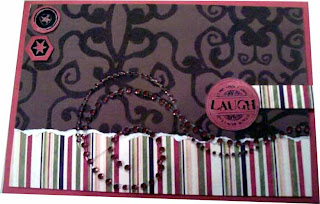
OUT OF THE LEFT OVER BITS I MADE THIS CARD!


3 comments:
Tan, your layouts are amazing!!! This looks great!
What an awesome step by step - great LO and card!
This looks great!!! Thanks for the inspiring Blog Tan! Love your ideas and thanks for sharing them with us! Luv Shaz
Post a Comment