I have a new blog!

If you want to see only my creations please come and check out and follow my new blog http://www.tanyah-payne.blogspot.com
Showing posts with label Stamping. Show all posts

Wednesday, January 5, 2011

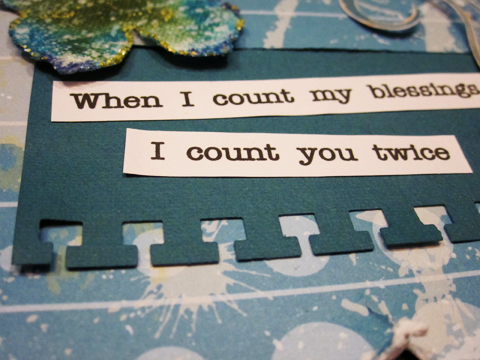
Quick card using Ruby Rockit papers

After seeing Sue's wonderful layout yesterday I was inspired to use up some of my Ruby Rockit papers to make a quick card.


I have used the following materials:


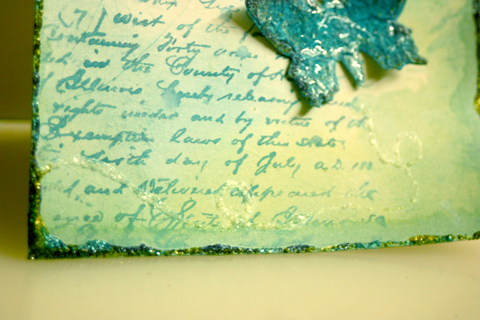
I had made the butterfly earlier in the week by playing around with some sticky back canvas.


I diecut a butterfly shape, then stamped the canvas using a script stamp inked with versamark then embossed.  Using a mini-mister, I wet the canvas then sprayed on some Color Wash.  I wet it first so the two colours would bleed into each other a bit.
When dry, I added some Distress Stickles.


.
 I have used a border punch to give the edge some definition, fussy cut a flourish from the Ruby Rockit paper and added one of my favourite verses.

All done...very simple...xxxooo

Hope everyone had a wonderful Christmas and all the best for the New Year.

nic...xxxooo

Wednesday, December 22, 2010

Last minute gift tags - Nicky Amber

I've made some very quick and easy Christmas gift tags for those last minute wrapping sessions.


I have only used some kraft cardstock, some patterned paper scraps, journaling pen and some paper raffia.

Step 1.  I have cut my cardstock to 2 inches x 3 inches, drawn a border around the edge with a journaling pen and punched a hole in the top.


Step 2.  I simply cut some basic shapes (triangle, square and circle) out of patterned paper scrap
(For these tags I have used scraps from Echo Park 'Everybody Loves Christmas' range and 7 Gypsies 'Avignon' range).

Step 3.  I drew a border around each shape with a black journaling pen.

Step 4.  Attach the patterned paper shape to the tag and tie some paper raffia through the hole at the top
(for the square shape I tied some paper raffia around it to make it look like a present).

For some visual interest on some of the tags, I wrote Merry Christmas repeatedly across the tag before I attached the patterned paper shape.


Step 5.  On the other side I have stamped to: and from:
Tip: to line up your stamps where you want them to appear.....simply place them down onto the tag

I then placed my acrylic block (which is in desperate need of a good clean) down onto the stamps to pick them up.
I then stamped the back of all the tags...

I have used basic shapes but you can personalise them to suit your style or for a different occasion altogether (birthdays, baby gifts, thank you etc...)

For example, here I have cut out a heart shape...

Hope that has given you some ideas for quick and easy tags.

Hope everyone has a safe and special Christmas
nic...xxxooo


Wednesday, December 8, 2010

Simple card using Ranger 'Distress' products - Nicky Amber

Well this week I thought I'd make a simple card using some of the new (and old)  Ranger 'Distress' products.


To start, I punched out a butterfly shape and then spread a thin layer of Ranger Distress Stickles.  On this butterfly I used Broken China, Shabby Shutters and Faded Jeans
 

I then used the Ranger Distress Crackle paint over the top of the image.
Once the shape is covered with the crackle paint, leave to dry.  When it dries it should form cracks in the surface to produce....
The size and amount of cracks will be determined by the thickness you apply the paint, thinner application leaves finer cracks while thicker application will leave larger cracks.

For the background of the card I used the Distress Ink watercolour technique I used a couple of weeks ago, for instructions click HERE.  Then I stamped my trusty script stamp using Distress Ink over the top.

I wanted to define the border so I used the Distress stickles around the edge of the page.
and also added a clear butterfly trail using the clear rock candy Stickles.

 So there you have it!  All you need to do is add a sentiment to suit your occasion.

Stickles can be used on your pages, cards and on other embellishments to add that something extra...
Here I've added it to the edges of this flower.

Thanks for looking...hope you enjoy working with the Ranger Distress products as much as I have!

nic...xxxooo

Wednesday, November 24, 2010

Watercolour Backgrounds with Distress Inks - Nicky Amber

Tanyah has just received a new shipment of Distress Inks in store (which are selling at a fantastic price!) so I thought I'd share a technique using them for all those lucky people who have snapped themselves up a bargain.

I'll be using Distress Inks to create a watercolour background.


Step 1.  To start off...select two or three colours and stamp or swipe the inkpad onto a craft mat or non-porous surface.

Step 2.  Using a mini mister...spray the ink until large droplets form.

 Step 3.  Press or swipe your paper into the misted ink.


Step 4.  The colours will 'bleed' into each other producing a lovely watercolour background.  If you would like more colour you can swipe and reswipe until you are happy with it.

The dried result (after doing some reswiping)......


With the watercoloured backgrounds I have made some gift tags.


To make these, I have used my new Spellbinder Nestabilities dies that Tanyah also has new instore.


 To dress them up I've used the Prima calligraphy script stamp
  and the Sullivans Best Friends stamp

 Resulting in these......
 

If you are local and interested in learning more Distress Ink techniques just let Tanyah know and we can organise a class to help you make the most of your Distress Inks.

Happy Creating...xxxooo

Wednesday, November 17, 2010

Docrafts Christmas Cards and class - Nicky Amber

This week I have used the Docrafts Delicate Filigree Cards and a range of techniques to make some Christmas cards.

So this........


has turned into these......


Card 1.
Keeping it very simple, I have just used an embossing folder to dry emboss the background, inking and liquid pearls to decorate.


Card 2.  
In this card I have used texture paste, glimmer mist, wet embossing (using embossing powders and a stamp) on the background and inking.

Card 3.

On this card I have blended Distress inks to create the background.


Card 4.
 
In this card I have used alcohol inks to create the background and a stamp with Distress inks to create interest on the tree.


Due to the many different techniques used for these cards, we have decided to offer these as a class at Scrap N Craft with T. 

Techniques you will cover include
  • using Distress inks
  • using Glimmer Mist
  • how to blend with your Distress inks
  • using Alcohol inks
  • wet embossing
  • dry embossing
  • stamping
This is a great opportunity for beginners or if you aren't familiar with any of these techniques to be shown step by step... and as a bonus you will also get to take home four beautiful handmade Christmas cards.
Hope to see you there.......if you would like more information please contact Tanyah on 0458217911.


Happy creating...xxxooo

Sunday, October 10, 2010

Christmas Gift Tags - by Annie Zorzo

Well I don't know about you....but up here on the north coast of NSW, I'm so sick of the rain!  Not only can't I get my endless rounds of washing done (not to self, invest in a clothes dryer!) but over the school holidays, it's been so hard to keep my daughter occupied.  To get rid of some cabin fever this week we went shopping and I'm always surprised by how early we start to see Christmas things in the shops.  It always gives me a kick in the pants to really start thinking and get organised.

So this week, with all the rain and to keep children occupied, we made some Christmas Gift Tags.  They're really easy to do, can get them whipped up in no-time and can tick gift tags off your Christmas list of things to do.

To make them you will need:

  • Price Tags or Luggage Tags - find them at an office supply shop - or make your own from cardstock 
  • All your stamps 
  • Inks - Limit your colour selection to three - I choose red, green and brown.
  • Your computer and printer
And here's how:
1.  If your going to make your own gift tags from cardstock, mine are measured at 5cm wide by 9.5 cm high.  If you're using bought ones, remove the string before starting to stamp.
2.  Basically there are no rules - except to start with your larger background stamps first.  I have very few Christmas stamps so most of mine are swirls, scrolls, love hearts, script writing, butterflies and even travel based stamps with postage stamps, luggage tags and a compass!  With mine, it's the traditional red and green with a little bit of brown that brings out the Christmas feel.  Alternate your colours and stamp away layering them as you go until your happy.
3.  On your computer, make a table and make each 'cell' of the table the exact size of your tag.  Select a font and type in To: and From: spacing it down the tag.
4.  Print onto paper
5.  Cut a very thin 2mm thick double sided tape.  Line up your tag inside the table with your stamped side facing down to the paper.  Secure your tag at the very top edge with your double sided tape.  Print again.
6.  Carefully remove tags from the paper.  They should come off easily but if the double sided tape gives you grief, trim the top of the tag by the 2mm thickness of the tape.
7.  Rethread the tags with string or add some decorative ribbon from your stash.

I've made mine fairly simply as there was a pre-schooler involved but there is no reason why you can't use embossing powders, glimmermist, bling, even some patterned paper to make yours.  Look through your stash or visit the shop and get busy!!!!!  Christmas is ...gulp... 11 weeks away!

Enjoy your day while I look forward to my cherub going back to pre-school tomorrow!!!
.

Wednesday, September 29, 2010

Step-by-step card sketch by Nicky Amber

Today I'll be going through a card sketch step-by-step.


Step 1.  Take a card base (pre-made or made yourself) and add a piece of patterned paper slightly smaller than your card.

Step 2. I have stitched around the border but that is totally optional
Note:  If you don't want the stitching to show to other side of the card, stitch the patterned paper before you attach it to the card.

Step 3.  Add a circle to the patterned paper.


Step 4.  Add embellishments around the circle.
             (I have added stamped butterflies, flowers and punched leaves)

Step 5.  Add your sentiment to the card.
            (I have used a quote as the sentiment for the sample card)


Sample card...

In this sample I have used:
  • pre-made card - ready made to take the hard work out of making your cards
  • cardstock - I matted the patterned paper with co-ordinating cardstock
  • patterned paper - choose your patterned paper to suit your card theme...eg.christmas, masculine, birthday, baby etc...
  • stamps - I stamped the butterflies then cut them out.  I also stamped a flourish stamp to cardstock and punched out the leaves.
  • kindyglitz - added to highlight areas
  • punches - punched out the leaf shapes
  • flowers - I added small rosebuds to the circle shape (Note: I only had white rosebuds so I coloured them with ink to match the card).
 Hope this helps you in your card-making.....happy creating!

Sunday, September 26, 2010

Creating your own Patterned Paper - by Annie Zorzo

From time to time, many a creative person will lose their mojo.  Mine has been on walk about of late and coming up with something that I'm happy to share with you has been a challenge.  Usually to get out of a rut like this you can use an inspirational sketch, play around with some gorgeous new products and papers from Tanyah or, like I did this week - just have a play.  With no project in mind and therefore no pressure, you can get back to having fun and might just come up with something that you love.

So what did I play with....Daubers!  These are great and have so many uses.  You can colour fabrics, lace and ribbon, give some colour to chipboards and like ink you can use them on stamps.  Daubers have a sheen to them so when your dauber inked project catches the light, your project glows.  With the daubers, I created my own stamped patterned paper...and I'm going to show you how I did it.

You'll need:
  • White, or another pale colour, cardstock 
  • Radiant Rain Daubers.  I've used three different shades of the one colour - Apple Blossom, Pink Azalea and Ginger Flower.
  • Versa Colour Inkpads.  I've used an old heavily used VersaColour Pine Cone and a new one
  • Stamps.  I've used three, a Basic Grey Flower, KaiserCraft Butterfly and a Prima Script stamp

HINT:  When using daubers, make sure you shake them up until you feel your arm is going to fall off.  All the particles that give the daubers their sheen settle on the bottom of the bottle and you need these mixed into the ink if you want your project to catch the light and shine.

1.  The stamp you use first is going to create a repeating pattern covering your cardstock.  Using the palest colour dauber, ink up your stamp and start stamping until your whole cardstock is covered.  I used the Basic Grey flower stamp and Apple Blossom dauber for this first step.  Don't worry if the dauber ink looks heavy on your stamp in some places, this will add to the whole affect when your finished.


2.  Clean the dauber ink off your stamp and then with your old heavily used Versacolour ink pad, ink up the same stamp again.  Lightly stamp over your first dauber inked stamps with the second colour.  Get as close as you can to an exact stamp over the top of the first but slightly off will not matter.  This will add some depth to the first stamp.
3.  Moving onto your second stamp and second tonal dauber colour, (Kaisercraft butterfly and Pink Azalea for me), ink up your stamp and imprint around your cardstock randomly.
HINT:  My stamp had an intricate pattern.  With the dauber inks, if you want this pattern to show through, stamp onto a scrap piece of paper first and the stamp onto your project with the second application.  Your pattern will show up better.  On the below, the left is first application and right is the second.  I wasn't concerned with the pattern of the stamp applied with the dauber as the next step brings it out...
4.  Clean the dauber ink off your stamp and then with your new or re-inked Versacolour ink pad, ink up the same stamp again.  Go over your first dauber inked stamps with the second colour.  This will add a bold definition of your stamps intricate pattern.
5.  Moving onto your last stamp and the darkest dauber tonal colour, in my project this is the Prima Script stamp and Ginger Flower dauber.  Randomly ink up your stamp, heavily in some parts, light in others and do not cover the whole stamp.  You don't want the entire stamp to come through onto your project.  Randomly stamp your paper.
6.  Finally, using both your heavily used and new versa colour ink pads, randomly brush across your project.  Both along the sides and randomly across the middle, this will dirty up your pale cardstock background and make your patterned paper look a bit more grungy.
There you have it, your own patterned paper.  Use it straight away on a project or add it to your stash.  So if you're feeling creatively challenged, take the pressure off yourself and go and have a play.  You never know, after a play, your mojo might just come back!

Enjoy your Sunday everyone.