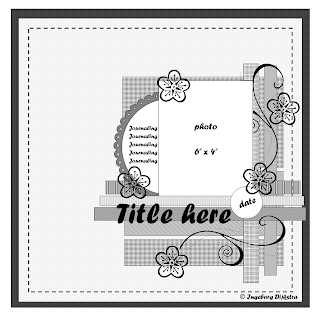
I have started to use sketches to create layouts a few years ago and in the last few months I have started to create my own sketches too. I made this sketch a while ago, but never made a layout with it, so this week I'd like to show you a step-by-step layout that I made based on this sketch:
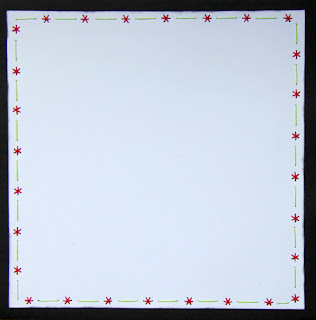
The sowing machine and I don't get along, so if I want stitching on my layouts it will have to be by hand. I love using Bazzil's templates to create borders and shapes. I wanted to create a very colourful layout and therefore I used two bright colours for my stitching:
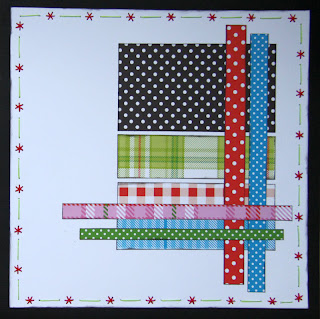
Using scraps of paper I cut quite a few strips of paper and added them to my layout:
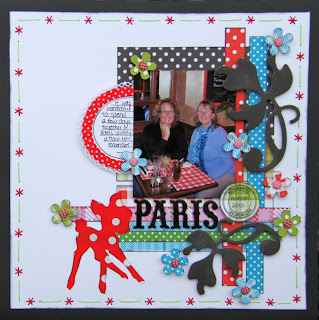
I added the photo, a handmade journaling tag, a date stamp and some chipboard embellishments:


 I have started to use sketches to create layouts a few years ago and in the last few months I have started to create my own sketches too. I made this sketch a while ago, but never made a layout with it, so this week I'd like to show you a step-by-step layout that I made based on this sketch:
 The sowing machine and I don't get along, so if I want stitching on my layouts it will have to be by hand. I love using Bazzil's templates to create borders and shapes. I wanted to create a very colourful layout and therefore I used two bright colours for my stitching:
 Using scraps of paper I cut quite a few strips of paper and added them to my layout:
 I added the photo, a handmade journaling tag, a date stamp and some chipboard embellishments:
 I punched some flowers, added colourful brads in the middle of each flower and added my title using Thickers. Done!
1 comment:
Just a quick note to let you know that a link to this post will be placed on CraftCrave today [17 Dec 01:00am GMT]. Thanks, Maria
Post a Comment