I have a new blog!

If you want to see only my creations please come and check out and follow my new blog http://www.tanyah-payne.blogspot.com

Friday, December 31, 2010

Using digital stamps by Ingeborg Dijkstra

I recently discoverd so called 'digital stamps'. I know, I know ... I am a bit of a slow learner with some things, because some of you have probably discovered these years ago.
I have bought a number of digital stamps, but there are also quite a few free digital stamps for you to download. One of my favourite places to look for digital stamps is Raindrops Echo Designs by Ann Vento. I downloaded the images and sentiments that I liked and put them in a publisher file. This is what my document looked like:

This is what my digital stamps looked like when printed on Kraft Cardstock:

This is what Ann writes about her free files:

'Thanks for taking an interest in the free files (digital stamps and/or sentiments, SVG, SCUT files, etc.) that I offer on my blog. The files that I've created using Inkscape/SCAL software can be used with SCAL as cutting files for your Cricut. The digital stamps/sentiments are usually created with royalty-free clipart and/or fonts; you can print out these digital stamps like others that you may have. You are free do whatever you like with them, but the only thing I ask is that if you use or share them in any way, you link back to this blog. I would really appreciate it, as I have put a lot of time and effort into making these files :) Other than that, enjoy, and I would LOVE to see how you've used them!'
So ... back to the card. I started with a piece of kraft cardstock 12" x 6" and folded it to make a 6" square. I cut a piece of paper (Master from the Upstairs Downstair Collection) slightly smaller to fit neatly onto the square card.
I added a few pieces of a small Bible, which I bought in a thrift shop to use on my cards and layouts. I also cut out one of the digital stamps and put it in the middle of the card. I added a piece of cotton lace too:
I also cut one of the 'digital bingo cards'. I made some 'rolls' out of the Bible pages and stamped a few swirls on a transparency with black Stazon ink. I added a circle piece of chipboard too:

I finally cut one of the digital butterflies and added it in the top right corner. Done!

Thursday, December 30, 2010

Gorgeous Teresea Collins papers

As a Mum to lots of boys I am always on the hunt for cool  papers  for boys and  I love this Teresa Collins  range.  For this layout  you will need

Teresa Collins CELEBRATE  papers
Paper  string ribbon
buttons
orange ricrac
Kaiser rubons
Jenny Bowlin chipboard buttons

1.  Use the Teresa Collins Celebrate  paper as the base
2. Spray  glimmermist on background.  I have also taken off the lid  and  dropped some larger  droplets   as well.


3.  Cut "Celebrate definitions" to 5 " x 11". Distress edges.
4.  Cut the Star paper  to 4 and a half inches x 7 inches.  Distress edges . We will be using the text  side.
5. Tear a 1 inch strip of the banner paper .  We will be using the brown spotted side.Trim to 11 and a half inches.  This will sit in underneath the text paper.
6. Cut out some stars
7. Tie red twine around the text paper before adhering.
8. From the Banner paper cut 2 rows of triangles.  I have trimmed one lot of triangles down so it can sit on top of the other - looking  like a  double layer - I have  curled the smaller top one before adhering.


9. Run orange ricrac down from bottom of photo to right hand side of layout
10. Adhere random buttons and stars
11. Take Kaiser rubons for title.
12.  Adhere  Jenny Bowlin chipboard  button


13. Add journalling.


Thanks for looking!!

Wednesday, December 29, 2010

Quick card using Rub n Buff - Nicky Amber

Rub n buff is a wax base metallic finish that can be used for decorating or antiquing wood, plaster, pottery, metal, leather, or gessoed surfaces. All you need to do is rub on and buff to a beautiful luster.

I have used some rub n buff to make a quick card.

I have inked this chipboard shape black and then rubbed some Rub n Buff over the top in some places to simulate a rusted finish.

For the butterflies... I embossed some black cardstock with an embossing folder, punched out with a butterfly punch and then rubbed some Rub n Buff over the top of the raised part. 


This product gives a wonderful metallic shine to your project.  It has many applications (scrapping and non-scrapping)...  I have seen it used for things such as giving picture frames and wooden moulding a nice metallic sheen.    It can also be used on metal, clay and other surfaces and with items including masks and templates.


Don't forget that all items in store have been reduced to clear so go and bag yourself a bargain....or two.

Happy creating...xxxooo

Monday, December 27, 2010

Patterned Bokeh - a photography technique by Sue Smith

I hope you all have had a fabulous Christmas, and have taken lots of pics to be scrapped. There is something so magical and wonderful about Christmas lights, and this year I was inspired to try something different with my camera by altering the bokeh effect.

If you are not aware of the term 'bokeh', it refers to the blurred background images in photos which become quite pronounced with a shallow depth of field (the area within the photo that is in focus), particularly when you use a wide-angle, macro or telephoto lens.

I had lots of fun experimenting with this effect by creating masks to sit over the front of my telephoto lens in different shapes, which then made all the little blurred light images echo the cut-out shape on the mask. Confused yet? Let me show you what I did....

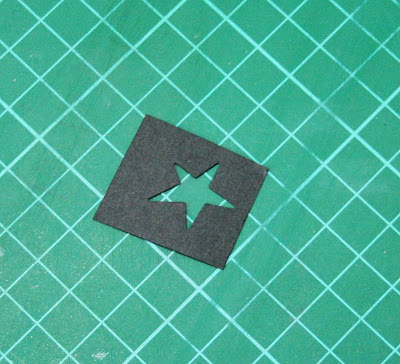
First of all, I used my small die-cutters to cut shapes in black cardstock....


I then attached this to a circle of cardstock the exact size of my lens and attached a straight strip of cardstock around the circumference of the circle like so....


This mask is then slipped over the front of your lens and can be held in place with blutack if you want it totally secure.

Now the fun begins....

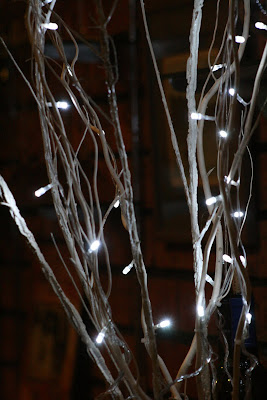
Here are the Christmas lights I worked with taking an ordinary photo first....


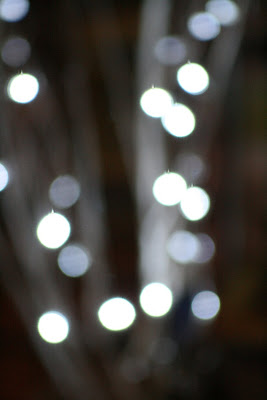
The same lights taken out of focus (you need to set your lens to manual focus instead of auto for this).....


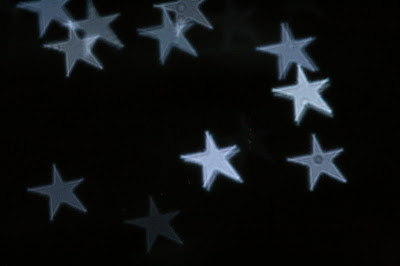
Now I applied the masks I made, and here is the effect you get with the star mask....


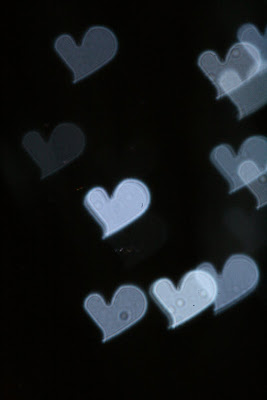
the heart mask....


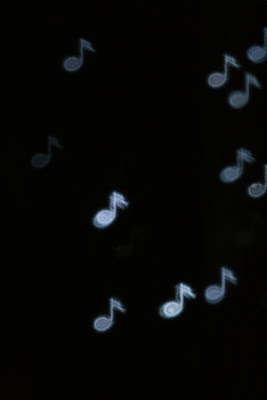
and the musical note mask....


Isn't that an amazing effect?

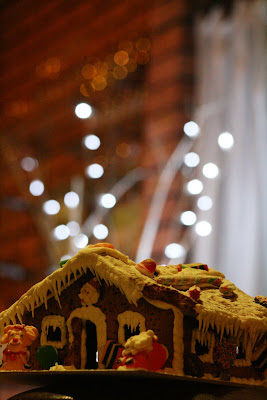
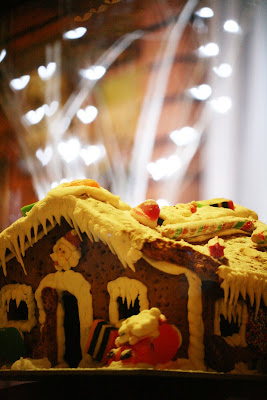
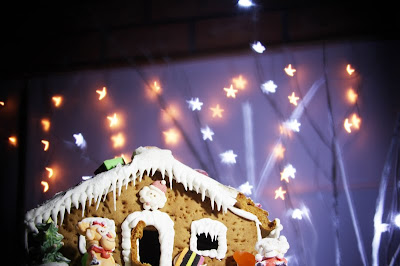
You can then use that effect in your photo as a background with your subject matter in focus and the patterned bokeh behind. This first photo is taken without any mask....


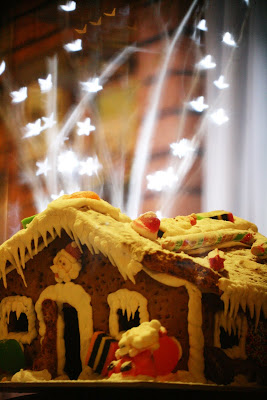
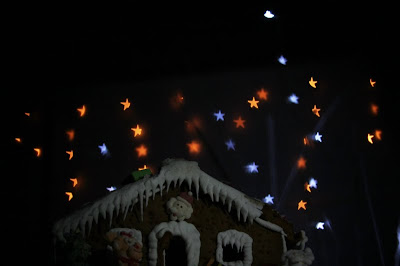
Then with the star mask....


...and the heart mask....


To achieve this effect properly, your 'in-focus' subject matter does need to be a fair distance from the lights, so that the lights stay out of focus. This does take quite a bit of experimenting to get the best and most dramatic effect, but it's lots of fun and very much worth the effort.

Here are a couple of other images taken with the star mask and a second set of lights and different camera settings....


I hope you have enjoyed this as much as I did preparing it, and that you might be inspired to give it a go yourself.

See you next Monday in 2011! Happy New Year! xxx

Sunday, December 26, 2010

OTP Jigsaw - by Annie Zorzo

Happy Boxing Day everyone!!!  I hope you have all had a lovely and festive Christmas with all of those you love.  I'm sure everyone is a bit tired today after yesterdays activites so I thought I would keep today's blog entry on the simple side.  Something you can set the kids up to do...if they're a bit older... and then go have a little kip!!!

Wish this was my idea but I got it from my sister-in-law in Indonesia who was helping me come up with ideas on how to keep my kids occupied over the school holidays in the wet weather....which we're having alot of where we are at the moment!  Quite simply, it's a photo of the child in question, done up as a very simple layout and then cut up to make a jigsaw puzzle.  For the smaller kids, keep the pieces to a minimum and watch their excitment when they see themselves reappear when it all fits back together.   For the older kids - the sky is the limit, use loads of papers and embellishments, then cut the jigsaw up into lots of smaller pieces and keep them occupied for ages!!!

My aim for this one for my youngest daughter was to make it fairly simple, bright and tactile.  And as it's a Christmas photo, the best way to do this is to add lots of sparkle!!!!


So here is what you need for a simple jigsaw:
* Cardboard
* Cardstock
* 2/3 pieces of pattern paper - I've used various October Afternoon papers - Farmfresh, Very Berry
* Ribbon - Lace, Ribbon and Sequin Trim
* Kindyglitz
* Judikins Embossing Powder
* Christmas Stamp
* VersaMagic Ink

And go about it like this...
1. Stick your cardstock to the cardboard.  Ink the edges
IMPORTANT NOTE - as you are going to be cutting this up into pieces, use lots of glue and make sure the undersides to be stuck down are completely covered.  You don't want pieces peeling up or coming lose once it's cut up.
2.  Using a Christmas Stamp I've stamped around the edges of the cardstock.
3.  I've then added some KindyGlitz to the edges for some sparkle.
4.  Cut 10x10" piece of pattern paper, ink the edges and stick down in the centre of the cardstock
5.  Cut two smaller pieces of pattern paper 11x5" and 10x2", ink the edges and stick down across the top section of the layout/jigsaw.
6. Sand the edges of your photo and stick down in the middle of your layout/jigsaw
7. Kindy Glitz around the edge of your photo
8. Taking some loop and thread lace I've glitter embossed the edges and then threaded a second piece of ribbon through.  I've then stuck this down under the photo.
9. Glue another ribbon strip across the top.

10. Cut up with a craft knife into pieces.  I've kept my edges straight and not interlocking since it's for a very young child, but you can cut it up as complicated as you like.

There there is a little Boxing Day Scrapping for you.  You could also do it at any time of the year, for Easter, School Holiday fun - why not make one each year, making it more complicated as you they grow?  Best use of all though, in my opinion, is for Birthday presents - quick, easy and hours of fun for the kids!

I'll leave you with it while I go have a Nana nap!!!  Merry Christmas.

PS - Thanks for the comments last week, my camera is working!!!!! Hip Hip Horray!!!!  Besides a whirring sound, it seems to be working OK, but I think it's days are numbered!!  Least it's got me through Christmas!  Thanks again x

Friday, December 24, 2010

OTP: a colourful clock by Ingeborg Dijkstra

As you might know, I am also a Design Team member for a Dutch blog called: Scrappassion Challenge Blog. From January 1, 2011 the blog is going international, since we like to give more ladies from all over the world to participate in our monthly challenges. Why don't you check out the International Scrappassion Blog and become a follower so you won't miss out on any news!

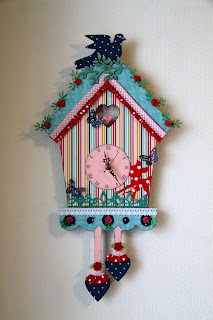
Anyway, this month's challenge is to create something OTP for your home. I had bought a wooden clock ages ago and I wanted to make something for our daughter Emma, so why not kill two birds with one stone? This is what my clock looked like:

I wanted to make the clock really colourful, so I used papers from the Mumma Bushka Collection from KaiserCraft. I covered the main part of the clock with striped paper:

I added two more patterns:

I wanted to add some colourful ribbons and embellishments:

I googled for 'clock' and printed a clock design on pink paper and cut it out:

I put the pieces together. The clock now looked like this:

I wanted more colour, so I added flowers, butterflies and some more embellishments:

Thursday, December 23, 2010

Christmas Morning layout

 I have had these  photos for a long time - and  so the quality is not that great but I love what they represent  so to print them smaller worked perfectly for this layout!

You will need
Green cardstock
Christmas paper
WOW  word
Adirondack  gold dabber
Gold trim


1. Use the green cardstock as your base
2. Trim 1.5 cm off top of page and right side of patterned paper...the  two plain green  sections!


3. Dab  the chipboard word with  the  gold  dabber and set aside to dry.


4.  I have  also  used the  dabber to give a gold  edge to the  cut down patterned paper
5.  Select  a variety of 3 x 4 photos.  I have raised  some of  these on a  small piece of  cardboard  to  vary  the  height of them on the   page.
6. Using a kraft knife  cut in and around the  "presents" on the patterned paper so  your photos  can slip in  behind

7.  Adhere patterned paper to cardstock
8. Arrange  photos  and check where you want your title
9.Adhere title
10.  Adhere ribbon
11. Add any journalling  etc.....


Have a Merry Christmas!!!1

Wednesday, December 22, 2010

Last minute gift tags - Nicky Amber

I've made some very quick and easy Christmas gift tags for those last minute wrapping sessions.


I have only used some kraft cardstock, some patterned paper scraps, journaling pen and some paper raffia.

Step 1.  I have cut my cardstock to 2 inches x 3 inches, drawn a border around the edge with a journaling pen and punched a hole in the top.


Step 2.  I simply cut some basic shapes (triangle, square and circle) out of patterned paper scrap
(For these tags I have used scraps from Echo Park 'Everybody Loves Christmas' range and 7 Gypsies 'Avignon' range).

Step 3.  I drew a border around each shape with a black journaling pen.

Step 4.  Attach the patterned paper shape to the tag and tie some paper raffia through the hole at the top
(for the square shape I tied some paper raffia around it to make it look like a present).

For some visual interest on some of the tags, I wrote Merry Christmas repeatedly across the tag before I attached the patterned paper shape.


Step 5.  On the other side I have stamped to: and from:
Tip: to line up your stamps where you want them to appear.....simply place them down onto the tag

I then placed my acrylic block (which is in desperate need of a good clean) down onto the stamps to pick them up.
I then stamped the back of all the tags...

I have used basic shapes but you can personalise them to suit your style or for a different occasion altogether (birthdays, baby gifts, thank you etc...)

For example, here I have cut out a heart shape...

Hope that has given you some ideas for quick and easy tags.

Hope everyone has a safe and special Christmas
nic...xxxooo