


Day 1 - Amanda Moran - Manda won a A2Z scraplet - set of crowns
Day2&3 - Lisa Kamphuis - Lisa has won a sheet or word rubons
Weekly winners are
Amanda Moran - $10 voucher coming your way
Sharon Dalton - A free prouduct is coming your way- Prima Collage Flowers!!!!!!!
Congradulations to all winners and thanks heaps for your support xx
Monday, September 22, 2008
Friday, September 19, 2008
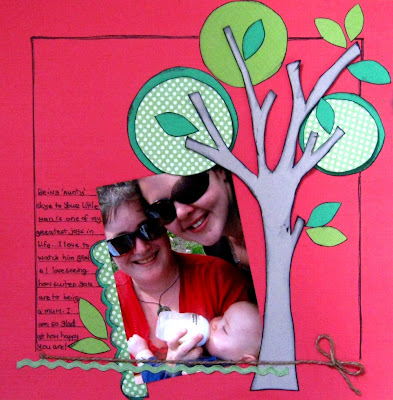
Layout Step-by Step Class by Skye Johnson
This layout class is awesome and thank you so much skye! your work is wonderful!
Material Needed:
The tree
Step 1
Using your pencil, draw a freehand tree on your raw chipboard or brown cardstock. Mine is about 11 inches hight and about 4 inches wide. I encourage freehand drawing but if you are not comfortable with this and need a template just contact me and I'll send one across.
Step 2
Cut your tree trunk out and sand and ink all of your edges. I perfer black ink as it works with most colour schemes.
Step 3
Set aside one of your papers/carstock for a backing page. using the remaining three papers, draw(in pencil!) and cut out the following circles.
Using scraps of papers A and C draw two scallop strips approximately 12cm long one with slightly larger scallops than the other. Sand and ink all edges and layer with double sided tape.
Step 5.
Cut several small leaf shapes from the remaining scraps of papers A and B - sand and ink all edges
Step 6
Position all elements on your page with your photo before sticking down. Move things around until you find a set up that you like - you might like your leaves in different places to where I have put mine - or your scallop along the bottom of the photo - it is up to you really!
Step 7
Stick all elements down with double sided tape.
Boarder:
So many people are afraid to draw a freehand boarder, so why not try it with a ruler first?
And that's pretty much it!
This layout is pretty much about how you want it to look! There are no rules with freehand, and you will always end up with something unique that is different to what everyone else has created.
Be confident in your drawing! There is no right or wrong way to do this and it is supposed to be fun!
Remember, you can always erase pencil lines and start again!
Have fun and happy scrapping!
Thanks again skye for a fantastic class!

Material Needed:
- 4x coordinating papers either patterned or cardstock, your choice
- 1 x Raw chipboard or brown Cardstock
- 30cm String/Ribbon
- 20cm Coordinating Ribbon/Ric Rac
- Pencil
- Pen
- Ink
- Scissors/Craft Knife
- Double sided Tape
- 3D foam tape/squares
The tree
Step 1
Using your pencil, draw a freehand tree on your raw chipboard or brown cardstock. Mine is about 11 inches hight and about 4 inches wide. I encourage freehand drawing but if you are not comfortable with this and need a template just contact me and I'll send one across.
Step 2
Cut your tree trunk out and sand and ink all of your edges. I perfer black ink as it works with most colour schemes.
Step 3
Set aside one of your papers/carstock for a backing page. using the remaining three papers, draw(in pencil!) and cut out the following circles.
- Paper A. 1 x 8cm Circle, 1 x 6.5cm Circle
- Paper B. 1x6.5cm Circle
- Paper C. 1x6.5cm Circle, 1 x 5cm Circle
- Mark these A, B and C on the back, so you can refer to them later. Ink all edges. Layer circles C on top of Circles A with 3D foam mounting tape/squares.
Using scraps of papers A and C draw two scallop strips approximately 12cm long one with slightly larger scallops than the other. Sand and ink all edges and layer with double sided tape.
Step 5.
Cut several small leaf shapes from the remaining scraps of papers A and B - sand and ink all edges
Step 6
Position all elements on your page with your photo before sticking down. Move things around until you find a set up that you like - you might like your leaves in different places to where I have put mine - or your scallop along the bottom of the photo - it is up to you really!
Step 7
Stick all elements down with double sided tape.
Boarder:
So many people are afraid to draw a freehand boarder, so why not try it with a ruler first?
- Using your ruler measure a boarder ( I have 1 ink to either side) - Draw a single ruled line across the top and down either side.
- Put your ruler to the side and freehand draw over these lines several times
- Tie a small bow in one end of your larger length of string/ribbon. and position this accross the bottom of your page to complete your border
- Position your smaller length of ribbon underneath
And that's pretty much it!
This layout is pretty much about how you want it to look! There are no rules with freehand, and you will always end up with something unique that is different to what everyone else has created.
Be confident in your drawing! There is no right or wrong way to do this and it is supposed to be fun!
Remember, you can always erase pencil lines and start again!
Have fun and happy scrapping!
Thanks again skye for a fantastic class!
Wednesday, September 17, 2008
Brads & Foil....!!!!
This is really cool!.... I loved how this one turned out!
STEP 1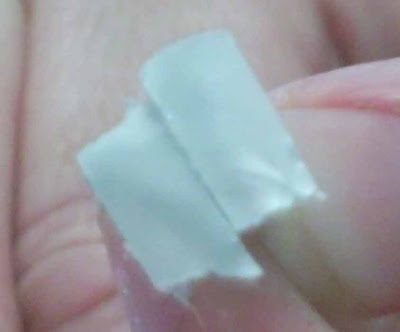
Step 2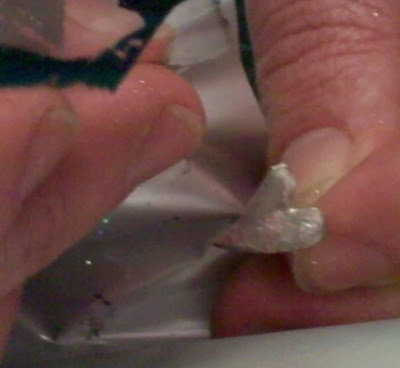
STEP 3
STEP 4
STEP 1

- Cover your brad with double sided tape
- Take off the backing of the double sided tape
- Any left over bits fold onto the brad
- This will make the brad a bit lumby & have some shape.
Step 2

- Place the shiny side of foil down onto the brad
STEP 3

- Rub the foil onto the brad
STEP 4

- Carefully take off the foil
Tuesday, September 16, 2008
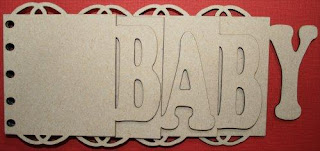
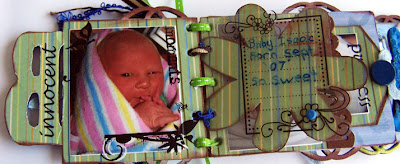
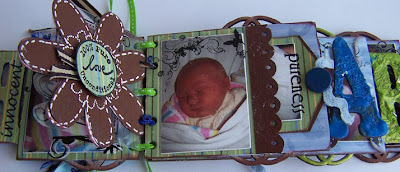
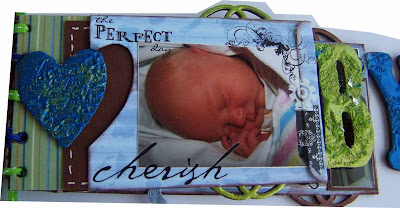
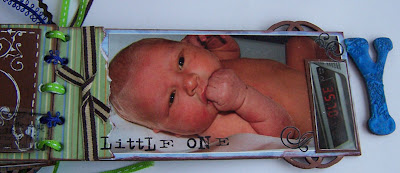
BABY MINI ALBUM - Class - by Tanyah Payne
HERE IS a Step-By-Step THE BABY ALBUM CLASS!
Materials required:
Baby A2Z scraplets album (or anyother mini A2Z scraplets album)
Opals
Versamark ink (watermark ink)
Gold Brillance ink
Black Brillance ink
texture stamp (we can order in for you email us for enquiries)
Image stamp (we can order in for you email us for enquiries)
Pritts Glue
Pattern Paper
Cardstock
Sissors
Craft knife
Accetate
Mini Brad
Great Big Brads
Rub ons
ribbon
White gel pen
Black Stazon Ink
DOUBLE EMBOSSING
Draw a flower shape to go as an extra page onto cardstock
Cut it out and cover one side with pattern paper
Ink the edges
Punch holes where needed for album
Cut a small sheet of accetate(this is optional)
Punch corresponding holes in accetate for album (this is optional)
Adhere the accetate to the flower with a mini brad
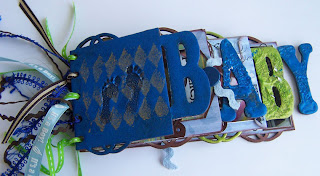
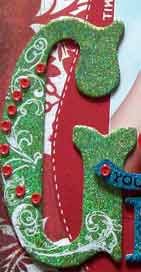
FOR ALL THE LETTERS - REFER TO THE FOIL & OPAL TECHNIQUE BELOW.
I have just used differnt coloured embossing powders on the letters.
http://tanyahpayne.blogspot.com/2008/09/alfoil-and-opals.htm
PAGE 2
INSERT TAG
PAGE 3
 TAB page 1

TAB page 2
 TAB page 3
 TAB page 4
PAGE 4
PAGE 6
INK ALL EDGES
USE 3MM THICK RIBBON TO PUT THE ALBUM TOGETHER
YOUR FINISHED!!!!!
Hope you enjoyed this one and have a go at it!
Till next time
Luv TanXx
hope you enjoy!


Materials required:
Baby A2Z scraplets album (or anyother mini A2Z scraplets album)
Opals
Versamark ink (watermark ink)
Gold Brillance ink
Black Brillance ink
texture stamp (we can order in for you email us for enquiries)
Image stamp (we can order in for you email us for enquiries)
Pritts Glue
Pattern Paper
Cardstock
Sissors
Craft knife
Accetate
Mini Brad
Great Big Brads
Rub ons
ribbon
White gel pen
Black Stazon Ink
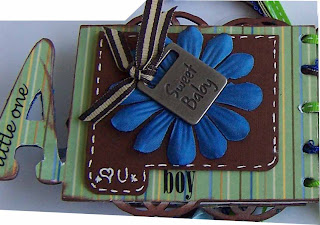
FRONT COVER

DOUBLE EMBOSSING
- Ink your front cover with watermark ink
- Sprinkle opal powders over the top
- Heat to melt powder
- While powder is hot sprinkle more powder and reheat
- Ink your texture stamp with Gold brillance ink
- Heat your image again if it has cooled hard
- Stamp into the wet embossing powder
- Ink using black brillance ink your image stamp & have ready
- Heat your embossed image and you will see the image come to the surface and become flat
- When wet stamp into the embossing powder
- Wait to cool

- Choose 1 cardstock, 2 co-0rdinate patern paper
- Cover the first page with paper
- First adhering Pritt glue
- Place the paper over the top of glue
- Cut around the edges and use a craft knife if needed to get into the tricky spots
- Sand and ink your edges
- Sand a small photo and adhere to the center of the page
- Place a word rubon on top of the 'b' and a corner one at the bottom
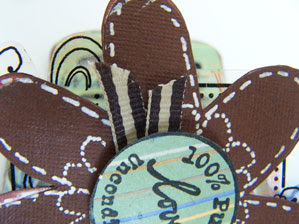
Draw a flower shape to go as an extra page onto cardstock
Cut it out and cover one side with pattern paper
Ink the edges
Punch holes where needed for album
Cut a small sheet of accetate(this is optional)
Punch corresponding holes in accetate for album (this is optional)
Adhere the accetate to the flower with a mini brad

- This is the other side of the insert page
- Using a white gel pen draw a stiched line all the way around
- Stamp a circle image (this could also be a rubon)
- Cut out the circle
- Place foam mount under circle
- Place in the center of flower
- Cut small strips of ribobn at the side of circle and place
FOR ALL THE LETTERS - REFER TO THE FOIL & OPAL TECHNIQUE BELOW.
I have just used differnt coloured embossing powders on the letters.
http://tanyahpayne.blogspot.com/2008/09/alfoil-and-opals.htm
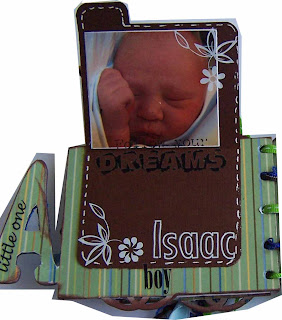
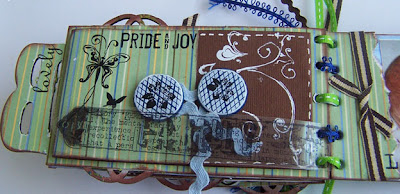
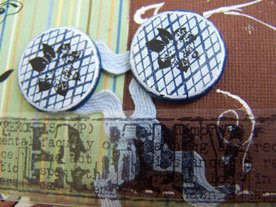
PAGE 2

- Cover page 2 with patten paper
- Using the corresponding patterned paper cut 7cm high x 6cm wide
- Ink
- Cut a 1.5cm stip of cardstock and draw & cut scollops on one edge
- Using your eyelet too punch holes in each scollop
- Adhere uner the 7x6cm paper
- Place double sided tape ONLY around edges of the 2 sides and at the end
- Sand and adhere a small photo in the center
- Place a rubon/sticker at the top left corner if you want to
- Punch holes where needed for album
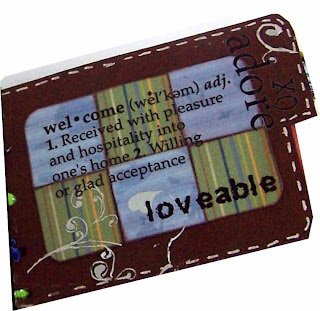
INSERT TAG

- Make a tag out of cardstock 5x8cm
- Cut a 'v' at the top
- Make another tag out of pattern paper 4.5 x 7.5cm
- Trim to make a 'v'
- Tear the bottom
- Adhere onto the tag
- Sand & Adhere a photo in the middle
- Place a brad and ric rac at the end of tag
- Place a rubon/sticker over the edge of photo
PAGE 3


- Cover with pttern paper page 3
- May need a craft knife to go into the hard to reach places
- Sand and ink the edges
- Make a flip up pocket
- Cut out of the cardstock 12 x 7 cm
- Cut one end accross 5cm leaving a little tab
- Fold in half the cardstock
- Adhere the bottom part to the album
- Place a small flower on the top of flap
- Adhere an embelishment on the top of the flower
- Using a white gel pen draw a stiched line all around
- Inside sand and place a small photo
- Use some stickers/rubons to decorate your page
- Re-punch holes in required place of album
 TAB page 1
- Cut 2 out of cardstockmeasuring 9x7cm
- Cut tabs at the top
- Cut a 1cm strip of patern paper
- Tear down one side
- Ink edges
- Adhere at the bottom of first tabed page
- Sand and adhere photo to first page
- Use white gel pen to draw a stiched line
- Use rubons/stickers to decorate

TAB page 2
- Using your white gel pen draw a stitched line
- Sand and adhere your photo on the back
- Place rubons/stickers where desired
- Punch holes to fit into album
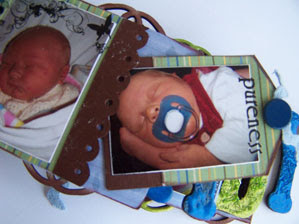
 TAB page 3
- Cut out 6 2x2cm squares
- Corner round only the top and bottom corners
- Ink the edges
- Place on top of page 3 as in the picture
- Use a a rubon/clear sticker to go over the top of these squares
- Draw a stitched line around the outside edges
 TAB page 4
- Repeat the above steps
PAGE 4

- Cover your 4th page with pattern paper
- Out of corresponding pattern paper we now need to make a pocket
- Cut a 10 x 15cm of the corresponding pattern paper
- Fold one 1cm edge
- Meet the other edge with the folded edge
- Adhere onto flap
- Punch using a Corner rounder at the bottom ends
- Fold and cut off an excess
- Ink edges and adhere flap
- The open part cut out a shape* in the center
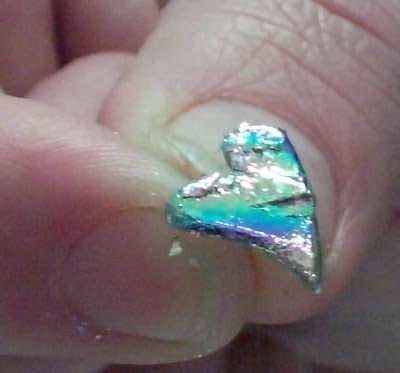
- *This shape- I used half a heart chp shape that i have used on the tag ( i will explain this part soon)
- Adhere the pocket onto page 4

- Cut out of cardstock 6.6 x 9cm
- Use a white gel pen to draw a stitched line all around
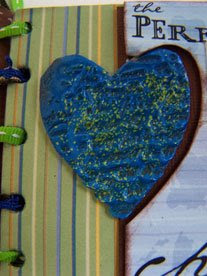
- Using your heart shape* above
- NOTE: have some glitter ready to use!
- Ink using versamark (watermark) ink
- Using opals- sprinkle over the top
- heat to melt
- Sprinkle the glitter on the melted powder
- Then ink a script stamp using versamark (watermark)ink- This will put a print into the heart
- Re heat shape if needed
- When powder is melted stamp on the shape
- When cooled
- Adhere the shape in place so it slots nicely into your envelope.


- Cover using patten paper page 5
- Out of the cardstock cut a strip 22 x 6cm
- Measure in 6cm and fold on one side
- measure in 7cm on the other side and fold
- Cut out of pattern paper 7cm x 6cm
- adhere onto the 6cm fold side allowing 1cm to be adhered underneath
- Adhere the back to page 5
- Place one brad on each side- I used Hot Off the Press great big brads, Then used rubons on top
- Cut some ric rac 10cm and twirl around the ribbon
- Using a white gel pen draw stitching all the way around
- Decorate using rubons/stickers
- Journal and/or put more photos inside
- Repunch holes as needed
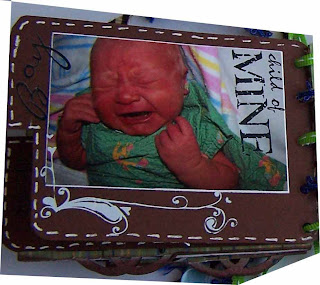
PAGE 6

- Cover the main page
- Cut a strip 7cm x 4cm
- Tear down one side
- Place and adhere ribbon
- Adhere to the page
- Sand & Adhere photo onto your page
INK ALL EDGES
USE 3MM THICK RIBBON TO PUT THE ALBUM TOGETHER
YOUR FINISHED!!!!!
Hope you enjoyed this one and have a go at it!
Till next time
Luv TanXx
Week 3 Day 2 & 3
A free prize will be given to the person
who has made the most posts in the gallery and blog.
who has made the most posts in the gallery and blog.
Please email at admin@scrapncraftwitht.com.au
Subject line: Week3 Day2&3
Make sure you let us know how many posts you have done!
Good luck everyone & have fun!
Monday, September 15, 2008
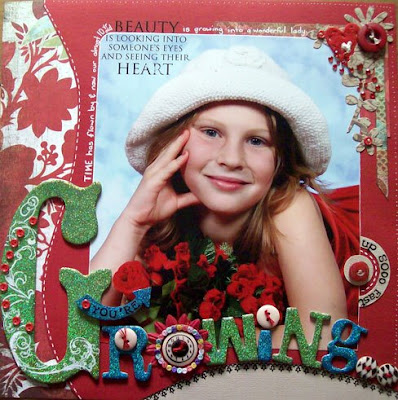
GROW - Layout class by Lisa Oxley
GROW - by Lisa Oxley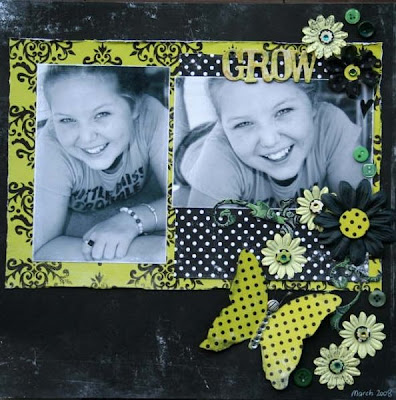
PRODUCTS:
CLASS
Step 1
Cut a 19.5.x 28.5cm rectanle piece of paper from the green/black flourish kaiser pattern paper
Step 2
Using your sander, sand & distress the edge of this piece of pattern paper, to finish use our finger nails to scuff and distress edge a little more
Step 3
Step4
Cut piece of black/white spot paper measuring 15 x 17cm. Distress edge and scuff also
Step 5
distress & sand photo edges
Step 6
Ink chipboard flourish
Step 7
Cut buttefly from green black spotted paper using class template
Step 8
Stamp paper flowers with scripted stamp
Step 9
Arrange all layout elements and commence securing items to base sheet of kaiser double sided black/striped pattern paper
Step 10
Add title using your chipboard lettes
Step 11
hidden journaling also can be added
Step 12
Detail flowers using bling and circle punches, detail butterfly using bling and brads
Step 13
Wind wire around brad to make "feelers", curl with a small set of pliers.
We would like to thank you lisa for this beautiful layout! It is awesome and hope you all enjoy!
Xx

PRODUCTS:
- Kaiser sublime range
- ( Please email us if you would like us to get this paper range in for you - paper kits cost $3.95 for 4 sheets of doublesided paper)
- Chipboard words
- Green paper flowers
- Green buttons
- Chipboard flourish
- Black ink
- Kaiser bling
- Brads
- Butterfly shape
- Wire
- Scrapted stamp (we can order one in if your wanting one)
- Sandpaper
- Stazon ink
- Foam mount
- White gel pen
- Double sided tape
CLASS
Step 1
Cut a 19.5.x 28.5cm rectanle piece of paper from the green/black flourish kaiser pattern paper
Step 2
Using your sander, sand & distress the edge of this piece of pattern paper, to finish use our finger nails to scuff and distress edge a little more
Step 3
Step4
Cut piece of black/white spot paper measuring 15 x 17cm. Distress edge and scuff also
Step 5
distress & sand photo edges
Step 6
Ink chipboard flourish
Step 7
Cut buttefly from green black spotted paper using class template
Step 8
Stamp paper flowers with scripted stamp
Step 9
Arrange all layout elements and commence securing items to base sheet of kaiser double sided black/striped pattern paper
Step 10
Add title using your chipboard lettes
Step 11
hidden journaling also can be added
Step 12
Detail flowers using bling and circle punches, detail butterfly using bling and brads
Step 13
Wind wire around brad to make "feelers", curl with a small set of pliers.
We would like to thank you lisa for this beautiful layout! It is awesome and hope you all enjoy!
Xx
Week 3, Day 1
Here is our first competiton for the week 3!
Answer the following question and email it to... admin@scrapncraftwitht.com.au
Place in the subject line: Week 3, Day1
What code do you need to get 20% off your products this month?
Good luck everyone to win something special!...
Answer the following question and email it to... admin@scrapncraftwitht.com.au
Place in the subject line: Week 3, Day1
What code do you need to get 20% off your products this month?
Good luck everyone to win something special!...
Week 2 Winners!!!!
Thank you to everyone who has joined in the fun this week. We have had a couple of classes and a few step by step technqiues and hope you have all enjoyed then
Please email us to let us know if their is a technique or product you would like us to feature and we will do our best to help out!
The winners are the following
WEEK 1 Prizes go to.....
CONGRATULATIONS TO ALL OUR WINNERS.
We look forward to another fun week of more prizes to be given out and will be doing a step by step class this week by our
September Guest Design Team member Lisa Oxley
hav fun creating everyone
Luv TanXx
Please email us to let us know if their is a technique or product you would like us to feature and we will do our best to help out!
The winners are the following
- Day 1 - Karen Calcutt
- Day 2 - Karen Calcutt
- - Kylie Abel
- Day 3 - Lizzy Simons
WEEK 1 Prizes go to.....
- Tamara Rapmund - a FREE product will be coming your way!
- Susan Luke - a $10 Voucher
CONGRATULATIONS TO ALL OUR WINNERS.
We look forward to another fun week of more prizes to be given out and will be doing a step by step class this week by our
September Guest Design Team member Lisa Oxley
hav fun creating everyone
Luv TanXx
Friday, September 12, 2008
Winners Are......
The winners are the following
Day 2
Karen Calcutt
Kylie Abel
Day 3
Liz Simon
You all have a sheet of small rubons in the post coming your way! enjoy!
Day 2
Karen Calcutt
Kylie Abel
Day 3
Liz Simon
You all have a sheet of small rubons in the post coming your way! enjoy!
EXCITING NEWS about SCRAPCHAT!!!!
A NEW FUN SCRAPBOOKING, CARDMAKING & STAMPING CHATTING SITE!
Everyone is invited to come and join in the fun. You can have your own blog/page invite your friends, let everyone know of advent you have comming up, share and have music and videos on your pages, Customise your pages, share your pages and more!!!!
COME AND REGISTER TODAY!!!!!
here are some of the options you have!
Visit Scrapchat
Visit Scrapchat
Find more photos like this on Scrapchat
Find more music like this on Scrapchat
There is a space for advertising. For enquiries please email admin@scrapchat.net Thankyou.
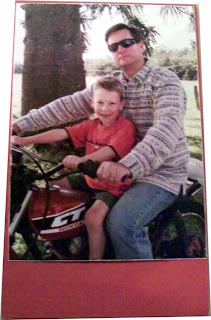
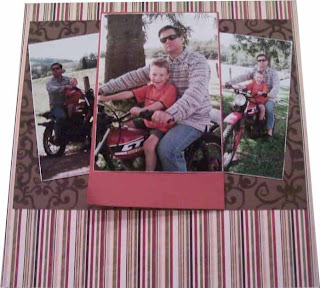
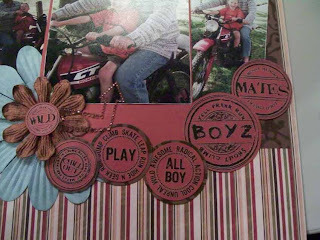
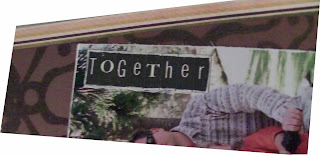
Father Layout Step by Step Class
Here is a FREE step-by-step layout class!......hope you enjoy and gives you all some ideas.
Materials used
Cardstock
Imaginisce patterened cardstock
Chatterbox flocked paper
Kaiser craft all boy circle rubons
large flower
Imaginisce bling flower
Kaisercraft brown arrow bling
Making Memories Mini alpha stickers
white gel pen
STEP 1
STEP 2
 STEP 3
STEP 4
 STEP 5
STEP 6
 STEP 7
 STEP 8
 STEP 9
STEP 10
 STEP 11
STEP 12
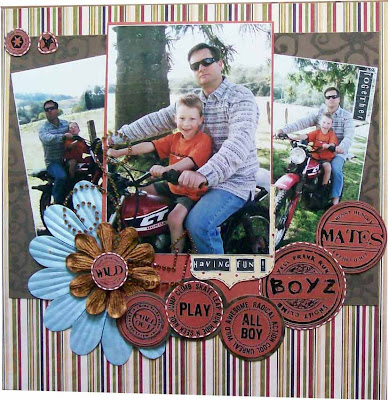
HERE IS THE FINISHED LAYOUT!!!!
HOPE YOU ENJOY!!!!
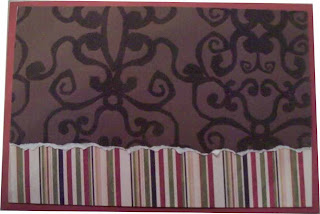
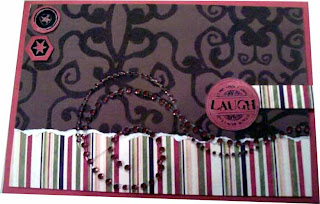
OUT OF THE LEFT OVER BITS I MADE THIS CARD!
Materials used
Cardstock
Imaginisce patterened cardstock
Chatterbox flocked paper
Kaiser craft all boy circle rubons
large flower
Imaginisce bling flower
Kaisercraft brown arrow bling
Making Memories Mini alpha stickers
white gel pen

STEP 1
- Find 3 photos
- 1 - 5x7
- 2 - 4x6
- Lightly sand the edges of all photos
- Mat your 5x7"photo
- Leave an inch boarder at the bottom of the photo

STEP 2
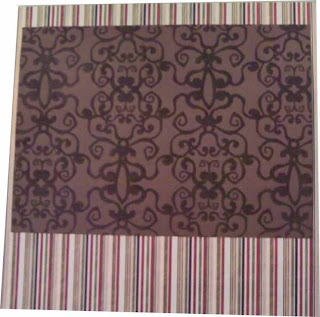
- Find your patterned paper you want to use. I have used Imaginisce patterened cardstock
- and Chatterbox flocked paper
- Cut the chatterbox paper to 20cm
- Cut 2cm off one side
- Ink the edges if you want to
- adhere onto your patterened paper
 STEP 3
- Place and adhere photos as seen in the picture.
- Don't adhere the bottom left of the matted photo just yet

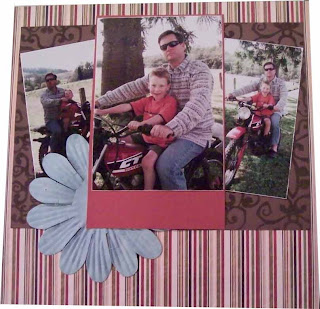
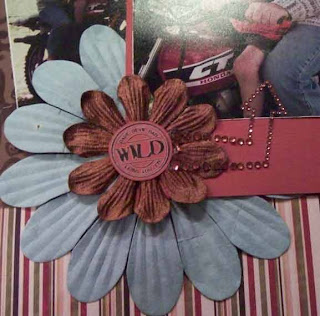
STEP 4
- Place a giant flower under the mattered photo
- Adhere the mattered photo onto the large flower
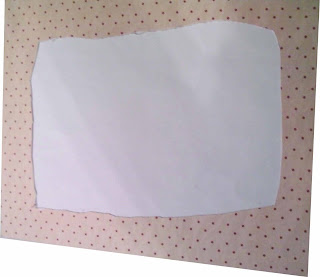
 STEP 5
- Turn over your layout
- Carefully cut out the backing of the cardstock
- As seen in the picture
- Try NOT to cut the flocked patterned paper

STEP 6
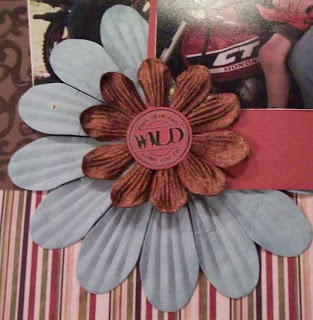
- Place a Imaginisce bling flower over the top of the large flower
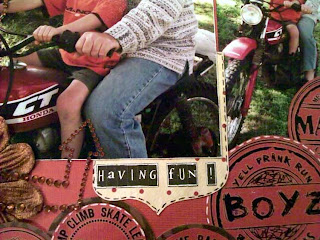
- Using the Kaiser craft all boy circle rubons
- Rub onto some cardstock
- Cut out
- Place in the center of the flower
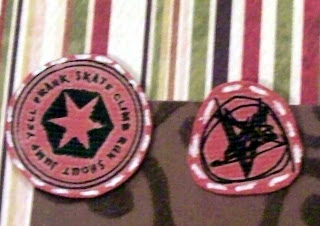
 STEP 7
- Using the Kaisercraft rubons
- Rub the circle rubons onto cardstock
- Cut them out
- Place and adhere on your layout as in the picture
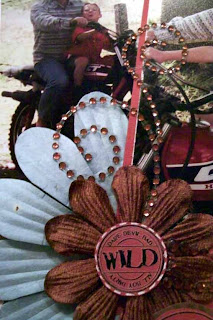
 STEP 8
- Take out the arrow bling on the plastic
- Place the plastic onto your layout to see where you want to place it
- Than take the bling off and place where desired
 STEP 9
- Adhere some prima bling over the flowers and photos

STEP 10
- Rub some kaiser craft rubons onto cardstock
- Cut out leaving a small edge
- Outline drawing a stiched line using a white gel pen
 STEP 11
- Using Making Memories mini alpha stickers
- Place on the right photo, a word
- Outline it with a white gel pen

STEP 12
- Out of the backing paper you had cut out earlier
- Cut a strip 9x6.5cm
- Draw and cut a bracket shape at one end
- Outline using a black zig writter
- Adhere under the main photo
- Add Making Memories Mini alpha stickers
- Outline the words using a white gel pen

HERE IS THE FINISHED LAYOUT!!!!
HOPE YOU ENJOY!!!!
OUT OF THE LEFT OVER BITS I MADE THIS CARD!


Thursday, September 11, 2008
Glitter and rubons!
Hi everyone
this technique is similar to one i have below.
HERE IS THE COMPLETED LAYOUT!
this technique is similar to one i have below.

- Using clear Think embossing powder UTEE
- Sprinkling glitter
- Then reheating.
- Once this is completed you can then add rubons, buttons and other embellishments!
HERE IS THE COMPLETED LAYOUT!

Wednesday, September 10, 2008
Gallery is now fixed- Week2, Day 3,Challenge 2
This is so exciting..... the little hick ups we had with our gallery is now fixed. So now you can see everyones comments and no more codes are needed to put up a post!.....
Just want to thank Karen Calcutt for fixing this for me!....big hug coming your way!!!!!
Now what a great way to have another challenge.......
Week 2, Day 3, challenge 2
have fun everyone and good luck
Luv TanXx
Just want to thank Karen Calcutt for fixing this for me!....big hug coming your way!!!!!
Now what a great way to have another challenge.......
Week 2, Day 3, challenge 2
- Upload 2 new layouts in the gallery and
- make a comment to go into a draw to win a prize!...
- Email me when you have done this at admin@scrapncraftwitht.com.au
- Subject line: Week 2, Day 3, Challenge 2
have fun everyone and good luck
Luv TanXx
Dripping Glue/embossing powder
 This is such a fun technique and your able to make it look like rain/snow etc
USING GLUE!
Step1 Colour your shape... I used twinkling H20's but daubers would be better
STEP 2 Place glue running down your sape
STEP 3 Add glitter and wait to dry
USING CLEAR UTEE
STEP 1 Ink the top of your letter with a watermark ink like versamark
STEP 2 Sprinkle clear UTEE, heat and reapply the powder a few times
 STEP 3 Turn your shape on its end and let the wet UTEE run down your shape
STEP 4 make sure the UTEE is wet and hot and sprinkle the glitter on the top
STEP 5 reheat the glitter
 NOW you can use rubons/stickers onto of the shape for great fun affects.
Tuesday, September 9, 2008
Week 2, Day 2 & 3 competition
Our next competition is the following;
Who is Scrap N Crafts Guest Design Team for September?
Email the answers to admin@scrapncraftwitht.com.au
Subject line: Week 2, Day2&3 Competition#1
Have you tried to do an altered project?
If so what have you tried and what would you like to have a go at?
Email the answers to admin@scrapncraftwitht.com.au
Subject line: Week 2, Day2&3 Competition#2
I will email you if you won and post what you have won!
Good luck everyone and have fun!!!
Luv Tanxx
Week 2 - Day 1 winner is......

Week 2... Day 1 winner is
Karen Calcutt
***!!!Congratulations!!!***
***!!!Congratulations!!!***
you have just won a
corner word designed
by Tanyah payne
corner word designed
by Tanyah payne
Alfoil and Opals
Here is a fun easy technique to add texture and interest.
STEP1

- Find a Shape/ alpha you would like to alter
STEP 2

- Find your versamark ink
- Ink the entire shape
- Till it looks wet
STEP 3

- When shape is wet
- completely cover with Opal embossing powder
STEP4

- Shack off excess
- Place back into container
- Till it looks like this
STEP 5

- Heat your powder
- When the powder is melted/hot
- Sprinkle more powder on top
- Re heat
- You may want to do this a few times
STEP 6

- Find some crystal glitter and have it ready
- If your powder has cooled and dried reheat
- When the powder is hot and melted sprinkle your glitter over the top
STEP 7

- Till it looks like this
STEP 8

Find some alfoil
Scrunch it up
Try and make it about the same size as your shape
STEP 9

- Heat your shape again if it is cooled/hard
- When the powder is melted
- Quickly place the alfoil on top of the shape
- Leave the foil until the shape has cooled
- Once it is cooled take alfoil off
- Some floil will stay on their which is what you want!
STEP 10- FINISHED

- I have reheated the middle and added another colour
- If your not happy with the foil on their or the texture not being enough or too much you can reheat and start again!
Check out our range of opals in our shop ... Scrap N Craft with T... HERE!
Hope you have enjoyed this one!
happy creating
Luv TanXx
Subscribe to:
Posts (Atom)